Skip to content
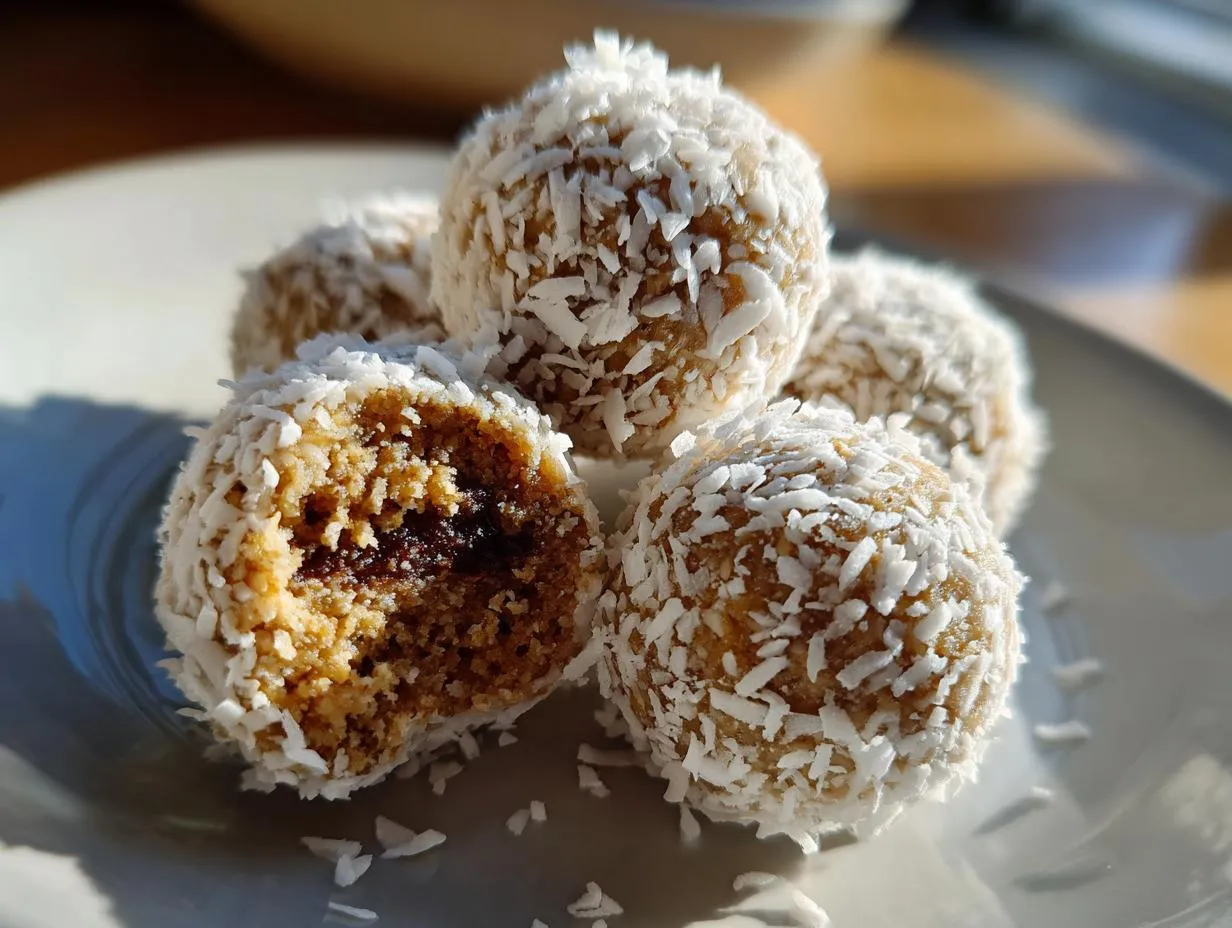
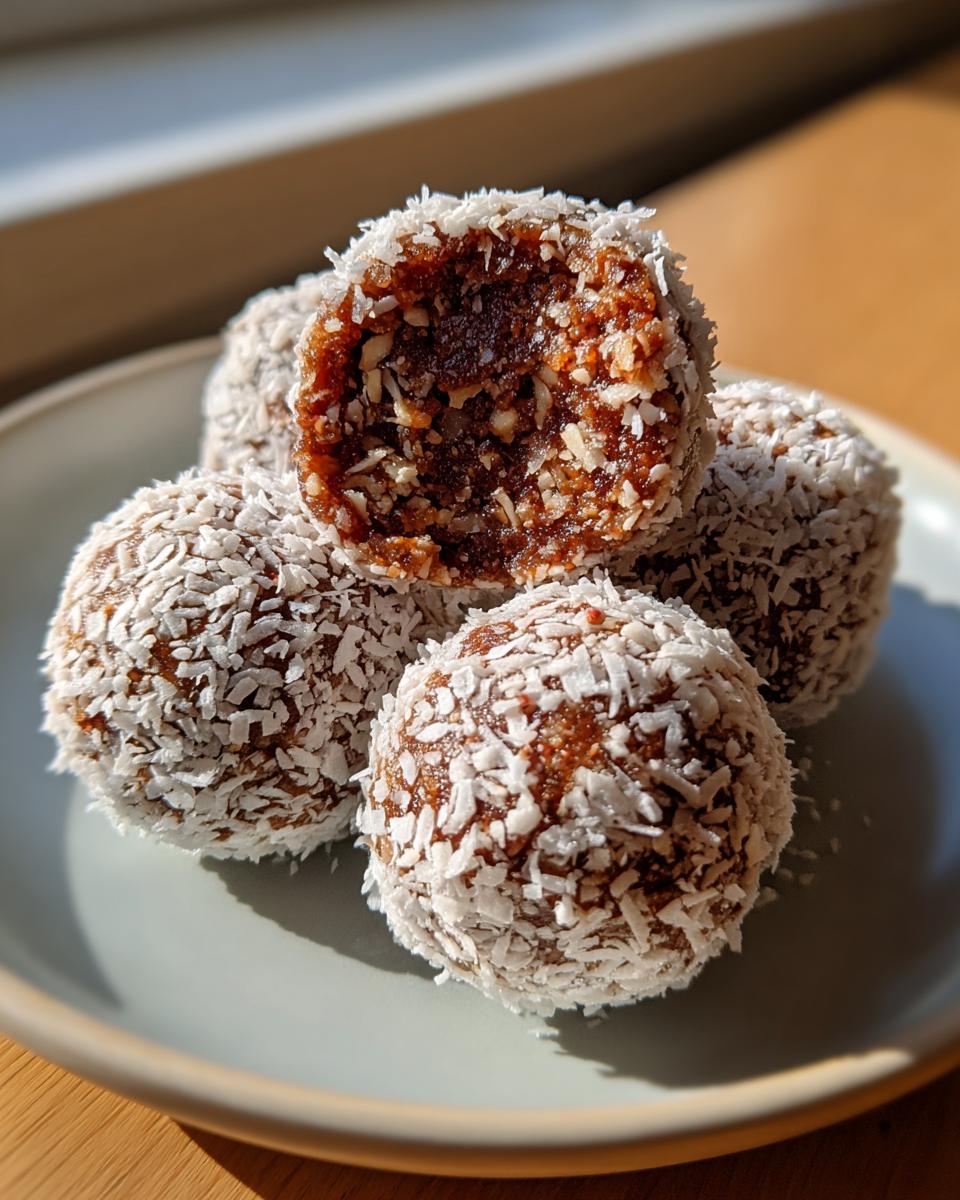
You know those days when you’re racing between work, errands, and life, and suddenly—bam!—a snack attack hits? That’s exactly when my Almond Bliss Balls swoop in to save the day. I stumbled on this recipe years ago during a particularly chaotic week when my kids needed after-school fuel and I needed something quick, wholesome, and *not* another granola bar. These little powerhouses come together in minutes with just almonds, dates, and a handful of pantry staples. No baking, no fuss—just pure, energy-packed goodness. They’re my secret weapon for sweet cravings, post-yoga recovery, or sneaking nutrients into tiny lunchboxes. And trust me, once you try them, you’ll be hooked too.
Why You’ll Love These Almond Bliss Balls
Oh, where do I even start? These little bites of joy have become my go-to for so many reasons, and I know you’ll adore them just as much. First off, they’re *ridiculously* easy—no oven, no waiting, just toss everything in the food processor and roll. Perfect for when you need a snack *now*. Plus, they’re packed with real ingredients that actually fuel you, not just empty calories. And the best part? You can tweak them endlessly to suit your mood or pantry. Here’s why they’re a total win:
- Quick & no-bake: Ready in 15 minutes flat—no heat, no mess.
- Nutrient-dense: Almonds for protein, dates for natural sweetness, and cocoa for a happy heart.
- Customizable: Swap coconut for crushed nuts, add a pinch of espresso, or go nut-free with sunflower butter.
- Kid-approved: My little ones think they’re eating candy (shh, don’t tell them otherwise).
Seriously, once you try these Almond Bliss Balls, you’ll wonder how you ever survived snack time without them.
Ingredients for Almond Bliss Balls
Alright, let’s talk ingredients—this is where the magic starts! I’ve made these Almond Bliss Balls so many times that I could probably recite this list in my sleep. But here’s the thing: using *fresh*, quality ingredients makes all the difference. Trust me, you’ll taste it in every bite. Here’s what you’ll need:
- 1 cup almonds: Raw and unsalted, please! These are the backbone of our bliss balls, so don’t skimp.
- 2 tbsp cocoa powder: Not just any cocoa—go for the good stuff. Dutch-processed or raw cacao both work like a dream.
- 1 tbsp almond butter: Pack it in that measuring spoon like you mean it! Creamy or crunchy, whichever makes your heart sing.
- 1 tsp vanilla extract: Pure vanilla, not the artificial stuff. It’s like a warm hug for your taste buds.
- ¼ tsp sea salt: Just a pinch to make all those flavors pop. Flaky Maldon salt? Even better.
- 2 tbsp shredded coconut: For that final, snowy coating. Unsweetened is my pick, but sweetened works if you’ve got a serious sweet tooth.
1 cup pitted dates: Squishy Medjool dates are my go-to—they’re naturally sweeter and stickier, which means no added sugar needed. Just make sure to pit them first (unless you fancy a dental surprise).
Pro tip: If your dates are looking a little sad and dry, soak them in warm water for 10 minutes first. It’ll bring them back to life and make blending a breeze. Now, let’s get rolling!
How to Make Almond Bliss Balls
Okay, friends—this is where the fun begins! Making these Almond Bliss Balls is so simple, you’ll laugh at how quickly they come together. But don’t let the ease fool you; there are a few little tricks I’ve picked up over the years to make them *perfect* every time. Follow these steps, and you’ll be snacking on bliss in no time!
Step 1: Blend the Almonds
First things first: grab your food processor (a blender works in a pinch, but a processor is ideal). Toss in those raw almonds and pulse until they’re finely ground—but here’s the key: stop *before* they start looking oily or turning into almond butter. You want a texture like coarse sand, not paste. This usually takes about 10-15 short pulses. Trust me, I’ve learned the hard way that over-processing makes the balls too dense. A little texture is good here!
Step 2: Create the Dough
Now, add in your dates, cocoa powder, almond butter, vanilla, and that pinch of sea salt. Blend again until it all comes together into a sticky, slightly crumbly dough. Here’s my secret weapon: pause halfway to scrape down the sides with a spatula. This ensures everything gets evenly mixed without leaving lonely date chunks hiding in the corners. The mixture should hold together when pinched—if it’s too dry, add a teaspoon of water; too wet? A sprinkle more cocoa powder. Easy peasy.
Step 3: Roll the Mixture
Time to get hands-on! Scoop out tablespoon-sized portions and roll them into 1-inch balls. Pro tip: wet your hands *lightly* with cold water before rolling—it keeps the dough from sticking like crazy to your fingers. If the mixture feels warm or overly soft, pop it in the fridge for 5 minutes to firm up. No one wants mushy bliss balls!
Step 4: Coat with Coconut
Pour your shredded coconut into a shallow bowl (I use a cereal bowl—less mess!). Roll each ball gently in the coconut until it’s lightly coated. Press just enough to make the coconut stick, but don’t go overboard—you want a delicate snowy finish, not a coconut snowball. If coconut’s not your thing, try crushed almonds or even cocoa powder for a double-chocolate vibe.
Step 5: Chill and Serve
Here’s the *most important* step: lay the balls on a tray or plate and chill them in the fridge for at least 30 minutes. I know, waiting is hard—but this transforms them from “meh” to “WOW!” The chilling firms them up so they hold their shape and lets the flavors meld beautifully. After that? Devour! They’ll keep at room temp for a few hours, but for long-term bliss, stash them in the fridge.
Tips for Perfect Almond Bliss Balls
After making countless batches (okay, maybe hundreds) of these Almond Bliss Balls, I’ve picked up some game-changing tricks that’ll take yours from good to *unreal*. First up: sweetness control. If your dates aren’t super ripe or you prefer less sugar, start with ¾ cup and add more until the dough tastes right to you—it’s your bliss, after all! Need them nut-free? Swap almond butter for sunflower seed butter (just check for added sugars). And for storage? Layer them between parchment paper in an airtight container—no sticking, no squishing. They’ll stay fresh and fabulous for days!
Almond Bliss Balls Variations
One of my favorite things about these Almond Bliss Balls? They’re like a blank canvas for creativity! Once you’ve mastered the basic recipe (which, let’s be real, is already *chef’s kiss*), try shaking things up with these fun twists:
- Superfood boost: Stir in 1 tbsp chia seeds or hemp hearts for extra crunch and omega-3s—my post-workout secret!
- Cacao magic: Swap cocoa powder for raw cacao powder if you want a deeper, slightly bitter chocolate hit (hello, antioxidant party!).
- Coatings galore: Instead of coconut, roll them in crushed pistachios, freeze-dried raspberry powder, or even mini chocolate chips for serious snack-time drama.
The possibilities? Endless. Just promise me you’ll try at least one wildcard version—your taste buds will thank you!
Storage and Reheating
Here’s the best part about these Almond Bliss Balls—they basically store themselves! Pop them in an airtight container in the fridge, and they’ll stay fresh and delicious for up to 2 weeks (if they last that long). For serious snack prep, freeze them in a single layer first, then transfer to a bag—they’ll keep for a solid month. No reheating needed—just grab one straight from the fridge or let it sit at room temp for 5 minutes if you prefer a softer bite. Easy, right?
Almond Bliss Balls Nutritional Information
Now, let’s talk numbers—but keep in mind, these are estimates (ingredient brands vary, and let’s be real, who measures coconut flakes *exactly*?). Per bliss ball, you’re looking at roughly 120 calories, with 7g of healthy fats from those almonds, 14g carbs (3g fiber—thanks, dates!), and 3g protein to keep you full. They’re naturally gluten-free, dairy-free, and packed with goodness. Not too shabby for a bite-sized treat that tastes like dessert!
FAQs About Almond Bliss Balls
I get so many questions about these little powerhouses—and I love sharing all the tips! Here are the answers to the big ones that pop up every time I make these vegan energy bites:
Can I use other nuts?
Absolutely! Walnuts, cashews, or even pecans work beautifully in place of almonds. Just keep the same measurements. My cousin swears by a half-almond, half-peanut combo for extra richness. If you’re going nut-free, sunflower or pumpkin seeds are fantastic swaps—just pulse them the same way.
Are they gluten-free?
100% yes! All the ingredients are naturally gluten-free, making these Almond Bliss Balls perfect for anyone avoiding gluten. Just double-check your cocoa powder and vanilla extract labels if you’re extra sensitive—some brands add sneaky fillers.
How long do they last?
In an airtight container in the fridge? Easily 2 weeks—if they don’t disappear first! They also freeze like a dream for up to a month. I stash a batch in my freezer for emergency snack attacks. No thawing needed—just grab and go!
Made these Almond Bliss Balls? I’d love to see your creations! Snap a pic and tag me @mykitchenadventures—nothing makes me happier than seeing your snack-time wins. And hey, if you tweaked the recipe, tell me your genius twists in the comments below. Happy bliss-ball-ing, friends!

7-Minute Almond Bliss Balls – Irresistible Energy Booster!
- Total Time: 45 minutes (including chilling)
- Yield: 12 balls 1x
- Diet: Vegan
Description
Almond Bliss Balls are a quick and healthy snack packed with natural ingredients. They are perfect for energy boosts, dessert cravings, or post-workout recovery.
Ingredients
- 1 cup almonds
- 1 cup pitted dates
- 2 tbsp cocoa powder
- 1 tbsp almond butter
- 1 tsp vanilla extract
- 1/4 tsp sea salt
- 2 tbsp shredded coconut (for coating)
Instructions
- Add almonds to a food processor and pulse until finely chopped.
- Add dates, cocoa powder, almond butter, vanilla extract, and sea salt. Blend until a sticky dough forms.
- Roll the mixture into small balls (about 1-inch diameter).
- Coat each ball in shredded coconut.
- Chill in the fridge for 30 minutes before serving.
Notes
- Store in an airtight container in the fridge for up to 2 weeks.
- For a nut-free option, replace almond butter with sunflower seed butter.
- Adjust sweetness by adding more or fewer dates.
- Prep Time: 15 minutes
- Cook Time: 0 minutes
- Category: Snack
- Method: No-bake
- Cuisine: International
Nutrition
- Serving Size: 1 ball
- Calories: 120
- Sugar: 8g
- Sodium: 50mg
- Fat: 7g
- Saturated Fat: 1.5g
- Unsaturated Fat: 4g
- Trans Fat: 0g
- Carbohydrates: 14g
- Fiber: 3g
- Protein: 3g
- Cholesterol: 0mg