Skip to content
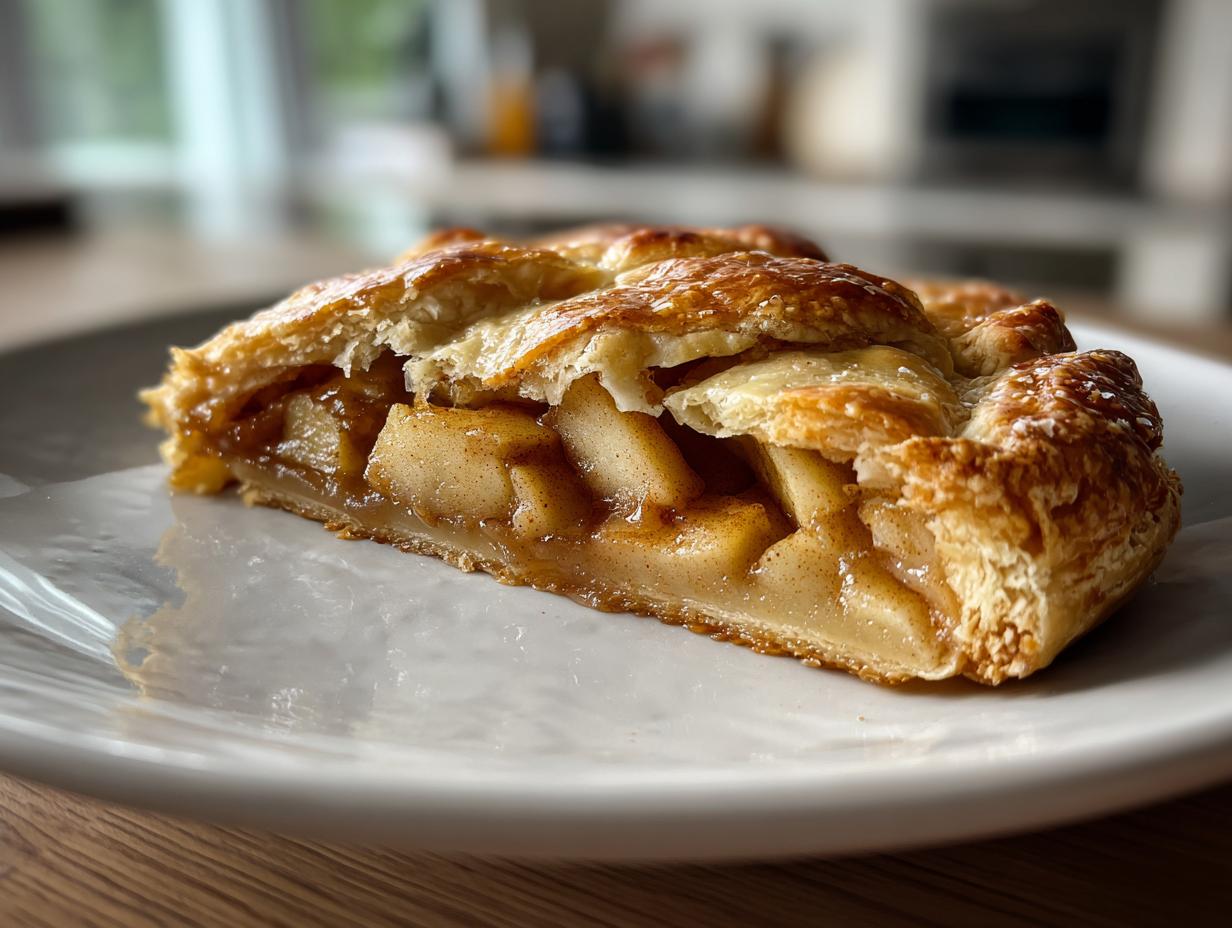
There’s something magical about an Apple Galette with Flaky Crust – it’s like the charming, carefree cousin of a fancy pie. I first fell in love with this rustic dessert when I needed a quick but impressive treat for a last-minute family gathering. My aunt, who’s normally skeptical of my kitchen experiments, took one bite and said, “This tastes like a French bakery!” The best part? It’s ridiculously simple to make. Unlike fussy pies that demand perfect crimping, this free-form beauty celebrates imperfections. Just pile those spiced apples in the center, fold the edges roughly, and boom – you’ve got a dessert that looks like you spent hours when really, it comes together faster than peeling all those apples!
Ingredients for Apple Galette with Flaky Crust
Gathering your ingredients is the first step to galette bliss – and trust me, every single one plays a special role. I’ve made this so many times that I can practically smell the cinnamon just reading this list!
- 2 cups all-purpose flour – The foundation of our flaky masterpiece
- 1/2 teaspoon salt – Just enough to balance the sweetness
- 1 tablespoon sugar – A little sweetness in the crust makes all the difference
- 3/4 cup cold unsalted butter, cubed – And I mean cold! Straight from the fridge, cut into little pieces
- 4-5 tablespoons ice water – The secret weapon for that perfect flaky texture
- 3 medium apples, peeled and thinly sliced – I like Granny Smith, but use what you love
- 1/4 cup sugar – For caramelizing those apples beautifully
- 1 teaspoon cinnamon – Because apples and cinnamon are soulmates
- 1 tablespoon lemon juice – Keeps the apples looking fresh and adds brightness
- 1 egg, beaten – For that gorgeous golden crust (we’ll use this as our egg wash)
Pro tip from my many galette adventures: measure everything before you start. That cold butter waits for no one, and you’ll want to work quickly once you begin the dough!
How to Make Apple Galette with Flaky Crust
Okay, let’s get to the fun part! Making this apple galette is like conducting a little kitchen symphony – each step builds on the last to create something magical. Don’t worry if your first attempt isn’t picture-perfect; mine certainly wasn’t! The beauty of a galette is in its rustic charm.
Preparing the Dough
First things first – that glorious flaky crust. In a large bowl, whisk together the flour, salt, and sugar. Now grab those cold butter cubes (I can’t stress enough how cold they need to be!) and work them into the flour mixture using your fingers or a pastry cutter. You’re looking for pea-sized crumbs – some bigger butter pieces are actually good here!
Here’s my trick: drizzle in the ice water one tablespoon at a time, gently tossing with a fork after each addition. The dough should just come together when you press it – don’t overmix! Form it into a disk, wrap in plastic, and chill for at least 30 minutes. This rest period is non-negotiable for easy rolling.
Assembling the Galette
While the dough chills, prep your apples. Toss those thin slices with sugar, cinnamon, and lemon juice – the lemon keeps them looking fresh and adds a lovely zing. When the dough is ready, roll it out on a floured surface into about a 12-inch circle (don’t stress about perfect circles – rustic is charming!).
Transfer the dough to a parchment-lined baking sheet. Pile those gorgeous spiced apples in the center, leaving a 2-inch border all around. Now comes my favorite part: fold the edges up over the apples, pleating as you go. No need to be precise – those uneven folds give it character!
Baking the Galette
Preheat your oven to 375°F (190°C) while you give the galette one last flourish – brush the folded crust with that beaten egg. This creates that beautiful golden sheen. Pop it in the oven and let the magic happen for 35-40 minutes.
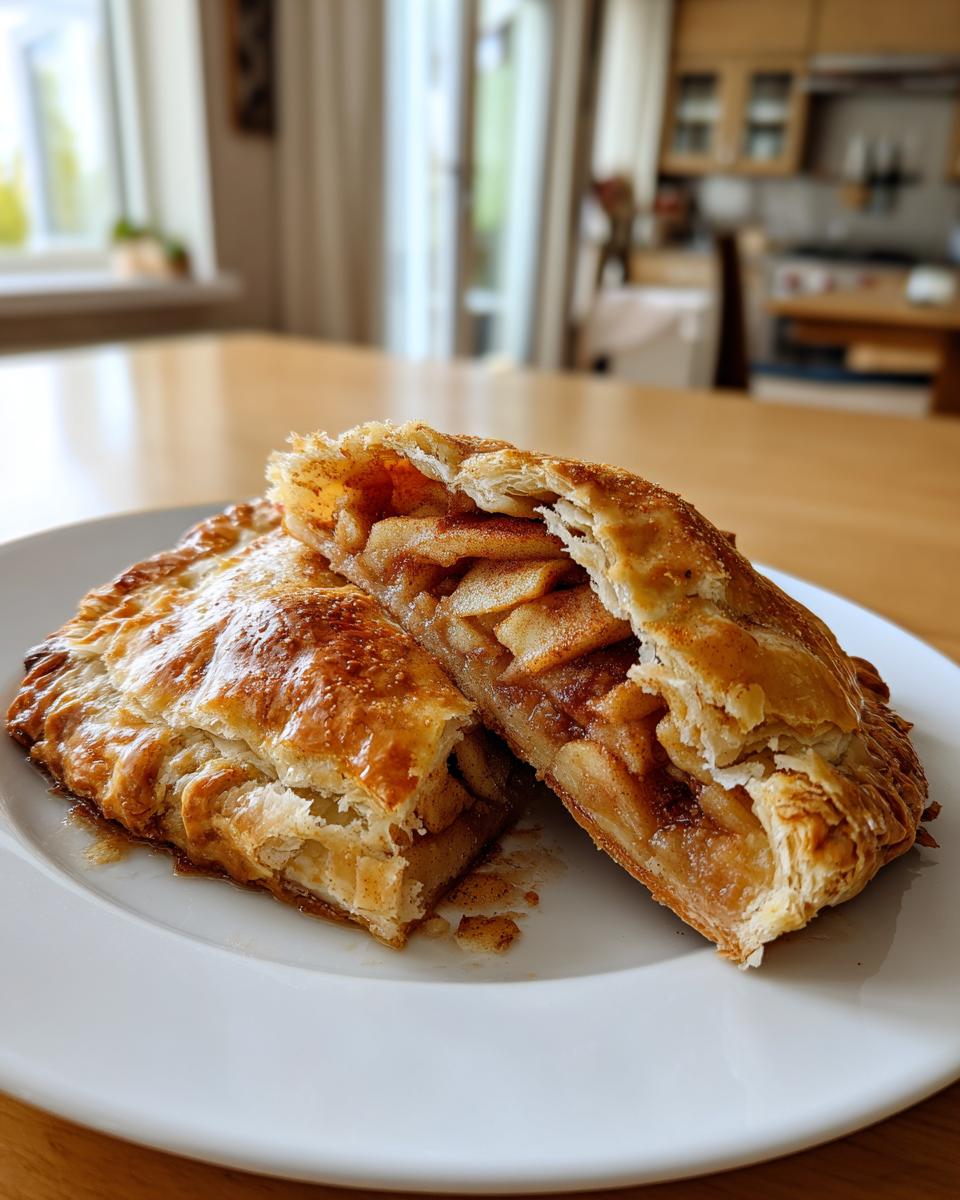
You’ll know it’s done when the crust is deeply golden and the apple juices are bubbling. Let it cool for at least 15 minutes before slicing – I know it’s hard to wait, but those juices need time to set! The aroma filling your kitchen will be absolutely intoxicating.
Why You’ll Love This Apple Galette with Flaky Crust
If you’re not already sold on this beauty, let me count the ways it’ll steal your heart (and probably become your new go-to dessert). Trust me, I’ve converted many pie skeptics with this recipe!
- Rustic elegance without the stress – Unlike fussy pies that demand perfect crimping, this free-form beauty celebrates happy accidents. Those uneven folds? Pure charm!
- Minimal prep, maximum payoff – From fridge to table in about an hour and a half (with most of that hands-off chilling time). Perfect for when company surprises you.
- Adapts to any season – Swap apples for peaches in summer, pears in fall, or berries in spring. The flaky crust works with everything!
- Crowd-pleasing flavor – The buttery crust with cinnamon-kissed apples hits that perfect sweet spot between fancy and comforting.
- Forgiving nature – Crack in the dough? Patch it. Juice bubbled over? Call it “caramelized.” It’s supposed to look homemade!
- Makes you feel like a pastry chef – That golden, flaky crust will have everyone asking for your secret. (Little do they know how simple it really is!)
Honestly, what’s not to love? It’s the dessert that keeps giving – delicious warm from the oven, at room temperature, or even cold straight from the fridge (not that I’d know anything about midnight snack raids…).
Tips for the Perfect Apple Galette with Flaky Crust
After making more apple galettes than I can count (some glorious, some… learning experiences), I’ve gathered all my hard-won wisdom to help you nail this every time. These little tricks make all the difference between “good” and “where have you been all my life?”
Chill out – seriously!
That dough needs its beauty sleep! I used to rush the chilling step until one disastrous galette taught me patience. Now I never skip the full 30 minutes (sometimes even 45 if my kitchen’s warm). Cold dough rolls easier and bakes up flakier. Pro tip: if the butter starts melting as you roll, pop everything back in the fridge for 10 minutes.
Apple anatomy matters
Slice those apples about 1/4-inch thick – too thin and they’ll turn to mush, too thick and they won’t soften properly. My grandma’s trick? Cut slices pole-to-pole (from stem end to blossom end) rather than crosswise. They arrange more beautifully and cook evenly. And peel them! I learned the hard way that skins can get tough during baking.
Sugar smarts
Taste your apples first! Tart Granny Smiths need the full sugar amount, while sweeter Honeycrisps might need less. I keep a little extra sugar handy to sprinkle on top if my apples aren’t cooperating. The lemon juice isn’t just for flavor – it balances the sweetness and keeps the apples from browning while you work.
Egg wash wizardry
Don’t skip the egg wash – it’s what gives that gorgeous golden glow. For extra sparkle, sprinkle coarse sugar on the crust before baking. If you’re out of eggs, heavy cream works in a pinch, though it won’t get quite as shiny.
Juice control
If your apples are extra juicy, toss them with a tablespoon of flour or cornstarch before piling onto the dough. This prevents a soggy bottom (the horror!). Some bubbling juices are normal and actually look beautiful – just lay some foil underneath if you’re worried about oven mess.
Remember – galettes are meant to look homemade, so don’t stress perfection. My first attempt looked like a pastry crime scene, but it still tasted amazing! Now it’s your turn to make some delicious memories (and maybe a few happy accidents) in the kitchen.
Ingredient Substitutions & Notes
Baking should be fun, not stressful – so let’s talk about how to make this apple galette work with what you’ve got! Over the years, I’ve tried all sorts of swaps when I’ve been mid-recipe and realized I’m out of something. Here’s what works (and what doesn’t) from my many kitchen experiments.
Flour Power Options
No all-purpose flour? No problem! For a gluten-free version, I’ve had great success with 1:1 gluten-free flour blends (Bob’s Red Mill is my favorite). Whole wheat flour works too – just use half whole wheat and half all-purpose so the crust stays tender. Once, in a pinch, I even used pastry flour and got the flakiest crust ever!
Sweetener Swaps
That tablespoon of sugar in the crust can be swapped with coconut sugar for a deeper flavor – it adds a lovely caramel note. For the apple filling, brown sugar works beautifully instead of white for a richer taste. Honey or maple syrup can work too, but reduce other liquids slightly since they add moisture.
The Magic of Lemon Juice
That tablespoon of lemon juice isn’t just for flavor – it’s your browning insurance! The acid prevents the apples from oxidizing while you work (you know, turning that unappetizing brown). No lemons? Any citrus juice works – I’ve used orange in a pinch. Even a teaspoon of vinegar mixed with water will do the trick in an emergency.
Butter Alternatives
While butter gives the best flavor, you can use frozen coconut oil (measure then freeze) for a dairy-free version. The key is keeping it icy cold, just like butter. I don’t recommend margarine – it makes the crust greasy rather than flaky.
Egg Wash Replacements
Out of eggs? Brush the crust with heavy cream, melted butter, or even milk for browning. For vegan options, almond milk with a bit of maple syrup works, though it won’t get quite as golden.
Remember – baking is part science, part adventure. Some of my best galettes came from “oops” moments when I had to improvise. The most important ingredient? A dash of confidence and a sprinkle of joy!
Serving Suggestions for Apple Galette with Flaky Crust
Oh, the joy of serving this beauty! While the apple galette is absolutely divine on its own, let me share my favorite ways to dress it up (or down) for any occasion. I’ve served this at everything from fancy dinner parties to casual backyard gatherings – it always steals the show!
The Classic: À la Mode
You can’t go wrong with a scoop of vanilla ice cream melting over the warm galette. The contrast of cold creaminess against the flaky, buttery crust is pure magic. My trick? Use good-quality vanilla bean ice cream – that speckled appearance makes it look extra special. For an adult twist, try cinnamon or bourbon vanilla ice cream!
Whipped Cream Wonderland
For something lighter, freshly whipped cream is my go-to. I like to sweeten mine with just a touch of powdered sugar and a splash of vanilla. Sometimes I’ll fold in a bit of cinnamon or cardamom for extra warmth. Pro tip: whip it to soft peaks – that cloud-like texture is perfect for draping over each slice.
Caramel Drizzle Drama
Want to take it over the top? Warm caramel sauce transforms this dessert into something truly spectacular. I either use my favorite store-bought brand or make a quick homemade version by melting sugar with butter and cream. Drizzle it artfully over each slice right before serving – the caramel pools around the apples in the most gorgeous way.
Cheese Please!
For a more sophisticated take, serve with a wedge of sharp cheddar or a dollop of mascarpone. The salty-creamy contrast against the sweet apples is incredible. My French friend introduced me to this pairing, and now it’s my secret weapon for impressing foodie friends!
Breakfast Bonus
Here’s my confession – leftover galette makes an amazing breakfast. Just rewarm it slightly and enjoy with a dollop of Greek yogurt and a drizzle of honey. The flaky crust becomes almost croissant-like when reheated. Perfect with your morning coffee!
No matter how you serve it, the key is warmth – that’s when the flavors really sing. I like to slice it at the table so everyone can admire those gorgeous layers before digging in. And don’t worry about perfect slices – part of the charm is those rustic, uneven pieces with extra crispy edges!
Storing and Reheating
Now, let’s talk about keeping your apple galette tasting just as amazing as the day you made it (if there’s any left, that is!). I’ve learned through many delicious trials – and a few sad, soggy errors – exactly how to store and revive this beauty.
At room temperature, your galette will stay fresh for about 2 days if you keep it in an airtight container or tightly wrapped in foil. But let’s be real – the crust is at its absolute best within the first 24 hours. That flaky texture starts to soften as time goes on, though the flavor only gets better!
For longer storage, pop it in the fridge where it’ll keep for up to 5 days. The cold does make the crust a bit softer, but here’s my trick: when you’re ready to enjoy it again, reheat individual slices in a 350°F (175°C) oven for about 10 minutes. This brings back that wonderful crispness better than any microwave ever could.
Want to freeze it? You absolutely can! Wrap the cooled galette tightly in plastic wrap, then foil, and it’ll keep for about 3 months in the freezer. When the craving hits, let it thaw in the fridge overnight, then reheat as above. I always keep one in my freezer for emergency dessert situations – you never know when guests might drop by!
Pro tip: If the apples seem dry after storage, a quick drizzle of warm apple cider or caramel sauce brings back all that luscious moisture. And whatever you do, resist the urge to refrigerate it while still warm – that condensation will make the crust soggy faster than you can say “second slice!”
Apple Galette with Flaky Crust FAQs
Over the years, I’ve gotten so many questions about this recipe from friends and family (and even a few panicked texts mid-baking!). Here are the answers to everything you might wonder about making the perfect apple galette – straight from my flour-dusted notebook of kitchen experiments!
Can I use store-bought pie dough instead of making my own?
Absolutely! While homemade dough gives you that incredible flaky texture and buttery flavor, store-bought works in a pinch. Just look for all-butter puff pastry or pie dough in the freezer section. Thaw it according to package directions before rolling out. It won’t be quite as magical as homemade, but it’ll still be delicious!
What are the best apples for galette?
My top picks are Granny Smith for their tartness and firm texture, or Honeycrisp for their perfect balance of sweet and crisp. Avoid super soft apples like Red Delicious – they turn to mush during baking. Mixing varieties (like one tart and one sweet apple) creates wonderful complexity!
Can I freeze the galette before baking?
Yes! This is my secret for always having dessert ready. Assemble the galette completely (including egg wash), freeze uncovered until solid (about 2 hours), then wrap tightly in plastic and foil. When ready to bake, no need to thaw – just add 5-10 minutes to the baking time. The crust might not get quite as golden, but it’ll still be fantastic.
Why did my crust turn out tough instead of flaky?
Oh honey, I’ve been there! Usually this means the butter got too warm or the dough was overworked. Next time, keep everything icy cold, handle the dough as little as possible, and don’t skip that chilling time. Also, make sure you’re using enough fat – skimping on butter is a one-way ticket to Tough Crust Town.
Can I make this gluten-free or vegan?
You bet! For gluten-free, use a 1:1 gluten-free flour blend (I like King Arthur’s). For vegan, substitute the butter with frozen coconut oil and use a plant-based egg wash (almond milk + maple syrup works). The texture changes slightly, but it’s still delicious. My vegan friend says it’s her favorite dessert at our gatherings!
Nutritional Information
Now, let’s talk numbers – but don’t let them scare you off this delicious treat! Remember, these are just estimates (your exact amounts will depend on your specific ingredients and how generously you slice it). I’ve calculated this based on making 6 decent-sized slices that satisfy your sweet tooth without going overboard.
Each serving of this heavenly apple galette comes out to about:
- 280 calories – Perfect for a dessert that feels indulgent but won’t wreck your day
- 14g fat (8g saturated) – That’s the butter working its flaky magic
- 36g carbohydrates – From the apples and just enough sugar to make them sing
- 3g protein – A little something from the flour and egg
- 3g fiber – Thank those apple skins we left on!
- 18g sugar – Mostly natural from the apples, with a boost from that caramelization
Now, here’s my philosophy – life’s too short not to enjoy homemade desserts! This galette is actually one of the more reasonable treats in my baking repertoire. The apples pack nutrients, and unlike some desserts drowning in frosting, you can actually taste each quality ingredient. Pro tip: pair it with a scoop of vanilla yogurt instead of ice cream if you’re watching calories – still delicious but a bit lighter!
Alright, my fellow baking adventurers – it’s your turn to work some galette magic in your own kitchen! I can’t wait for you to experience the joy of pulling this golden beauty from your oven, watching as your family’s eyes light up at first bite. Trust me, once you master this recipe, it’ll become your secret weapon for every occasion (and maybe even some “just because” days).
Now grab those apples and that rolling pin – your flaky crust destiny awaits! When you make it (because I know you will), come back and tell me all about your galette adventure in the comments. Did you stick to the classic version or put your own spin on it? Any happy accidents that turned into brilliant discoveries? I want to hear every delicious detail!
Happy baking, my friends – may your crust be flaky, your apples perfectly spiced, and your kitchen filled with that incredible cinnamon-scented joy. Don’t forget to snap a photo of your masterpiece before it disappears (because it will… quickly)! You can find more delicious inspiration on Pinterest.
Print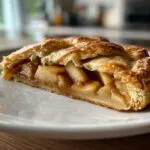
Irresistible Apple Galette with Flaky Crust in 5 Easy Steps
- Total Time: 1 hour 30 minutes (includes chilling)
- Yield: 6 servings 1x
- Diet: Vegetarian
Description
A simple yet delicious apple galette with a flaky crust. Perfect for any occasion.
Ingredients
- 2 cups all-purpose flour
- 1/2 teaspoon salt
- 1 tablespoon sugar
- 3/4 cup cold unsalted butter, cubed
- 4–5 tablespoons ice water
- 3 medium apples, peeled and thinly sliced
- 1/4 cup sugar
- 1 teaspoon cinnamon
- 1 tablespoon lemon juice
- 1 egg, beaten (for egg wash)
Instructions
- Mix flour, salt, and sugar in a bowl.
- Add cold butter and mix until crumbly.
- Gradually add ice water until dough forms.
- Chill dough for 30 minutes.
- Preheat oven to 375°F (190°C).
- Roll dough into a circle and transfer to a baking sheet.
- Toss apples with sugar, cinnamon, and lemon juice.
- Arrange apples in the center of the dough, leaving a border.
- Fold edges over the apples.
- Brush crust with egg wash.
- Bake for 35-40 minutes until golden.
Notes
- Use cold butter for a flaky crust.
- Chill dough before rolling for easier handling.
- Adjust sugar based on apple sweetness.
- Prep Time: 20 minutes
- Cook Time: 40 minutes
- Category: Dessert
- Method: Baking
- Cuisine: French
Nutrition
- Serving Size: 1 slice
- Calories: 280
- Sugar: 18g
- Sodium: 100mg
- Fat: 14g
- Saturated Fat: 8g
- Unsaturated Fat: 5g
- Trans Fat: 0g
- Carbohydrates: 36g
- Fiber: 3g
- Protein: 3g
- Cholesterol: 50mg