Skip to content
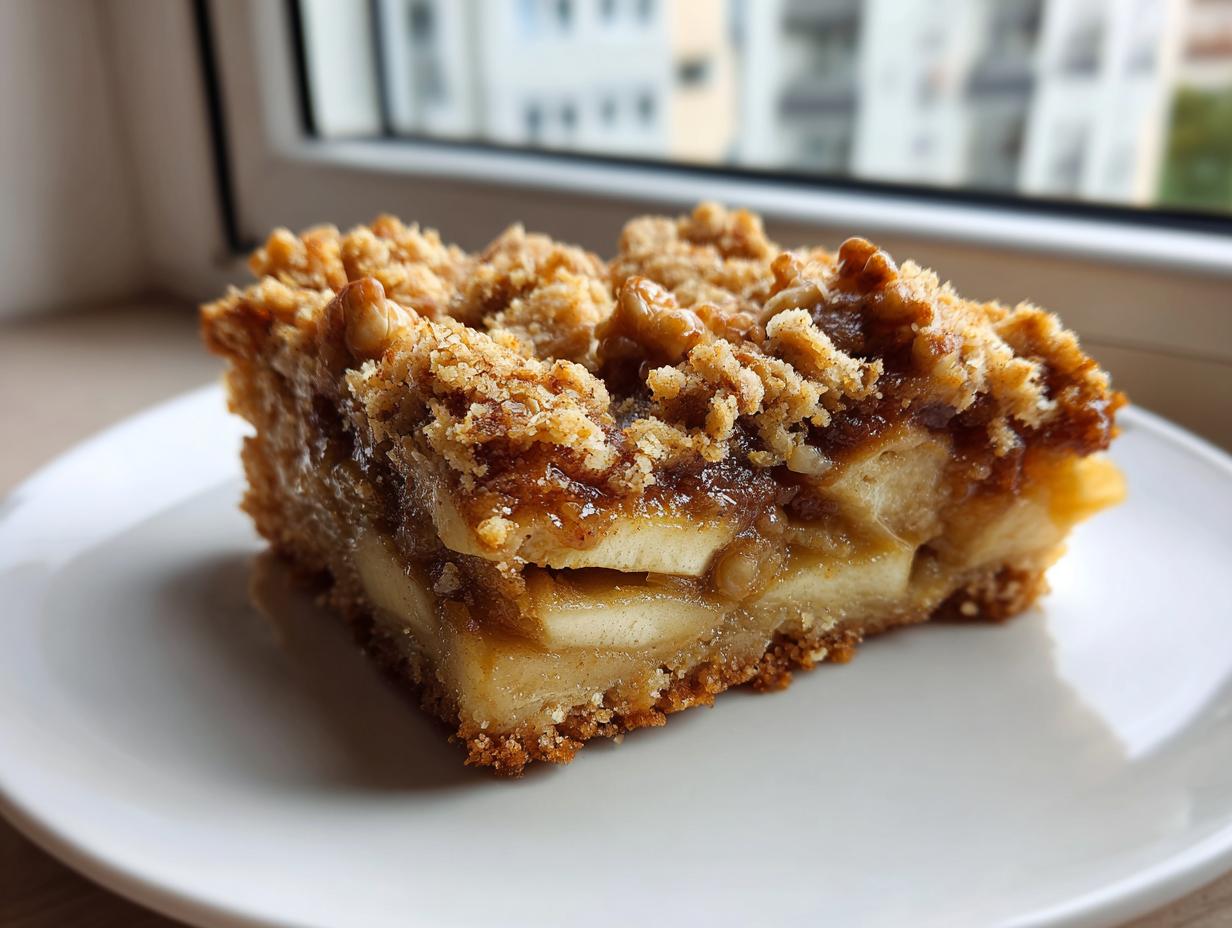
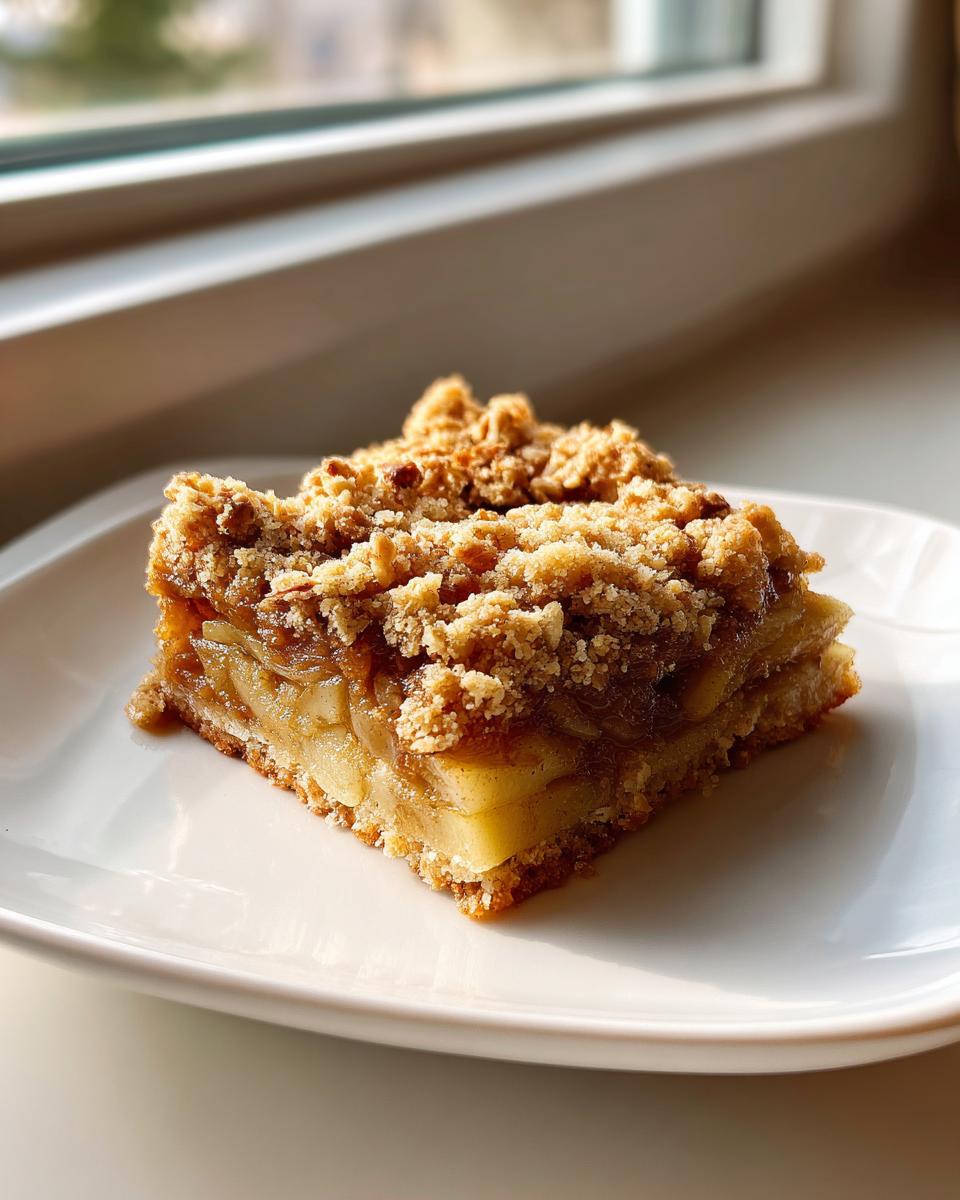
Oh my goodness, let me tell you about the first time I made these apple pie bars with streusel topping – they changed my whole relationship with baking! I love apple pie as much as the next person, but honestly? Rolling out pie crust stresses me out. These bars give you all that incredible spiced apple goodness with a buttery crumb crust and that irresistible streusel crunch on top – no pastry skills required.
I remember making these for a last-minute potluck last fall when my neighbor unexpectedly dropped by with apples from her tree. Forty minutes later (yes, they come together that fast!), we were standing in my kitchen eating warm bars straight from the pan, crispy topping crumbling everywhere. The smell of cinnamon and brown sugar filled the whole house, and I knew I’d found my new go-to dessert. Now these apple pie bars with streusel topping are my secret weapon for everything from holiday gatherings to “oops I need a dessert NOW” moments.
Why You’ll Love These Apple Pie Bars with Streusel Topping
Listen, I know you’re going to adore these bars as much as I do – here’s why!
- Easier than pie (literally): No rolling pins, no fancy crimping – just press the crust into the pan and layer on the goodness
- Perfect grab-and-go treat: Way more portable than slice of pie – wrap one up for lunchboxes or picnic baskets
- That irresistible texture combo: Buttery bottom crust, tender spiced apples, and that oh-so-satisfying crunchy streusel topping
- Better the next day: The flavors deepen overnight (if they last that long!)
- Crowd-pleaser magic: Works for everything from fancy dinner parties to casual backyard barbecues
Trust me, once you try these, you’ll wonder why you ever bothered with fussy pie crusts!
Ingredients for Apple Pie Bars with Streusel Topping
Okay, let’s talk ingredients – and I mean exactly what you’ll need to make these bars shine. No vague “some apples” or “a bit of sugar” here – we’re getting specific because these little details make all the difference!
- 2 cups all-purpose flour – spooned and leveled, please! No packing it down
- 1/2 cup granulated sugar – this sweetens our buttery crust just right
- 1/2 cup cold butter, cubed – and I mean COLD (I pop mine in the freezer for 10 minutes first)
- 4 cups apples, peeled and thinly sliced – Granny Smith are my go-to for that perfect tartness that balances the sweetness
- 1/4 cup brown sugar – packed lightly for the apple layer (that molasses flavor is key!)
- 1 teaspoon cinnamon – because what’s apple pie without that warm spice?
- 1/2 cup rolled oats – old-fashioned, not instant, for the best streusel texture
- 1/4 cup chopped walnuts – optional but oh-so-worth it for that extra crunch
See that “peeled and thinly sliced” note for the apples? I learned the hard way that thick chunks make for uneven baking – aim for about 1/4 inch slices and you’ll get perfect tender apples in every bite!
Equipment You’ll Need
No fancy gadgets required here! Just gather these basics:
- 9×13-inch baking pan – metal or glass both work great
- Mixing bowls – one for crust, one for streusel
- Pastry cutter – or two forks if you’re feeling old-school
- Peeler and sharp knife – for those apple prep sessions
That’s it – now let’s get baking!
How to Make Apple Pie Bars with Streusel Topping
Alright, let’s get to the fun part – making these irresistible apple pie bars! Don’t let the layers fool you – this is seriously simple stuff. Just follow these steps and you’ll have golden, crumbly perfection in no time.
Preparing the Crust
First things first – preheat that oven to 350°F (175°C). No cheating here – we want it nice and hot before our bars go in!
Now for the crust – it’s the foundation of our bars, so we want it just right. In a big bowl, whisk together your flour and granulated sugar. Then grab those ice-cold butter cubes (I told you they needed to be cold!) and start cutting them in with a pastry cutter or two forks. You’re looking for a texture like coarse sand with some pea-sized butter bits remaining – these little pockets will make your crust beautifully flaky.
Here’s my pro tip: work quickly and don’t overmix! We’re not making bread here – too much handling will make the crust tough. Just mix until it holds together when you pinch it between your fingers.
Layering the Apples
Dump that crumbly crust mixture into your greased 9×13 pan and press it down firmly with your fingers or the bottom of a measuring cup. Get it nice and even – this gives every bar the perfect base.
Now for the star of the show – those apple slices! Arrange them in an even layer over the crust. Don’t just dump them in – take a minute to spread them out so every bite gets apple goodness. Sprinkle that brown sugar and cinnamon evenly over the top – I like to mix them together first in a little bowl to make sure the spices distribute perfectly.
Adding the Streusel Topping
Time for my favorite part – that glorious crunchy topping! In that same bowl you used for the crust (less dishes – yay!), mix together the oats and walnuts. Just toss them with your fingers until they’re well combined.
Now sprinkle this mixture evenly over the apples. Don’t press it down – we want it nice and loose so it gets crispy in the oven. And don’t skimp! Cover every inch of those apples for maximum crunch in every bite.
Pop that beauty in your preheated oven and bake for about 40 minutes. You’ll know they’re done when the topping is golden brown and you can smell that heavenly cinnamon-apple scent throughout your kitchen. Resist the temptation to cut them right away – let them cool completely so they set up properly. I know, it’s hard, but trust me, it’s worth the wait!
Tips for Perfect Apple Pie Bars with Streusel Topping
After making these bars more times than I can count, I’ve picked up some tricks for absolute perfection:
- Chill the crust – Pop the pan in the fridge for 15 minutes before baking to prevent shrinking
- Apple thickness matters – Uniform 1/4-inch slices mean even cooking (no mushy or crunchy surprises!)
- Dry those apples – Pat slices with a paper towel to remove excess moisture and prevent soggy crust
- Cool completely – The hardest part! But cutting too soon makes messy bars instead of clean squares
- Brown sugar trick – Rub cinnamon into brown sugar with your fingers to eliminate spice clumps
Follow these simple pointers and you’ll get bakery-worthy bars every single time!
Variations for Apple Pie Bars with Streusel Topping
Oh, the possibilities with these bars! Once you’ve mastered the basic version, try these fun twists to keep things exciting:
- Nut swap: Pecans or almonds work beautifully instead of walnuts – toast them first for extra flavor!
- Spice it up: Add a pinch of nutmeg or cardamom to the cinnamon for a warm, complex spice blend
- Drizzle magic: Warm caramel sauce or a simple powdered sugar glaze takes these over the top
- Berry bonus: Toss in a handful of fresh cranberries with the apples for tart contrast
- Maple love: Replace half the brown sugar with pure maple syrup for autumnal vibes
The base recipe is so forgiving – don’t be afraid to make it your own!
Serving and Storing Apple Pie Bars with Streusel Topping
Here’s the deal – these bars need patience after baking! Let them cool completely in the pan (about 2 hours) before slicing – I know it’s torture with that amazing smell, but this ensures clean cuts. Store leftovers in an airtight container at room temperature. They’ll stay fresh and delicious for up to 3 days… if they last that long! For longer storage, freeze individual bars wrapped in parchment paper – just thaw and reheat slightly for that fresh-baked taste.
Nutritional Information
Let’s be real – we’re not eating apple pie bars for their health benefits! But just so you know what you’re getting into, here’s the scoop: these bars pack all the cozy, comforting goodness you’d expect from any proper apple dessert. The nutritional values will vary depending on exactly how big you cut your bars (I won’t judge if you go for “generous” portions!), which apples you use, and whether you add those optional walnuts.
As with all homemade treats, consider these numbers friendly estimates rather than exact science. Things like how much streusel topping you pile on or whether you use salted vs unsalted butter can shift the numbers a bit. That said, each bar gives you a lovely balance of carbs, fats, and just enough protein to make it feel somewhat respectable!
Remember: Nutritional info is about awareness, not anxiety. Enjoy these apple pie bars with streusel topping as part of your balanced approach to eating – maybe with an extra cup of coffee for good measure!
Frequently Asked Questions
I get questions about these apple pie bars all the time – let me answer the most common ones so you can bake with confidence!
Can I use frozen apples instead of fresh?
You can, but thaw and drain them thoroughly first! Frozen apples release tons of liquid, which can make your crust soggy. I recommend placing thawed slices in a colander for 30 minutes, then patting dry with paper towels. You may need to reduce baking time by 5-10 minutes too.
How do I prevent a soggy bottom crust?
Three secrets: 1) Make sure your butter is ice-cold when making the crust, 2) Don’t skip chilling the crust before baking, and 3) Pat those apple slices dry! The drier your apples, the crisper your crust will stay.
Can I make these gluten-free?
Absolutely! Swap the all-purpose flour for your favorite gluten-free blend (I like 1:1 mixes with xanthan gum). The streusel topping works great with gluten-free oats too. Just check all your labels!
Why did my streusel topping sink into the apples?
This usually means your apple layer was too thick or wet. Stick to that 4-cup measurement of thinly sliced apples, and make sure they’re patted dry. If it still happens, try baking the crust alone for 10 minutes before adding apples and topping.
Can I prepare these bars ahead of time?
You sure can! The unbaked bars keep well covered in the fridge overnight – just add 2-3 minutes to the baking time. Already baked? They actually taste better the next day as the flavors meld together!
For more delicious recipes and baking inspiration, be sure to check out our Pinterest page!
Print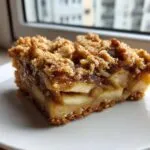
Irresistible Apple Pie Bars with Streusel Topping in 40 Minutes
- Total Time: 60 mins
- Yield: 12 bars 1x
- Diet: Vegetarian
Description
Delicious apple pie bars with a crunchy streusel topping. Perfect for dessert or a sweet snack.
Ingredients
- 2 cups all-purpose flour
- 1/2 cup granulated sugar
- 1/2 cup cold butter, cubed
- 4 cups apples, peeled and sliced
- 1/4 cup brown sugar
- 1 tsp cinnamon
- 1/2 cup rolled oats
- 1/4 cup chopped walnuts
Instructions
- Preheat oven to 350°F (175°C).
- Mix flour and granulated sugar in a bowl. Cut in butter until crumbly.
- Press mixture into a greased 9×13-inch baking pan.
- Layer apples over the crust. Sprinkle with brown sugar and cinnamon.
- Combine oats and walnuts for the streusel topping. Sprinkle over apples.
- Bake for 40 minutes or until golden brown.
- Cool before cutting into bars.
Notes
- Use tart apples like Granny Smith for best results.
- Store in an airtight container for up to 3 days.
- Prep Time: 20 mins
- Cook Time: 40 mins
- Category: Dessert
- Method: Baking
- Cuisine: American
Nutrition
- Serving Size: 1 bar
- Calories: 220
- Sugar: 18g
- Sodium: 85mg
- Fat: 8g
- Saturated Fat: 5g
- Unsaturated Fat: 2g
- Trans Fat: 0g
- Carbohydrates: 35g
- Fiber: 2g
- Protein: 3g
- Cholesterol: 20mg