Skip to content
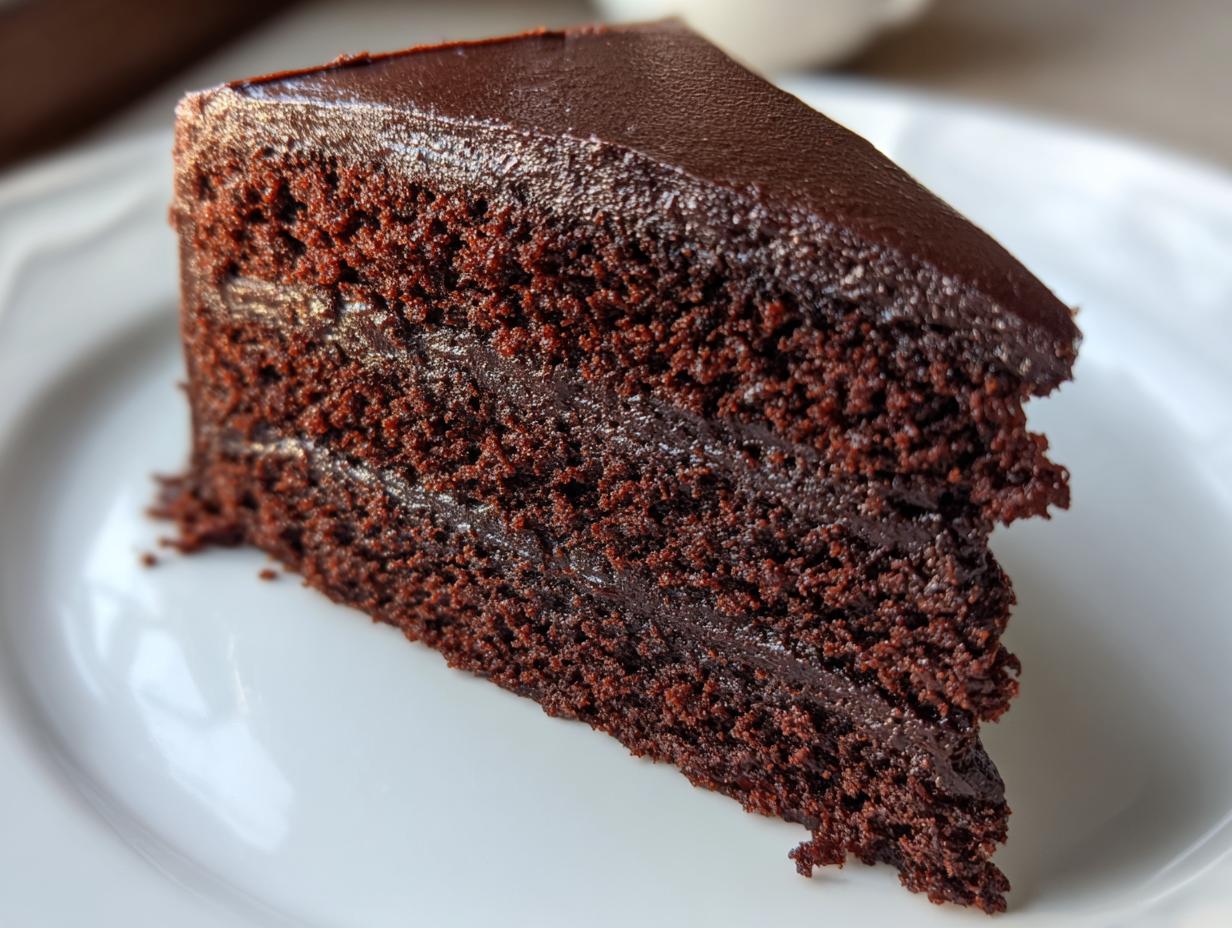
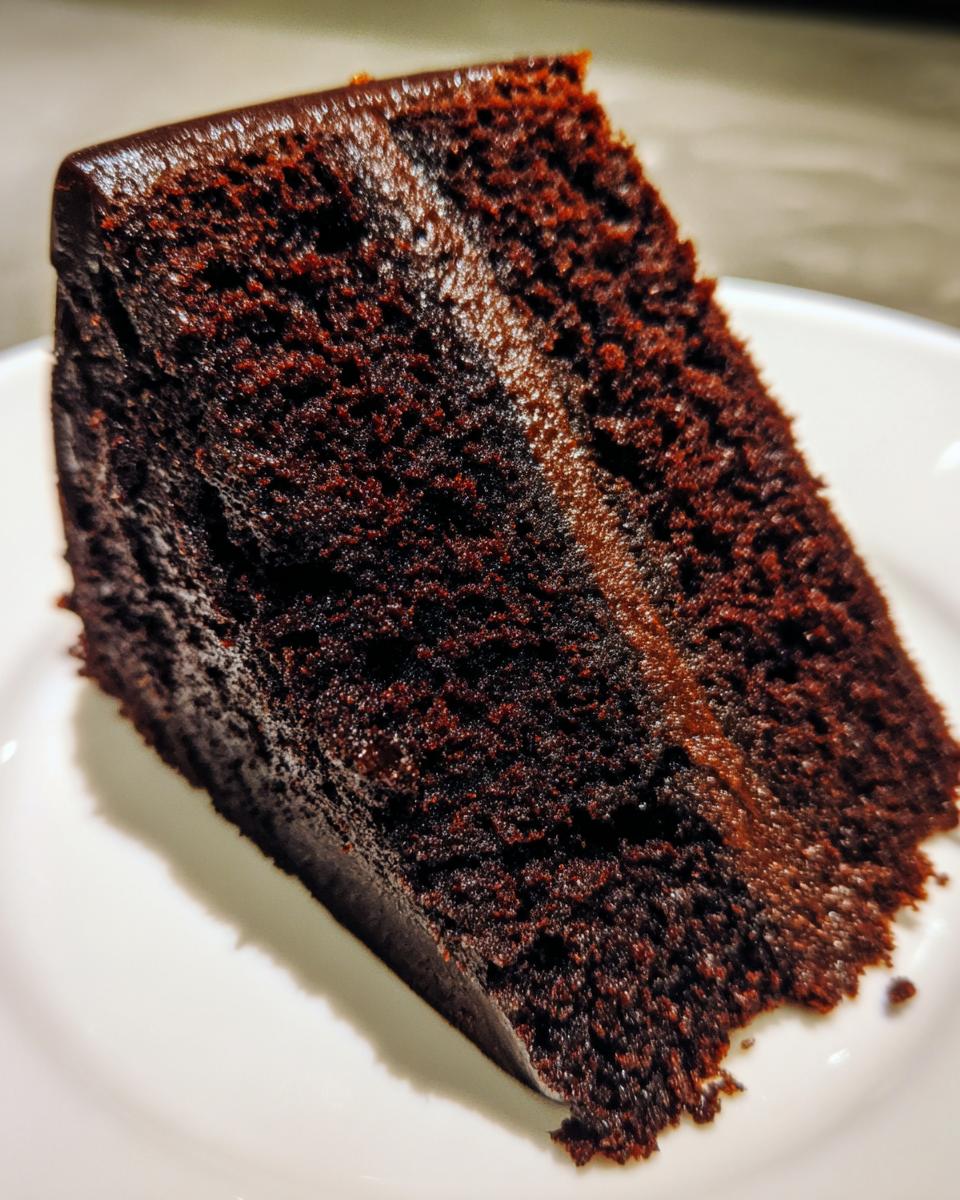
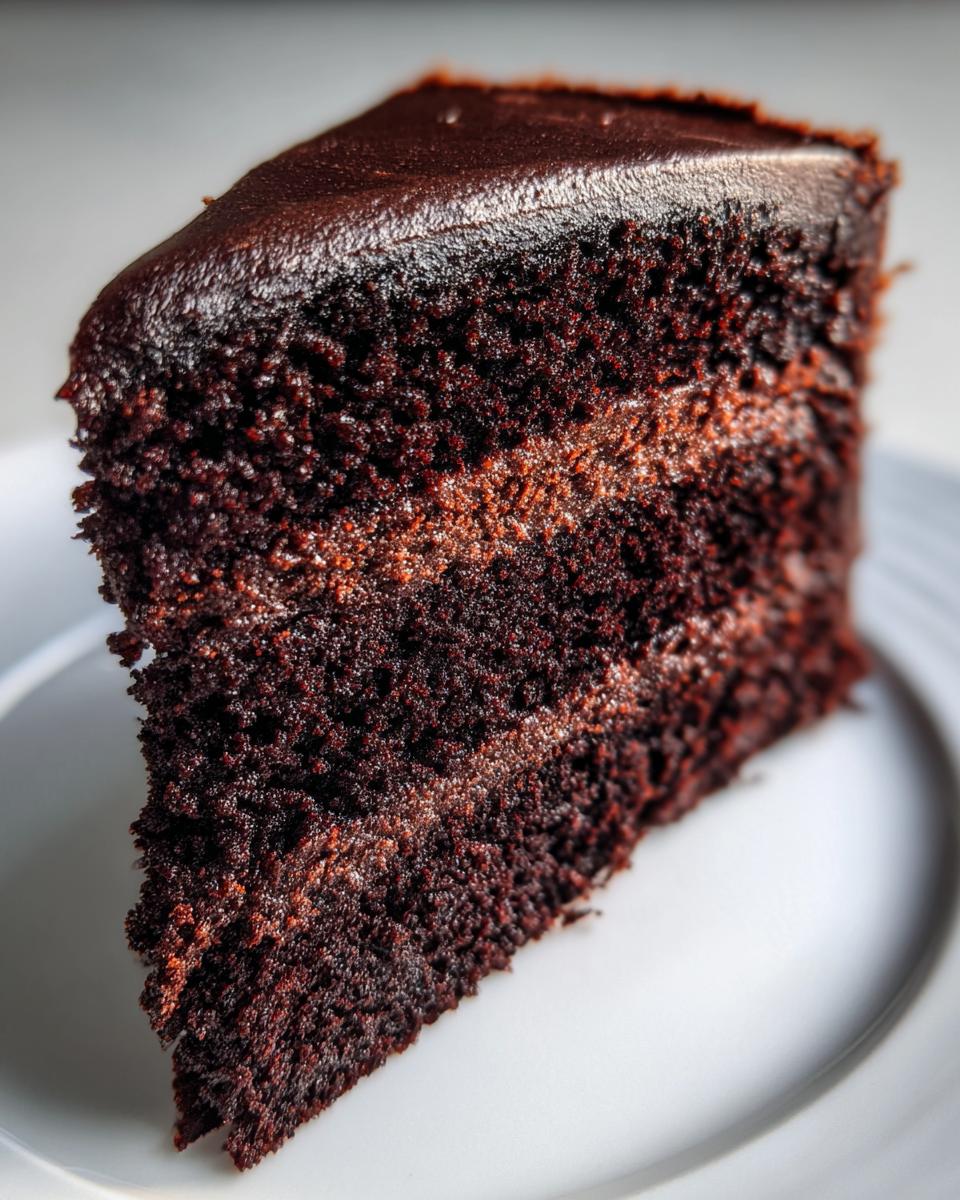
I’ll never forget the first time I bit into a slice of Black Velvet Cake – it was like tasting chocolate silk. My friend Sarah brought it to a potluck years ago, and I immediately begged for the recipe after one heavenly forkful. This isn’t just any chocolate cake. The crumb is so tender it practically melts in your mouth, with a deep cocoa flavor that makes supermarket cakes taste like cardboard by comparison. What really sets it apart? That luxurious, velvety texture (hence the name!) that comes from the perfect balance of oil, buttermilk, and hot water in the batter. Now it’s my go-to dessert for birthdays, dinner parties, or let’s be honest – anytime I need a chocolate fix that feels downright indulgent.
Ingredients for Black Velvet Cake
Gathering the right ingredients is the first step to cake magic! Here’s everything you’ll need for that perfect velvety texture and rich chocolate flavor:
- 2 cups (240g) all-purpose flour – spooned and leveled (don’t scoop directly from the bag!)
- 2 cups (400g) granulated sugar – I like to use organic cane sugar for a cleaner sweetness
- 3/4 cup (75g) unsweetened cocoa powder – splurge on the good stuff here! I’m obsessed with Dutch-processed for extra richness
- 2 tsp baking soda – make sure yours is fresh (it should fizz with vinegar)
- 1 tsp baking powder – aluminum-free is my preference
- 1 tsp salt – just regular table salt works fine
- 2 large eggs – room temperature please! Cold eggs can make the batter seize
- 1 cup (240ml) buttermilk – no buttermilk? Mix 1 tbsp lemon juice or vinegar into regular milk and let it sit 5 minutes
- 1 cup (240ml) vegetable oil – I use grapeseed oil, but any neutral oil works
- 2 tsp pure vanilla extract – skip the imitation stuff for this cake
- 1 cup (240ml) hot water – just boiled from the kettle works perfectly
Pro tip: Measure everything before you start mixing! There’s nothing worse than realizing mid-recipe you’re out of an ingredient. I line mine up in order of use – it makes the whole process smoother.
How to Make Black Velvet Cake
Alright, let’s get baking! This Black Velvet Cake comes together like a dream if you follow these simple steps. I’ve made this recipe dozens of times, and trust me – the method matters just as much as the ingredients for that signature velvety texture.
Preparing the Batter
First things first – preheat your oven to 350°F (175°C). Don’t skip this! A properly heated oven is crucial for even baking. While that’s warming up, grease two 9-inch round cake pans with butter or baking spray, then dust them lightly with cocoa powder (it prevents white flour spots on your beautiful dark cake).
Now for the fun part:
- In a large bowl, whisk together all your dry ingredients – flour, sugar, cocoa powder, baking soda, baking powder, and salt. I like to sift them through a fine mesh strainer to eliminate any lumps. This aerates the flour too, which helps create that tender crumb we’re after.
- In another bowl, whisk the eggs, buttermilk, oil, and vanilla until smooth. The mixture should look creamy and slightly frothy.
- Here’s where magic happens! Pour the wet ingredients into the dry ingredients and mix just until combined. I can’t stress this enough – overmixing develops gluten and makes cakes tough. A few lumps are totally fine!
- Slowly stream in the hot water while gently stirring. The batter will be thin – that’s normal! The hot water blooms the cocoa powder for maximum chocolate flavor.
Baking and Cooling
Divide the batter evenly between your prepared pans. I like to use a kitchen scale for precision, but eyeballing works too – just give each pan a gentle shake to level it out.
Bake on the middle rack for 30-35 minutes. Around the 25-minute mark, start checking with the toothpick test – insert it near the center, and if it comes out with just a few moist crumbs (not wet batter), you’re golden. The cake should spring back when lightly pressed too.
Here’s my #1 cake-saving tip: let the cakes cool in their pans for exactly 10 minutes before turning them out onto a wire rack. This prevents them from breaking apart, but doesn’t let them get soggy. Then cool completely before frosting – about an hour. I know it’s tempting to frost while warm, but patience rewards you with perfect layers that don’t slide!
Tips for the Perfect Black Velvet Cake
After countless batches (and a few hilarious kitchen disasters), I’ve learned exactly what makes this cake go from good to oh-my-goodness amazing. Here are my can’t-live-without secrets:
- Cocoa is king! That dusty old tin in your pantry won’t cut it – spring for premium Dutch-process cocoa. The difference in flavor is like night and day. My personal favorite? The deep, almost fruity notes of Valrhona or Guittard.
- Temperature matters. Cold eggs make the batter curdle, while cold buttermilk causes the oil to seize up. I leave everything out for 30 minutes before baking. No time? Submerge eggs in warm water for 5 minutes, and microwave buttermilk in 10-second bursts until it’s just barely lukewarm.
- Set that timer! Overbaking is the #1 culprit for dry cake. At 30 minutes, start checking every 60 seconds. Remember – the cake continues cooking from residual heat after coming out of the oven.
- High-altitude hack: Living above 3,000 feet? Reduce baking powder to 3/4 tsp and add an extra tablespoon of flour. The batter may need 5-10 extra minutes in the oven too.
- Bubbly batter blues? If your batter looks foamy after adding hot water, don’t panic! Just gently tap the pans on the counter before baking to release air bubbles that could cause tunnels in your cake.
One last thing – if your cake domes dramatically, level it with a serrated knife after it’s completely cool. Those scraps make the best chef’s snack (or midnight fridge raids… not that I’d know anything about that).
Ingredient Substitutions & Notes
Baking is all about making recipes work for you! While I swear by the original Black Velvet Cake ingredients, I’ve picked up some clever swaps over the years for when you’re in a pinch. Here’s my tried-and-true guide to substitutions without sacrificing that velvety texture:
Buttermilk Alternatives
No buttermilk? No problem! My favorite quick fix is stirring 1 tablespoon of lemon juice or white vinegar into 1 cup of regular milk and letting it sit for 5 minutes – it gives that same tangy kick that reacts perfectly with the baking soda. Greek yogurt works wonders too – just thin out 3/4 cup yogurt with 1/4 cup water until it reaches buttermilk consistency.
Flour Options
For my gluten-free friends, a 1:1 gluten-free flour blend works beautifully here. I’ve had great results with Bob’s Red Mill. Whole wheat pastry flour adds a nutty depth if you substitute half the all-purpose flour – but don’t go 100% whole wheat unless you want a denser cake that resembles chocolate bread (trust me, learned that the hard way).
The Hot Water Mystery
I get asked all the time – why hot water? It’s not just to thin the batter! Hot water “blooms” the cocoa powder, releasing its full flavor potential. Think of it like brewing coffee – heat extracts more complexity. The water also helps dissolve the sugar completely for a smoother texture. If you forget to boil water, just microwave what you need for 60 seconds – but don’t skip this step!
When You’re Out of Eggs
Ran out of eggs? Mix 1 tablespoon ground flaxseed with 3 tablespoons water per egg and let it thicken for 5 minutes. The texture will be slightly denser but still delicious. For extra richness, a ripe mashed banana works too – though it’ll add a subtle fruity note.
Cocoa Powder Choices
While Dutch-process cocoa gives that signature deep chocolate flavor, natural cocoa works in a pinch. Just don’t substitute instant hot cocoa mix – the sugar and milk powder will throw off the whole recipe (yes, I made this mistake so you don’t have to). Dark cocoa powder creates an even richer “black” color if you’re going for drama!
Remember: baking is part science, part creativity. The first time you make this cake, follow the recipe exactly. Then feel free to play – that’s how all the best kitchen discoveries happen!
Serving Suggestions for Black Velvet Cake
Now for the best part – eating this glorious cake! While Black Velvet Cake is practically perfect naked (no frosting, I mean), I’ve discovered some magical pairings that take it to the next level. Here are my favorite ways to serve this chocolate masterpiece:
Classic Pairings That Never Fail
A scoop of vanilla bean ice cream melting over warm cake is my ultimate comfort food. The hot-cold contrast is heavenly! For something lighter, freshly whipped cream with a hint of espresso powder complements the chocolate beautifully. In summer, I love topping slices with macerated berries – their bright acidity cuts through the richness. A drizzle of salted caramel or chocolate ganache? Yes please!
Presentation Perfection
This cake deserves to be shown off! Here’s how I make it look as good as it tastes:
- The Naked Cake Look: Just a thin crumb coat of frosting lets that dark color peek through. Garnish with edible flowers or gold leaf for special occasions.
- Dusting Magic: A light snowfall of powdered sugar through a stencil creates instant elegance. Try cocoa powder for a deeper look.
- Layer Cake Glam: Stacked tall with cream cheese frosting between layers, then finished with chocolate curls cascading down the sides.
- Individual Portions: Bake in ramekins for personal molten cakes, or cut chilled cake into neat squares for parties.
Unexpected Twists
Feeling adventurous? Try these fun variations:
For breakfast (don’t judge), I’ll toast a slice and spread it with peanut butter – the ultimate grown-up PB&J experience. My friend swears by pairing it with orange marmalade. Coffee lovers should try brushing each layer with espresso syrup before frosting. And if you really want to wow guests, serve miniature versions with a shot glass of cold milk for dunking!
No matter how you serve it, the most important tip? Enjoy every decadent bite. This cake was made for savoring slowly with good company – preferably with extra napkins for chocolate smudges!
Storing and Freezing Black Velvet Cake
Here’s the good news – if by some miracle you have leftover Black Velvet Cake (I usually don’t), it keeps beautifully! The key is proper storage to maintain that velvety texture. After years of trial and error (and one tragic drying-out incident), here’s exactly how I handle my cake leftovers:
Room Temperature Storage
For short-term storage, an airtight container at room temp works perfectly for 2-3 days. I swear by my glass cake dome – it lets me admire the cake while keeping it fresh. No dome? Place a sheet of parchment paper directly on the cut surfaces before covering with plastic wrap. This prevents condensation from making the top soggy.
Pro tip: If your kitchen runs warm, tuck a slice of bread into the container. The cake will steal moisture from the bread instead of drying out! Replace the bread daily.
Refrigerator Rules
Need to store it longer? The fridge buys you an extra 4-5 days. But beware – cold temperatures can make the crumb denser. Always bring slices to room temperature before serving to restore that melt-in-your-mouth texture. For frosted cakes, chilling actually helps set the frosting, but still let it sit out for 30 minutes before slicing.
My favorite fridge hack? Wrap individual slices in parchment paper before putting them in a container. This way, you can grab one piece without exposing the whole cake to temperature changes.
Freezing Like a Pro
This cake freezes like a dream! Here’s my foolproof method:
- Cool the cake completely (I mean completely – no warmth whatsoever).
- Wrap tightly in plastic wrap, then aluminum foil to prevent freezer burn.
- Label with the date – it keeps for 3 months at peak quality.
- For frosted cakes, flash-freeze uncovered first until the frosting sets (about 1 hour), then wrap.
Thaw overnight in the fridge, then bring to room temperature before serving. Want just one slice? Use a serrated knife to cut frozen cake – it’s surprisingly easy!
Reviving Leftovers
If your cake does dry out (it happens to the best of us), don’t despair! My grandma taught me to brush the cut sides with simple syrup (equal parts sugar and water, heated until dissolved). For an extra treat, use coffee or flavored liqueur in the syrup. A quick 10-second zap in the microwave can work wonders too – just don’t overdo it or you’ll end up with chocolate pudding!
Remember – whether you’re storing, freezing, or reviving, the goal is to preserve that signature velvet texture. With these tips, you can enjoy your Black Velvet Cake almost as much the second day as you did the first!
Black Velvet Cake Nutritional Information
Now, let’s talk numbers – but don’t let this scare you away from that second slice! These values are estimates based on my recipe testing, but yours might vary slightly depending on exact ingredients and portion sizes. I always say homemade desserts are about balance anyway – a little indulgence never hurt anyone!
Per generous slice (1/12 of the cake):
- Calories: 320 – about what you’d burn walking a brisk mile, so there’s your justification!
- Total Fat: 14g (3g saturated) – mostly from that vegetable oil keeping our cake moist
- Carbohydrates: 48g – with 24g coming from sugars (it is cake, after all)
- Fiber: 3g – thank you, cocoa powder!
- Protein: 5g – eggs and flour doing their part
- Sodium: 380mg – mainly from the leavening agents
A few quick notes about these numbers:
The hot water in this recipe is calorie-free (obviously), but it’s what makes the texture so incredible. If you’re watching sugar intake, you can reduce it to 1 1/2 cups – the cake will still be delicious, just slightly less sweet. Using Dutch-process cocoa instead of natural adds about 10 extra calories per slice but delivers way more flavor bang for your buck.
Remember, these are estimates – your actual nutrition will depend on whether you frost it (cream cheese frosting adds about 150 calories per slice), how thick you cut your pieces (I may or may not be guilty of “baker’s portions”), and which brands you use. But honestly? Some things are worth savoring without overanalyzing. Life’s too short not to enjoy really good cake!
Frequently Asked Questions
After baking countless Black Velvet Cakes (and fielding tons of questions from friends), I’ve compiled the answers to the most common baking dilemmas. Here’s everything you need to know to become a Black Velvet Cake pro!
Can I use Dutch-process cocoa powder?
Absolutely – and I highly recommend it! Dutch-process cocoa gives this cake its signature deep, rich chocolate flavor and darker color. The alkalizing process removes some acidity, so it pairs perfectly with baking soda in our recipe. If you only have natural cocoa, no worries – your cake will still taste amazing, just slightly brighter in flavor.
Help! My cake turned out dry. What went wrong?
Don’t panic – we can fix this! Dry cake usually means either overbaking or overmixing. Next time, set a timer for 5 minutes before the suggested bake time and do the toothpick test. If it’s already dry, try my grandma’s trick: brush simple syrup (equal parts sugar and water, heated) over the cake layers before frosting. This adds moisture back in beautifully!
Can I make Black Velvet Cupcakes instead?
You bet! This batter makes about 24 standard cupcakes. Fill liners 2/3 full and bake at the same temperature for 18-22 minutes. They’re done when the tops spring back when lightly touched. Pro tip: the hot water makes the batter thin, so pour it carefully into a measuring cup with a spout for neat filling.
Why does my batter look so thin?
That’s completely normal – in fact, it’s what creates that velvety texture! The hot water makes the batter seem scarily liquid at first, but trust the process. As it bakes, the flour and eggs create structure while the liquid keeps everything incredibly moist. Just be careful pouring it into pans – I like to use a ladle for control.
Can I make this cake ahead of time?
Definitely! In fact, the flavors deepen beautifully overnight. Bake the layers up to 2 days in advance, wrap them tightly in plastic wrap once cooled, and store at room temperature. Frost the day you’re serving for best texture. The assembled frosted cake keeps well for 3 days – if it lasts that long!
For more baking inspiration, check out our Pinterest!
Print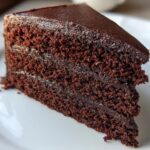
Irresistible Black Velvet Cake in 30 Minutes
- Total Time: 50 minutes
- Yield: 12 servings 1x
- Diet: Vegetarian
Description
A rich and moist chocolate cake with a smooth, velvety texture.
Ingredients
- 2 cups all-purpose flour
- 2 cups granulated sugar
- 3/4 cup unsweetened cocoa powder
- 2 tsp baking soda
- 1 tsp baking powder
- 1 tsp salt
- 2 large eggs
- 1 cup buttermilk
- 1 cup vegetable oil
- 2 tsp vanilla extract
- 1 cup hot water
Instructions
- Preheat oven to 350°F (175°C). Grease and flour two 9-inch round cake pans.
- In a large bowl, whisk flour, sugar, cocoa powder, baking soda, baking powder, and salt.
- Add eggs, buttermilk, oil, and vanilla. Mix until combined.
- Gradually add hot water and mix until smooth.
- Divide batter evenly between pans. Bake for 30-35 minutes or until a toothpick comes out clean.
- Cool in pans for 10 minutes, then transfer to a wire rack to cool completely.
Notes
- Use high-quality cocoa powder for best flavor.
- Do not overmix the batter.
- Store in an airtight container at room temperature for up to 3 days.
- Prep Time: 15 minutes
- Cook Time: 35 minutes
- Category: Dessert
- Method: Baking
- Cuisine: American
Nutrition
- Serving Size: 1 slice
- Calories: 320
- Sugar: 24g
- Sodium: 380mg
- Fat: 14g
- Saturated Fat: 3g
- Unsaturated Fat: 10g
- Trans Fat: 0g
- Carbohydrates: 48g
- Fiber: 3g
- Protein: 5g
- Cholesterol: 35mg