Skip to content
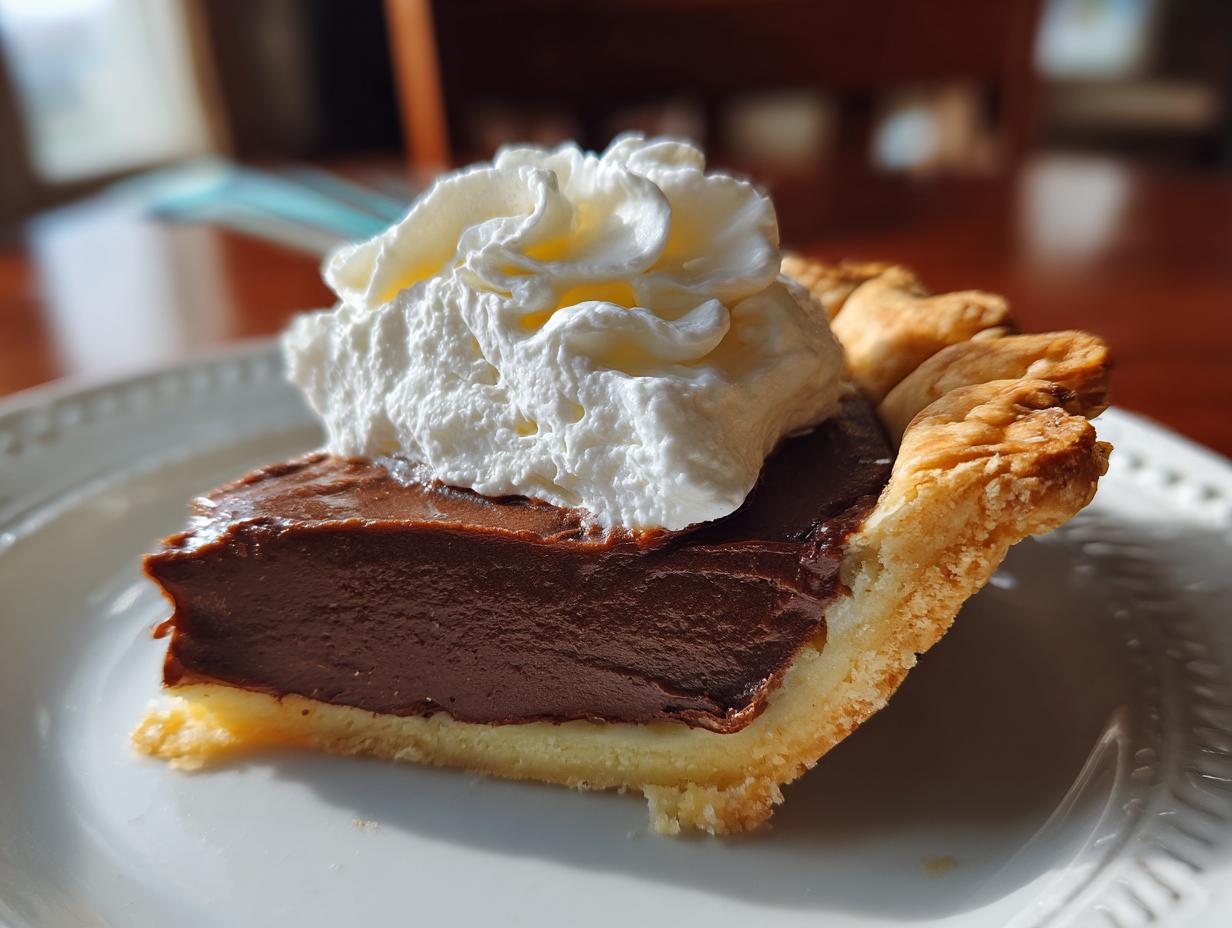
I’ll never forget the first time I made chocolate cream pie from scratch—my grandmother stood over my shoulder, guiding my shaky hands as I whisked the silky filling. “Patience, dear,” she’d say as the chocolate melted into that perfect velvety texture. Now, whenever I catch that rich cocoa scent wafting through my kitchen, it takes me right back to her cozy linoleum-floored kitchen where magic happened with just a few simple ingredients.
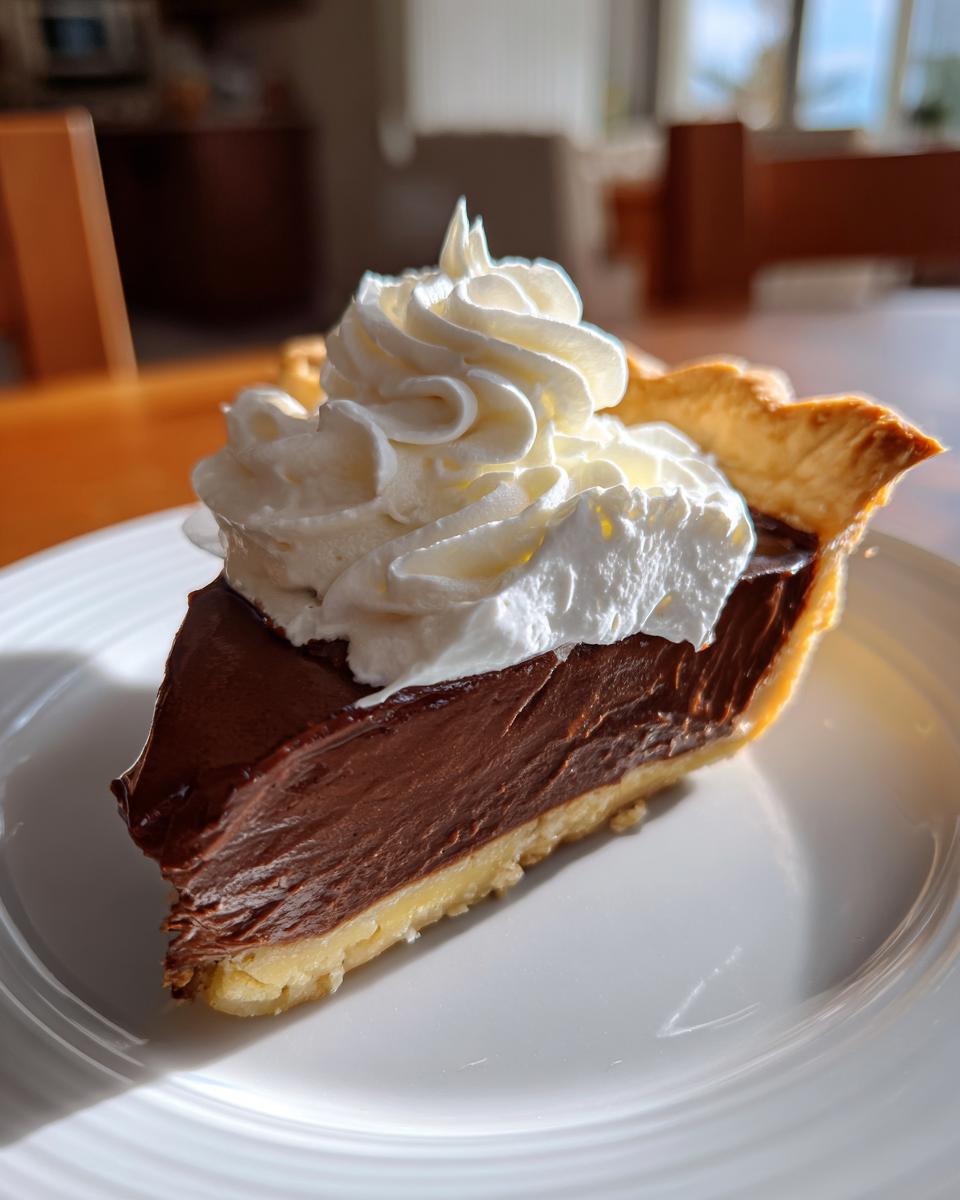
This chocolate cream pie is everything dessert should be—luxuriously smooth, deeply chocolatey, and surprisingly easy to make. Whether you’re a first-time pie maker or a seasoned baker, this recipe delivers that wow factor without fuss. The filling sets up beautifully in a crisp crust, creating that dreamy contrast between flaky and creamy that’ll have everyone begging for seconds. Trust me, once you taste homemade chocolate cream pie, you’ll never go back to store-bought again!
Why You’ll Love This Chocolate Cream Pie
Listen, I know we all have our favorite desserts, but this chocolate cream pie? It’s in a league of its own. Here’s why it’ll become your new go-to:
- That filling! We’re talking silky-smooth, melt-in-your-mouth decadence. The combo of semisweet and unsweetened chocolate gives it this deep, rich flavor that’s not too sweet—just perfect.
- The crust! Whether you go store-bought or homemade (my personal weakness), that crisp, flaky base is the ideal partner for the creamy filling. It’s all about that textural contrast!
- So easy. Don’t let the fancy look fool you—this is one of those “looks impressive but secretly simple” desserts. If you can whisk and stir, you’re golden.
- Works for any occasion. Fancy dinner party? Check. Tuesday night treat? Double check. This pie dresses up or down like nobody’s business.
Ingredients for Chocolate Cream Pie
Okay, let’s talk ingredients! I’m a firm believer that great pies start with great ingredients, and this chocolate cream pie is no exception. Here’s exactly what you’ll need to make magic happen:
- 1 9-inch pie crust, baked and cooled – Store-bought works in a pinch, but if you’ve got the time, a homemade crust takes it next level
- 1 cup granulated sugar – Just your regular white sugar does the trick here
- 1/3 cup cornstarch – This is our thickening superhero – don’t skimp!
- 1/4 tsp salt – Just a pinch to balance all that sweetness
- 3 cups whole milk – Trust me, the extra fat makes all the difference in that creamy texture
- 4 oz semisweet chocolate, chopped – I like using good-quality baking bars rather than chips
- 2 oz unsweetened chocolate, chopped – This gives our pie that deep, intense chocolate flavor without being too sweet
- 4 large egg yolks – Save those whites for meringue – they’re not invited to this party
- 2 tbsp unsalted butter – Because everything’s better with butter, right?
- 1 tsp vanilla extract – The flavor booster that makes everything sing
- Whipped cream for topping – The cloud-like crown our pie deserves
See? Nothing too fancy, but when these simple ingredients come together… oh boy, you’re in for something special. Just make sure everything’s measured and ready before you start – it makes the whole process so much smoother!
How to Make Chocolate Cream Pie
Now for the fun part! Making chocolate cream pie is like conducting a delicious symphony – follow these steps carefully, and you’ll be rewarded with dessert perfection.
Step 1: Prepare the Filling Base
Grab your trusty heavy-bottomed saucepan and whisk together the sugar, cornstarch, and salt. This might look boring now, but these are the foundation of our luscious filling. Slowly pour in the milk while whisking constantly – I mean it, no breaks! Keep going until you’ve got a completely smooth mixture with no lumps. This patience now means no weird clumps later.
Step 2: Cook the Mixture
Turn the heat to medium and keep that whisk moving! The mixture will start thickening after about 5-7 minutes. Don’t walk away – this is when lumps try to sneak in. When you see big bubbles breaking the surface (we’re talking lava bubbles here, not gentle simmering), you’re golden. That means the cornstarch has done its job and our base is ready for chocolate!
Step 3: Add Chocolate
Take the pan off the heat right away – burnt chocolate is nobody’s friend. Toss in both kinds of chopped chocolate and whisk like your pie depends on it (because it does!). After about a minute, you’ll see the most beautiful transformation as the chocolate melts into the hot base. Keep whisking until it’s completely smooth and velvety.
Step 4: Temper the Egg Yolks
Here’s where beginners get nervous, but don’t worry – I’ll walk you through it. In a separate bowl, whisk those yolks until smooth. Now grab a ladle of the hot chocolate mixture and drizzle it into the yolks while whisking constantly. This “tempering” step gently warms the eggs so they won’t scramble when added to the pan. Once you’ve incorporated about a cup this way, you’re safe to add it all back to the saucepan.
Step 5: Final Cooking and Assembly
Return the pan to medium heat and cook for exactly 2 minutes – set a timer! The filling will thicken noticeably as the eggs cook through. Remove from heat and stir in the butter and vanilla. That butter makes everything extra rich and glossy. Now pour this chocolate heaven into your waiting crust. Smooth the top, then press plastic wrap directly on the surface to prevent a skin from forming (because nobody wants a wrinkly pie top).
Step 6: Chill and Serve
Pop your pie in the fridge for at least 4 hours – I know, the wait is torture! But this chilling time is when the magic happens as the filling sets up perfectly. Right before serving, top with billows of fresh whipped cream. For extra flair, dust with cocoa powder or chocolate shavings. Then slice, serve, and accept all the compliments coming your way!
Tips for the Best Chocolate Cream Pie
After making more chocolate cream pies than I can count (and eating my fair share of test batches!), I’ve learned a few tricks that make all the difference between good and “oh my goodness, give me that whole pie!” Here are my can’t-live-without tips:
- Chocolate matters! Don’t skimp here – that bag of chocolate chips won’t give you the same rich depth as good baking chocolate. I splurge on 60-70% cacao bars and chop them myself. The flavor difference? Night and day.
- Chill time isn’t optional. I know it’s tempting to dive in after 2 hours, but that full 4-hour chill is what gives you those picture-perfect slices. Bonus: the flavors actually deepen as it sits!
- Plastic wrap is your friend. Press it right onto the surface of the warm filling – no air gaps! This stops that weird skin from forming. Learned this the hard way after ruining my first three pies.
- Room temp egg yolks work best. Take them out when you start prepping – they’ll incorporate much smoother than cold ones straight from the fridge.
One last pro tip? If your filling seems a bit thin after cooking, don’t panic! Sometimes it just needs that full chilling time to set up properly. I’ve rescued many a pie that looked questionable at first but turned out perfectly after a patient wait in the fridge.
Chocolate Cream Pie Variations
While I’m completely obsessed with the classic version, sometimes it’s fun to play around with chocolate cream pie flavors. Here are my favorite easy twists that still keep the soul of the original recipe intact:
- Coffee kick: Add 1-2 teaspoons of instant espresso powder or a shot of cooled espresso to the milk mixture before cooking. It doesn’t make it taste like coffee—just intensifies the chocolate flavor in this magical way. My husband calls this the “grown-up pie” version.
- Salty-sweet: After adding the whipped cream topping, sprinkle with flaky sea salt. That tiny salty crunch against the sweet cream? Absolute perfection. I use Maldon salt because the pyramid flakes look gorgeous.
- Crunchy top: Instead of plain whipped cream, I’ll sometimes press crushed chocolate cookies or toffee bits onto the chilled filling before adding the cream. The texture contrast makes every bite more interesting.
The best part? You can mix and match these ideas! Last Thanksgiving I did the espresso version with sea salt on top, and my brother-in-law ate three slices before we cut the actual turkey. Just remember—no matter what variation you try, that silky chocolate base will always be the star of the show.
Serving and Storing Chocolate Cream Pie
Alright, let’s talk about the best ways to serve and keep your chocolate cream pie tasting fresh as can be! First rule of pie club? Always serve it chilled. That cool temperature makes the creamy filling slice beautifully and gives that satisfying contrast against the crisp crust. I like to dollop on extra whipped cream right before serving – the fluffier, the better!
Now, storing leftovers (if you have any!) is just as important as making it. Here’s what works best in my kitchen:
- Cover it well: Use plastic wrap pressed directly on any exposed filling, then foil or a pie dome over the whole thing. This keeps the crust crisp and prevents fridge odors from sneaking in.
- Fridge is your friend: This pie definitely needs refrigeration – no countertop sitting! It’ll stay perfect for 2-3 days, though let’s be real… mine never lasts that long.
- Quick tip: If the crust gets soft after storing, pop individual slices in the toaster oven for 2-3 minutes to crisp it back up. Game changer!
One more thing – if you’re making this ahead for an event, you can prep the fully assembled pie up to a day in advance. Just hold off on adding the whipped cream topping until right before serving. That way, your masterpiece stays picture-perfect!
Chocolate Cream Pie FAQs
Can I use a store-bought crust?
Absolutely! I won’t judge – we’ve all been there when time is tight. A good-quality store-bought crust works fine in a pinch, though I’ll admit homemade does give you that extra flaky, buttery goodness. If you go store-bought, I recommend blind baking it first (that’s just baking it empty for 10 minutes) so it stays crisp against the creamy filling.
Can I make this pie ahead?
Oh honey, this pie practically begs to be made ahead! In fact, I think it’s even better after a full 24 hours in the fridge – the flavors have more time to mingle and deepen. Just hold off on the whipped cream topping until right before serving. That way, you get fresh, fluffy peaks instead of sad, deflated cream.
How do I fix a lumpy filling?
Don’t panic if you spot some lumps – we can fix this! Immediately pour your filling through a fine-mesh sieve while it’s still warm, using a spatula to press it through. This catches any pesky cornstarch clumps or rogue egg bits. I always keep a sieve handy when making custards – it’s saved many a dessert in my kitchen!
Nutritional Information
Now, I know we’re not eating chocolate cream pie for its health benefits, but in case you’re curious (or tracking), here’s the scoop on what’s in each delicious slice. Just remember, these numbers are estimates – your exact amounts will vary slightly depending on the brands you use and how generous you are with that whipped cream topping!
- Calories: 380 per slice (about 1/8 of the pie)
- Fat: 20g (11g saturated – blame that on the good stuff like butter and chocolate!)
- Carbs: 45g (30g sugars – but hey, it’s dessert!)
- Protein: 6g (thank those egg yolks!)
- Fiber: 2g (every little bit counts, right?)
My grandma used to say, “Life’s too short to count calories in pie,” and while that’s probably not medical advice, I think she was onto something. Everything in moderation – including moderation itself when it comes to this chocolatey masterpiece!
Share Your Chocolate Cream Pie
Nothing makes me happier than seeing your chocolate cream pie creations! Whether it turned out perfectly or had some funny little quirks (we’ve all been there!), I’d love to hear about your baking adventures. Did you add your own special twist? Maybe the kids helped stir the filling? Those stories are what make sharing recipes so special.
If you snap a photo of your masterpiece, tag me – I always do a little happy dance when I see those chocolatey slices pop up in my feed. And hey, if you’ve got questions or tips to pass along to other bakers, drop them in the comments too. After all, the best recipes are the ones we make our own!
Tried this recipe? Let us know how it turned out – the good, the messy, and everything in between. Happy baking, friends!
For more delicious recipes and baking inspiration, be sure to follow us on Pinterest!
Print
Delicious Chocolate Cream Pie Recipe in Just 4 Simple Steps
- Total Time: 4 hours 35 minutes
- Yield: 8 servings 1x
- Diet: Vegetarian
Description
A rich and creamy chocolate pie with a flaky crust, perfect for any occasion.
Ingredients
- 1 9-inch pie crust, baked and cooled
- 1 cup granulated sugar
- 1/3 cup cornstarch
- 1/4 tsp salt
- 3 cups whole milk
- 4 oz semisweet chocolate, chopped
- 2 oz unsweetened chocolate, chopped
- 4 large egg yolks
- 2 tbsp unsalted butter
- 1 tsp vanilla extract
- Whipped cream for topping
Instructions
- In a saucepan, whisk sugar, cornstarch, and salt.
- Gradually whisk in milk until smooth.
- Cook over medium heat, stirring constantly, until thick and bubbly.
- Remove from heat and add chocolates. Stir until melted.
- In a bowl, whisk egg yolks. Gradually add 1 cup of hot mixture to yolks, stirring constantly.
- Return yolk mixture to saucepan. Cook for 2 more minutes, stirring.
- Remove from heat. Stir in butter and vanilla.
- Pour filling into crust. Cover and chill for at least 4 hours.
- Top with whipped cream before serving.
Notes
- Use high-quality chocolate for best flavor.
- Chill the pie fully before slicing.
- Store leftovers in the fridge.
- Prep Time: 20 minutes
- Cook Time: 15 minutes
- Category: Dessert
- Method: Stovetop
- Cuisine: American
Nutrition
- Serving Size: 1 slice
- Calories: 380
- Sugar: 30g
- Sodium: 180mg
- Fat: 20g
- Saturated Fat: 11g
- Unsaturated Fat: 7g
- Trans Fat: 0g
- Carbohydrates: 45g
- Fiber: 2g
- Protein: 6g
- Cholesterol: 110mg