Skip to content
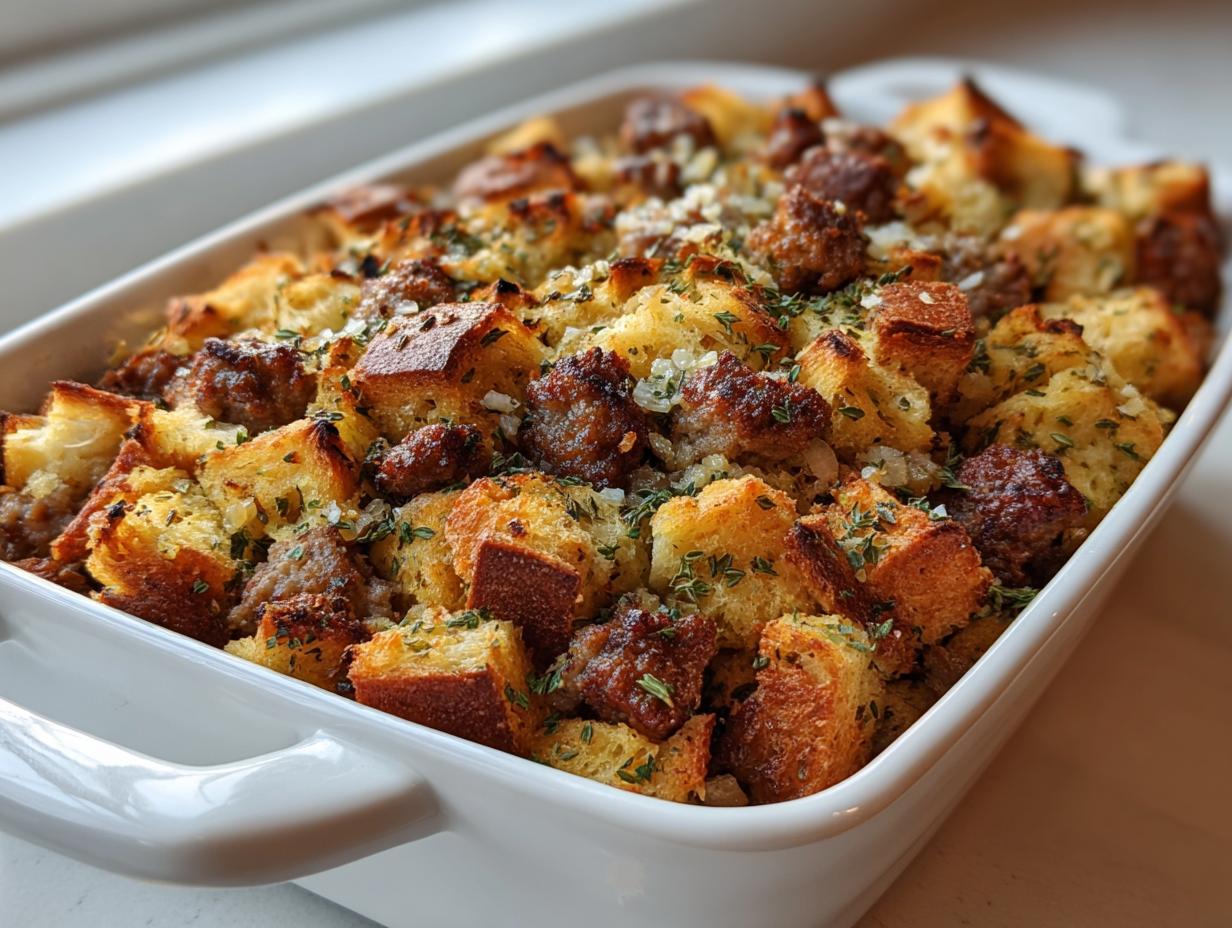
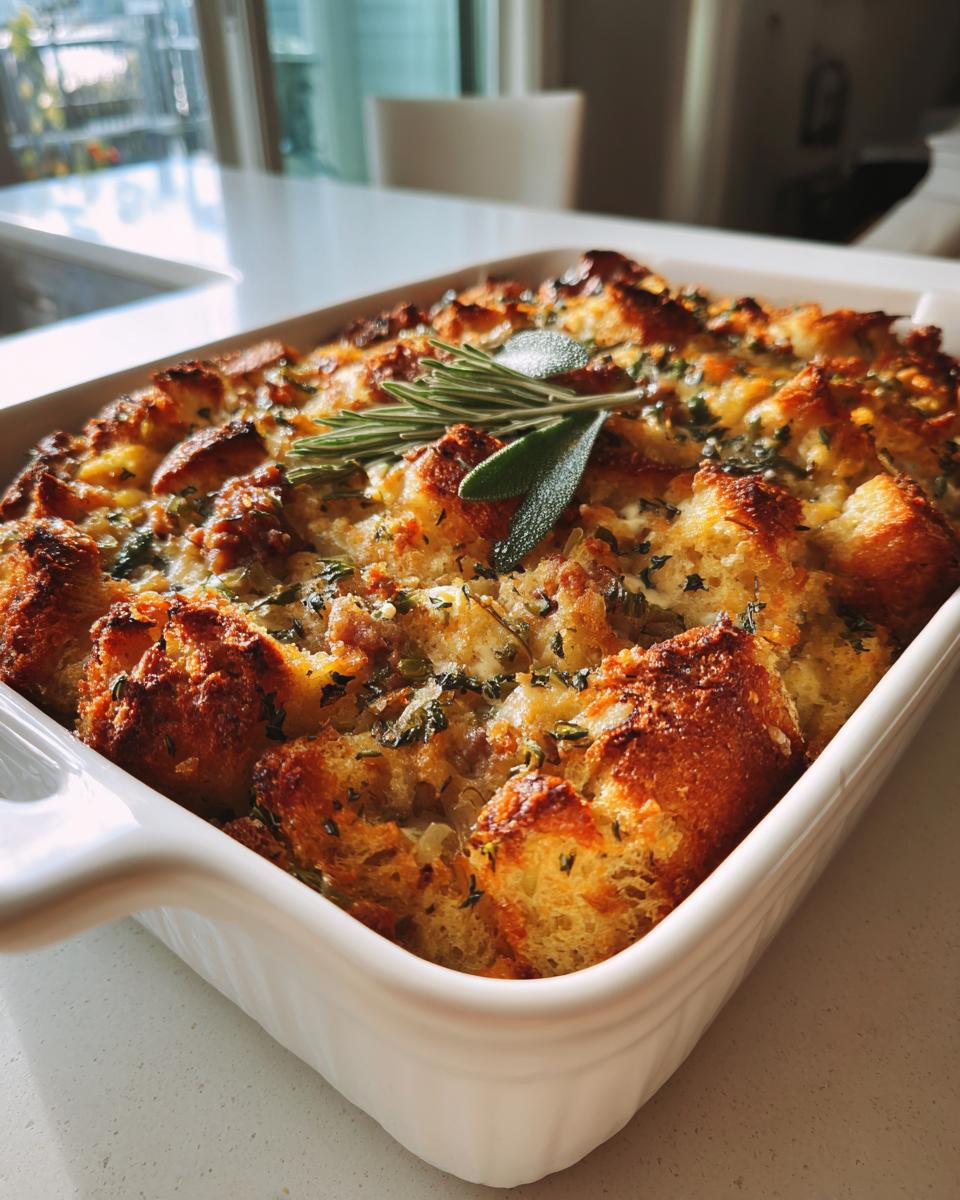
Nothing says “holiday feast” quite like the aroma of classic sage and sausage stuffing wafting from the oven. This recipe has been my family’s centerpiece side dish for as long as I can remember—my grandmother would always make a double batch because we’d inevitably eat half of it straight from the pan before dinner! After years of perfecting her original recipe (and making countless batches for friends’ Thanksgivings), I’ve nailed down the perfect balance of savory sausage, earthy sage, and that irresistible crispy-on-top, moist-inside texture. The secret? A little extra patience when browning the sausage and fresh sage leaves rubbed between your fingers to release their oils. Trust me, your guests will be begging for seconds!
Why You’ll Love This Classic Sage and Sausage Stuffing
Oh, where do I even start? This stuffing isn’t just good—it’s the kind of dish that disappears before the turkey even gets carved! Here’s why it’s become my go-to every holiday season:
- That unbeatable, nostalgic flavor – The combination of savory sausage and aromatic sage tastes like childhood holidays in every bite
- Surprisingly simple to make – Just one skillet and a mixing bowl for a dish that looks (and tastes) like you spent hours on it
- Always a crowd favorite – Even the pickiest eaters go back for seconds (I’ve seen it convert veggie-haters with those caramelized onions!)
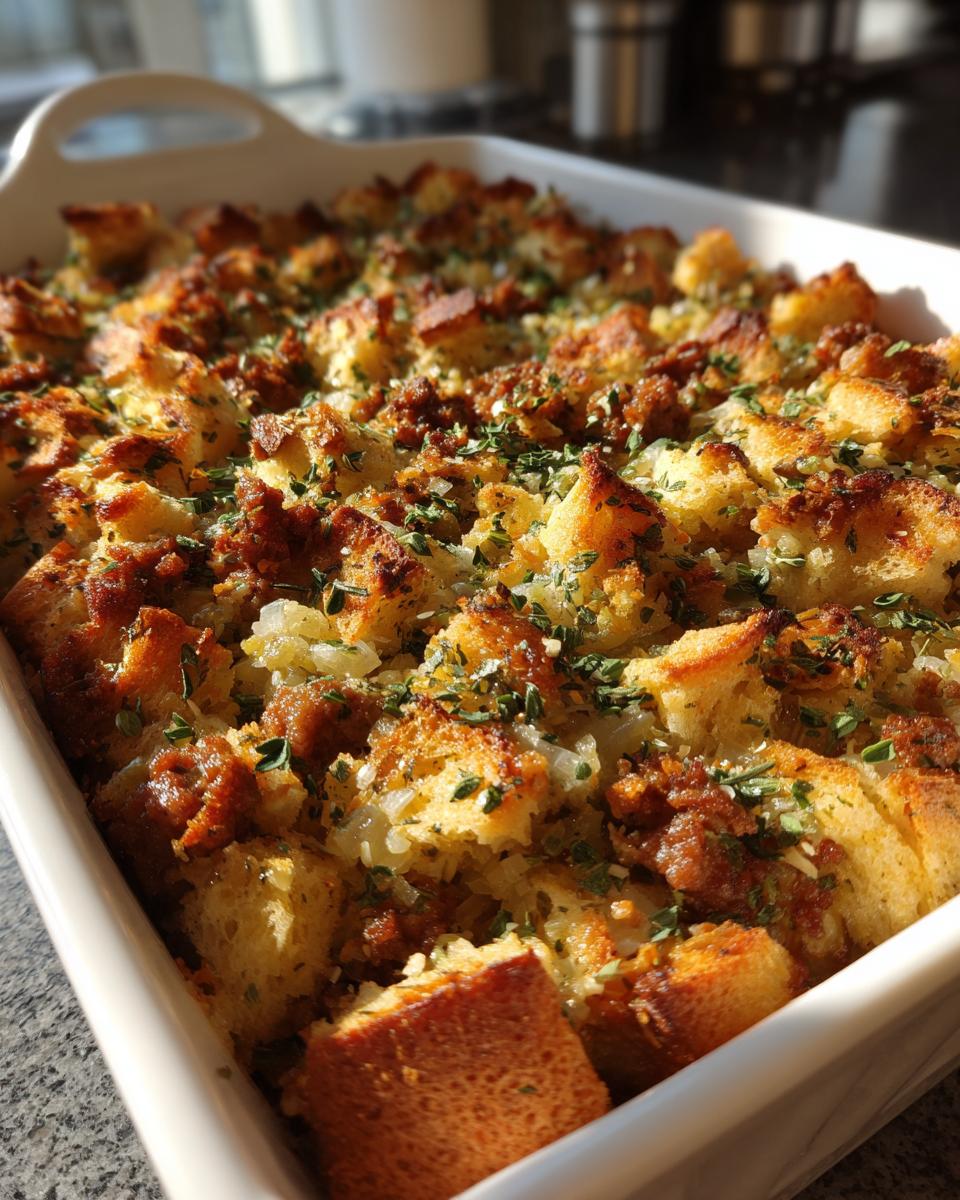
- Perfect texture contrast – Crispy golden top gives way to that irresistibly moist interior
Honestly, the hardest part? Not eating all the sausage while you’re browning it—but I won’t judge if you “sample” a piece or two!
Ingredients for Classic Sage and Sausage Stuffing
Gathering these simple ingredients is like collecting little flavor powerhouses – each one plays a crucial role in creating that perfect stuffing texture and taste we all crave. Here’s what you’ll need:
- 1 pound pork sausage (I always use mild, but hot works if you like spice!)
- 1 cup chopped onion – about 1 medium onion, diced small
- 1 cup chopped celery – include those leafy tops for extra flavor
- 2 cloves garlic, minced (or 1 tablespoon from the jar in a pinch)
- 8 cups dried bread cubes – day-old French or sourdough works best
- 2 tablespoons fresh sage, chopped (see notes for dried substitution)
- 1 teaspoon salt – I use kosher, but table salt works fine
- 1/2 teaspoon black pepper – freshly cracked if possible
- 2 cups chicken broth (low-sodium lets you control the salt)
- 1/2 cup butter, melted (salted or unsalted both work)
- 2 eggs, lightly beaten – our “glue” to hold it all together
Ingredient Notes and Substitutions
We’ve all been mid-recipe when we realize we’re missing something – here’s how to adapt without sacrificing flavor:
- Sausage: Turkey sausage works beautifully for a lighter version (just add 1 tablespoon olive oil when browning). Vegetarian? Swap in plant-based sausage and veggie broth.
- Bread: No day-old bread? Toast fresh cubes at 300°F for 15 minutes to dry them out. Cornbread makes a delicious Southern twist!
- Fresh vs dried sage: Use 2 teaspoons dried if fresh isn’t available (rub between fingers to wake up the oils). For extra punch, add 1/2 teaspoon dried thyme too.
- Broth: Homemade stock is gold, but store-bought works great. For extra richness, substitute 1/2 cup broth with dry white wine.
Remember – the best stuffing comes from cooking with what you’ve got and making it your own!
Equipment Needed for Classic Sage and Sausage Stuffing
You’ll be shocked how little you need to make this holiday showstopper – just a few trusty kitchen workhorses! Here’s what I always pull out:
- Large skillet – For browning that glorious sausage and softening the veggies (my well-seasoned cast iron works perfectly)
- Mixing bowl – Big enough to hold all those bread cubes with room to stir (I use my grandma’s old yellow ceramic one)
- 9×13 baking dish – Or any 3-quart casserole dish for that perfect golden crust
- Wooden spoon – For stirring without scratching your pan (and sneaking tastes)
That’s it! No fancy gadgets needed – just good old-fashioned tools that let the ingredients shine.
How to Make Classic Sage and Sausage Stuffing
Alright, let’s get to the good part – turning these simple ingredients into holiday magic! I’ve made this so many times I could probably do it in my sleep, but here’s exactly how I get that perfect texture every single time:
- Fire up the oven to 350°F (175°C) – this gives your skillet time to heat while the oven preheats.
- Brown that sausage in your skillet over medium heat. Don’t rush this – I let it go for about 5 minutes, breaking it into small crumbles with my wooden spoon until it’s got those gorgeous golden-brown spots. Drain any excess fat (but leave about 1 tablespoon for flavor!).
- Add your veggies – toss in the onions, celery, and garlic. Cook until they soften, about 5 minutes. You’ll know it’s ready when the onions turn translucent and your kitchen smells incredible.
- Combine everything in your biggest mixing bowl. Dump in the bread cubes, then add the sausage mixture, sage, salt, and pepper. Toss gently – I use my hands to really distribute everything evenly.
- Moisten the mixture by pouring in the chicken broth, melted butter, and beaten eggs. Mix just until combined – you want every bread cube coated but not mushy.
- Bake it up! Transfer to your greased baking dish, cover with foil, and bake for 30 minutes. Then remove the foil and bake another 15 minutes until the top is crispy and golden. Resist eating it straight from the pan – it’s HOT!
Pro Tips for Perfect Stuffing
Through years of trial and error (and many holiday meals), here are my golden rules for stuffing success:
- Dry bread is key – if your cubes aren’t dry enough, you’ll end up with mush. Toast fresh bread if needed!
- Don’t overmix after adding liquids – gentle folds prevent a dense texture.
- For extra crispiness, pop it under the broiler for 1-2 minutes at the end (watch closely!).
- Let it rest 5 minutes after baking – this helps it set up for perfect slices.
See? Easy as pie (or should I say, easy as stuffing)!
Serving Suggestions for Classic Sage and Sausage Stuffing
This stuffing practically begs to be the star of your holiday spread! Of course it’s perfect with roast turkey and all the fixings—I love how the savory sausage plays off tart cranberry sauce. But don’t stop there! Try it alongside glazed ham, roasted chicken, or even piled on top of leftover turkey sandwiches. My secret? A little gravy “moat” around each serving for maximum deliciousness. And yes, I’ve been known to eat cold leftovers straight from the fridge at midnight—no shame!
Storing and Reheating Classic Sage and Sausage Stuffing
Here’s the beautiful thing about this stuffing—it might taste even better the next day! In our house, we never seem to have leftovers, but if you’re lucky enough to save some, here’s how to keep it fresh:
- Fridge: Store in an airtight container for up to 4 days. The sage flavor actually deepens!
- Freezer: Portion into containers and freeze for up to 3 months. Thaw overnight before reheating.
- Reheating: My trick? 350°F for 15-20 minutes with a splash of broth to revive moisture. Cover with foil if it’s browning too fast.
Pro tip: Day-old stuffing makes killer breakfast hash with a fried egg on top!
Nutritional Information for Classic Sage and Sausage Stuffing
Now, let’s be honest – holiday meals aren’t exactly diet food! But since I know some folks like to track these things, here’s the scoop per serving (about 1 cup): roughly 320 calories, with 12g protein and 28g carbs. The numbers can vary based on your specific ingredients – I always say focus on the love baked into each bite rather than counting every gram!
FAQs About Classic Sage and Sausage Stuffing
Q1: Can I make this stuffing ahead of time?
Absolutely! You can assemble it up to a day in advance—just cover and refrigerate before baking. Add 5-10 extra minutes to the baking time since it’ll be cold from the fridge. The flavors actually improve with this rest time!
Q2: What’s the best bread to use?
I swear by rustic breads like sourdough or French bread—their sturdy texture holds up best. But honestly? Any bread works in a pinch! Just make sure it’s dried out (day-old or lightly toasted) so your stuffing doesn’t turn mushy.
Q3: Can I cook the stuffing inside the turkey?
While you certainly can, I prefer baking it separately for food safety reasons and that perfect crispy top. Plus, you get way more crispy edges this way—my favorite part!
Q4: My stuffing turned out dry—how can I fix it?
No worries! Next time, add a bit more broth (start with 1/4 cup extra). For now, drizzle some warm broth over the baked stuffing and let it soak in for 5 minutes before serving.
Q5: Can I freeze leftovers?
Yes! Freeze portions in airtight containers for up to 3 months. Reheat thawed stuffing in a 350°F oven with a splash of broth to keep it moist.
Share Your Experience
I’d love to hear how your sage and sausage stuffing turns out! Snap a pic of that golden crust and tag me – nothing makes me happier than seeing your holiday tables filled with this comfort food. Did you add any special twists? Drop a comment below and let’s swap stuffing stories!
Print
Irresistible Classic Sage and Sausage Stuffing – 3 Pro Secrets Inside
- Total Time: 1 hour 5 minutes
- Yield: 8 servings 1x
- Diet: Low Lactose
Description
A flavorful and traditional stuffing made with sage and sausage, perfect for holiday meals.
Ingredients
- 1 pound pork sausage
- 1 cup chopped onion
- 1 cup chopped celery
- 2 cloves garlic, minced
- 8 cups dried bread cubes
- 2 tablespoons fresh sage, chopped
- 1 teaspoon salt
- 1/2 teaspoon black pepper
- 2 cups chicken broth
- 1/2 cup butter, melted
- 2 eggs, beaten
Instructions
- Preheat oven to 350°F (175°C).
- Cook sausage in a skillet over medium heat until browned. Drain excess fat.
- Add onion, celery, and garlic to the skillet. Cook until softened, about 5 minutes.
- In a large bowl, combine bread cubes, cooked sausage mixture, sage, salt, and pepper.
- Stir in chicken broth, melted butter, and beaten eggs until well mixed.
- Transfer mixture to a greased baking dish.
- Cover with foil and bake for 30 minutes. Remove foil and bake for another 15 minutes until golden brown.
Notes
- Use day-old bread for best results.
- Adjust seasoning to taste.
- For a crispier top, broil for 1-2 minutes after baking.
- Prep Time: 20 minutes
- Cook Time: 45 minutes
- Category: Side Dish
- Method: Baking
- Cuisine: American
Nutrition
- Serving Size: 1 cup
- Calories: 320
- Sugar: 3g
- Sodium: 800mg
- Fat: 18g
- Saturated Fat: 8g
- Unsaturated Fat: 8g
- Trans Fat: 0g
- Carbohydrates: 28g
- Fiber: 2g
- Protein: 12g
- Cholesterol: 80mg