Skip to content
There’s something magical about pulling a bubbling cherry cobbler from the oven – that sweet, fruity aroma filling your kitchen is pure summer in a baking dish. I still remember my first attempt at making cherry cobbler when I was 12, standing on a step stool to reach my grandma’s counter. I burned the edges (oops!) but the taste? Absolute heaven. This simple dessert has been my go-to for every potluck and backyard barbecue since. What makes cherry cobbler so special is how effortlessly it comes together – juicy cherries, a buttery topping, and just enough sweetness to make it feel like a hug in dessert form. After years of perfecting this recipe, I can tell you it’s the kind of dessert that makes people ask for seconds before they’ve even finished their first serving.
Why You’ll Love This Cherry Cobbler
Trust me, once you try this recipe, you’ll understand why I make it on repeat all summer long. Here’s what makes it so special:
- Simple as can be – Just toss together a few pantry staples and you’re halfway done. No fancy techniques or equipment needed!
- That perfect sweet-tart balance – The juicy cherries get just caramelized enough under the golden biscuit topping. Every bite is pure comfort.
- Works with fresh OR frozen cherries – No fresh cherries? No problem! I always keep frozen ones stocked for spontaneous cobbler cravings.
- Steals the show anywhere – From casual weeknight desserts to fancy dinner parties, this cobbler somehow fits right in. Just watch how fast the dish empties!
The best part? That heavenly moment when you scoop out a serving and see those ruby-red juices bubbling up around the edges. Absolute magic.
Ingredients for Cherry Cobbler
Here’s everything you’ll need for my go-to cherry cobbler – I promise it’s all simple stuff you probably already have in your kitchen! The key is measuring carefully (no eyeballing here, trust me):
- 4 cups fresh or frozen cherries (pitted – and yes, frozen work great straight from the bag!)
- 1 cup granulated sugar (divided between the cherries and batter)
- 1 cup all-purpose flour (spooned and leveled, not packed)
- 1 teaspoon baking powder (make sure it’s fresh for maximum rise)
- 1/2 cup whole milk (2% works in a pinch, but whole makes the topping extra tender)
- 1/2 cup unsalted butter, melted (and slightly cooled – I use the microwave in 30-second bursts)
- 1 teaspoon pure vanilla extract (the good stuff – it makes a difference!)
- 1/4 teaspoon salt (just enough to balance all that sweetness)
See? Nothing fancy – just honest ingredients that transform into something spectacular in the oven. Now let’s get baking!
How to Make Cherry Cobbler
Okay, let’s get to the fun part! Making cherry cobbler is so simple you’ll wonder why you don’t make it every week. I’ll walk you through each step – just follow along and you’ll have a perfect dessert in no time. Don’t forget to preheat that oven first!
Preparing the Cherries
First things first – those beautiful cherries! If you’re using fresh ones, here’s my foolproof pitting method: grab a paperclip and bend it straight, then use the curved end to scoop out the pits. Messy? Maybe. Effective? Absolutely! (Or use a cherry pitter if you’re fancy.) Frozen cherries? Just measure them straight from the bag – no thawing needed! Toss your cherries with about 1/4 cup of the sugar – this helps draw out those amazing juices while baking. Spread them evenly in a greased 9×9 baking dish – I use butter for that extra flavor boost.
Making the Batter
Now for the magic topping! In a medium bowl, whisk together the flour, remaining 3/4 cup sugar, baking powder and salt. Make a well in the center – this helps everything combine evenly. Pour in the milk, melted (but slightly cooled!) butter, and vanilla. Stir just until combined – a few lumps are totally fine! Overmixing makes the topping tough, and we want fluffy, tender perfection. The batter will be thick but pourable – like pancake batter but a touch denser.
Assembling and Baking the Cherry Cobbler
Here’s where the magic happens! Pour that beautiful batter right over your sugared cherries – don’t worry if it doesn’t cover every single cherry. The batter will spread as it bakes. Slide it into your preheated 375°F oven and resist opening the door for at least 30 minutes (I know, it’s hard!). You’ll know it’s done when the top is golden brown and the edges are bubbly – about 45 minutes total. Pro tip: If the top browns too fast, just tent it with foil. Let it cool for 10-15 minutes before serving – those cherry juices need time to thicken up!
Tips for the Perfect Cherry Cobbler
After making this cobbler more times than I can count, I’ve learned a few tricks that make all the difference. First – taste your cherries before adding sugar! Sweet cherries might need less, while tart ones might need an extra sprinkle. Always grease your baking dish well (I use butter for flavor) to prevent those delicious caramelized edges from sticking. Serve it warm – the contrast of cold vanilla ice cream melting into the warm cobbler is heavenly. And here’s my secret: let it sit for 10 minutes after baking. The juices thicken just enough to coat your spoon perfectly without being runny.
Variations for Cherry Cobbler
One of the things I love most about cherry cobbler is how easy it is to mix things up! Feeling adventurous? Swap the vanilla extract for almond extract – it pairs *so* well with the cherries and adds this amazing nutty aroma. If you’re not a cherry person (or just want to experiment), try using peaches, blueberries, or even a mix of berries. For a fun twist, skip the biscuit topping and make a crumbly streusel instead – just mix flour, brown sugar, oats, and cold butter until it looks like coarse crumbs. Bake as usual, and you’ll get this gorgeous crunchy topping that’s impossible to resist. The possibilities are endless!
Serving Suggestions for Cherry Cobbler
Warm cherry cobbler straight from the oven is already a treat, but let’s take it to the next level! My go-to is a big scoop of vanilla ice cream – the way it melts into the warm cherries is pure magic. Whipped cream works too, especially with a sprinkle of cinnamon on top. Trust me, serving it warm makes all the difference – those flavors just sing together!
Storing and Reheating Cherry Cobbler
Leftovers? (As if!) But if you somehow have extra cherry cobbler, let it cool completely before covering tightly with plastic wrap or transferring to an airtight container. It’ll keep in the fridge for up to 3 days – though mine never lasts that long! To reheat, pop individual servings in the microwave for 30 seconds or warm the whole dish in a 300°F oven until toasty again. Pro tip: Add a fresh scoop of ice cream to make it taste just-baked!
Nutritional Information for Cherry Cobbler
Here’s the scoop on what’s in each delicious serving of cherry cobbler (about 1 cup): roughly 320 calories, with 12g of fat (7g saturated), 52g carbs (2g fiber, 32g sugar), and 3g protein. Keep in mind – these numbers can vary based on your exact ingredients and brands used. I always say life’s too short to stress over dessert math though – just enjoy that second helping!
FAQ About Cherry Cobbler
Got questions about making cherry cobbler? I’ve got answers! Here are the most common ones I hear:
- Can I use frozen cherries? Absolutely! Frozen cherries work just as well as fresh ones – no need to thaw them first. Just measure them straight from the bag and toss them in.
- How do I know when the cobbler is done? Look for a golden-brown topping and bubbling cherry juices around the edges. If you’re unsure, stick a toothpick in the center – it should come out clean or with just a few crumbs.
- Can I make this gluten-free? Yep! Swap the all-purpose flour for a 1:1 gluten-free baking blend. Just make sure it contains xanthan gum for the best texture.
- Can I use a different fruit? Of course! Peaches, blueberries, or a mix of berries all work beautifully. Just adjust the sugar based on the fruit’s tartness.
Still have questions? Leave a comment – I’m here to help!
Share Your Cherry Cobbler Experience
Now I want to hear from you! Did your cobbler turn out as golden and bubbly as mine? Snap a pic of that gorgeous dessert and tag me – I live for those cherry-stained spoon shots! Leave a comment below with your tweaks or stories (my grandma would love hearing them too). And if this recipe became your new favorite? Give it a 5-star rating so more bakers can discover the joy of cherry cobbler!
![]()

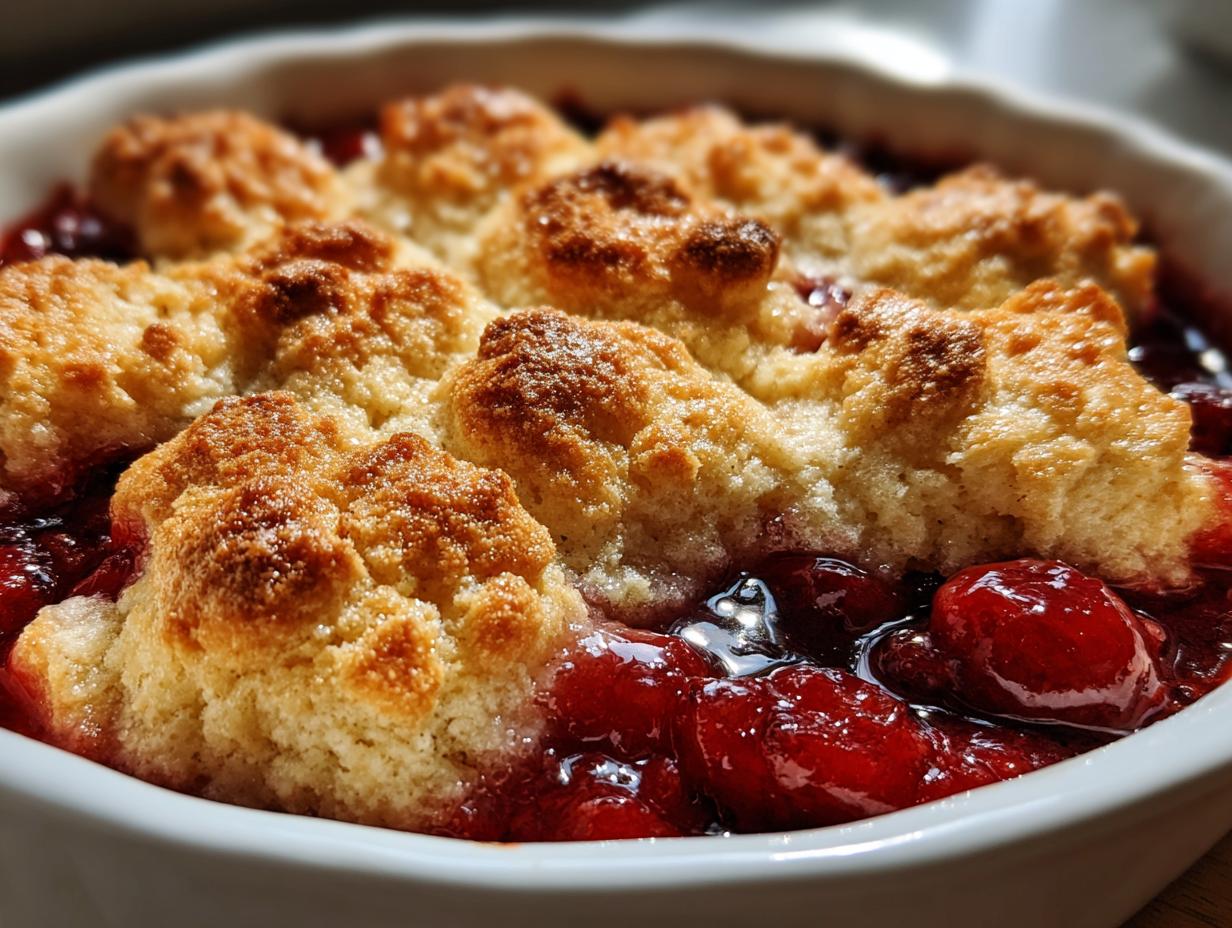
Irresistible 4-Ingredient Cherry Cobbler Everyone Loves
- Total Time: 1 hour
- Yield: 6 servings 1x
- Diet: Vegetarian
Description
A classic dessert with sweet cherries baked under a buttery biscuit topping.
Ingredients
- 4 cups fresh or frozen cherries
- 1 cup granulated sugar
- 1 cup all-purpose flour
- 1 teaspoon baking powder
- 1/2 cup milk
- 1/2 cup unsalted butter, melted
- 1 teaspoon vanilla extract
- 1/4 teaspoon salt
Instructions
- Preheat oven to 375°F.
- Spread cherries in a greased baking dish.
- Mix flour, sugar, baking powder, and salt in a bowl.
- Stir in milk, melted butter, and vanilla until combined.
- Pour batter over cherries.
- Bake for 45 minutes or until golden brown.
- Cool slightly before serving.
Notes
- Use pitted cherries for best results.
- Serve warm with vanilla ice cream.
- Adjust sugar based on cherry tartness.
- Prep Time: 15 mins
- Cook Time: 45 mins
- Category: Dessert
- Method: Baking
- Cuisine: American
Nutrition
- Serving Size: 1 cup
- Calories: 320
- Sugar: 32g
- Sodium: 110mg
- Fat: 12g
- Saturated Fat: 7g
- Unsaturated Fat: 4g
- Trans Fat: 0g
- Carbohydrates: 52g
- Fiber: 2g
- Protein: 3g
- Cholesterol: 30mg