Skip to content

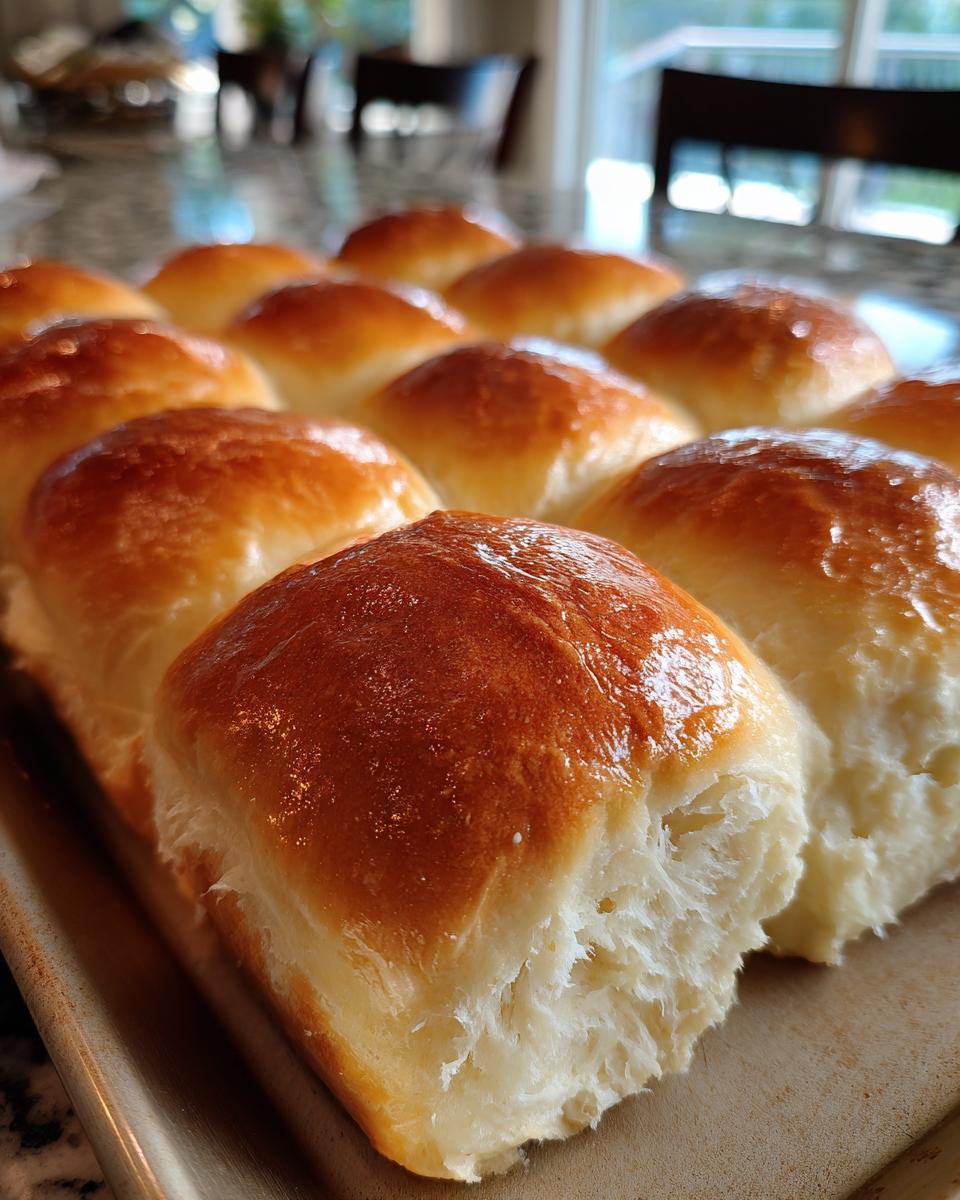
You know those days when you crave homemade bread but dread the kneading and fuss? Let me introduce you to my beloved no-knead dinner rolls – the magical solution that proves incredible bread doesn’t need elbow grease. After baking for nearly twenty years (and making every mistake imaginable), I can confidently say this recipe delivers pillowy-soft results with just minutes of hands-on time.
The first time I tried these rolls, I nearly cried happy tears when they emerged golden and fragrant from my oven. That’s the beauty of no-knead dough – while it rests, wild yeasts work their magic, developing flavor and texture that rivals traditional kneaded breads. Whether you’re juggling kids, work, or just Netflix binges, these rolls fit perfectly into busy lives.
What makes them truly special? That sticky dough you’ll initially doubt transforms into airy wonders with the most satisfying pull-apart texture. Trust me, once you taste these warm with butter melting into the crevices, you’ll understand why this recipe earned a permanent spot in my kitchen rotation.
Why You’ll Love These No-Knead Dinner Rolls
Let me count the ways these rolls make life better! After years of testing recipes, I can honestly say this one checks all the boxes for busy home bakers. Here’s what makes them absolutely magical:
- Effortless perfection: No kneading means no aching arms! Just stir the ingredients together and let time do the hard work. The dough practically takes care of itself while you go about your day.
- Cloud-like texture: That first bite will convince you – these rolls are impossibly soft inside with just the right chew. The secret? The long rise creates those beautiful air pockets that make each bite dreamy.
- No fancy tools required: All you need is one bowl and a spoon – no stand mixer, dough hooks, or special gadgets. Even my most kitchen-phobic friends succeed with this recipe!
- Crowd-pleasing magic: Whether it’s holiday dinners or weeknight soups, these rolls disappear fast. I always make a double batch because people inevitably ask for seconds (and thirds!).
The best part? Seeing that proud “I made bread!” grin when someone tries their first homemade roll. That moment never gets old!
Ingredients for No-Knead Dinner Rolls
Gather these simple pantry staples – I promise you probably have most already! The beauty of this recipe lies in its straightforward ingredient list that delivers extraordinary results:
- 3 cups (360g) all-purpose flour (not self-rising) – This gives the perfect balance of tenderness and structure
- 1 teaspoon fine sea salt – Enhances all the flavors without overpowering
- 1 tablespoon granulated sugar – Just enough to feed the yeast and create golden crust
- 1 packet (2 1/4 teaspoons) active dry yeast – The magical microbe that makes the dough rise
- 1 1/4 cups (300ml) warm water (110°F/45°C) – The Goldilocks temperature for yeast happiness
- 2 tablespoons olive oil – Adds richness and keeps the rolls moist
Ingredient Notes & Substitutions
Over the years, I’ve experimented with every variation imaginable – here’s my hard-earned wisdom:
Yeast: That warm water temperature is crucial! Too hot kills the yeast, too cold slows it down. I use my kitchen thermometer religiously for this step. If your yeast doesn’t bubble after 5 minutes, it might be expired – always check the date!
Flour: While all-purpose flour works perfectly, you can substitute up to 1 cup with whole wheat flour for nuttier flavor (the rolls will be slightly denser). Bread flour creates chewier rolls – great if you prefer more structure.
Oil alternatives: Melted butter instead of olive oil adds richness, while avocado oil keeps it neutral. In a pinch, I’ve even used melted coconut oil for a subtle tropical twist!
Water tip: If you don’t have a thermometer, the water should feel warm but not hot on your wrist – like comfortable bath temperature. When in doubt, err on the cooler side!
How to Make No-Knead Dinner Rolls
Now for the fun part – let’s turn these simple ingredients into golden, pillowy clouds of deliciousness! Don’t let the simplicity fool you – there’s actual magic happening in that bowl. Here’s exactly how I make these beauties every time:
- Mix dry ingredients: In your biggest mixing bowl, whisk together the flour, salt, sugar, and yeast. I like to make a little well in the center – it helps incorporate everything evenly later.
- Add wet ingredients: Pour in that perfectly warmed water and olive oil all at once. Stir with a sturdy wooden spoon until you’ve got a shaggy, sticky dough. And I mean sticky – this is normal! Resist the urge to add more flour here.
- First rise: Cover the bowl with a damp kitchen towel (I sometimes use plastic wrap) and let it sit in a warm, draft-free spot. In about 2 hours, that sad-looking blob will transform into a puffy, bubbly dough that’s nearly doubled in size. My favorite spot? On top of the fridge where it’s just a bit warmer.
Shaping and Baking the Rolls
This is where the real excitement builds! Here’s how to turn that risen dough into perfect little rolls:
- Portion the dough: Lightly flour your hands and work surface. Scrape the dough out – it’ll still be sticky, but manageable with floured fingers. I divide it into 12 roughly equal pieces (about 2 oz each if you’re weighing). Pro tip? Use a bench scraper – it’s a game changer!
- Shape with care: Cup each piece in your hands, gently tucking and pinching the bottom to form smooth balls. Don’t overwork them – rustic is charming! Arrange them on a parchment-lined baking sheet with about 1 inch between each one. They’ll cozy up as they rise.
- Final rise: Cover lightly and let them puff up again for 30 minutes. They won’t double this time, but should look noticeably plumper. Meanwhile, preheat your oven to 375°F (190°C) – the perfect temperature for golden perfection.
- Bake to golden glory: Slide them into the oven and prepare for the best kitchen aroma. In 20-25 minutes, they’ll turn a beautiful golden brown and sound hollow when tapped underneath. I always watch for that perfect color – like a summer tan!
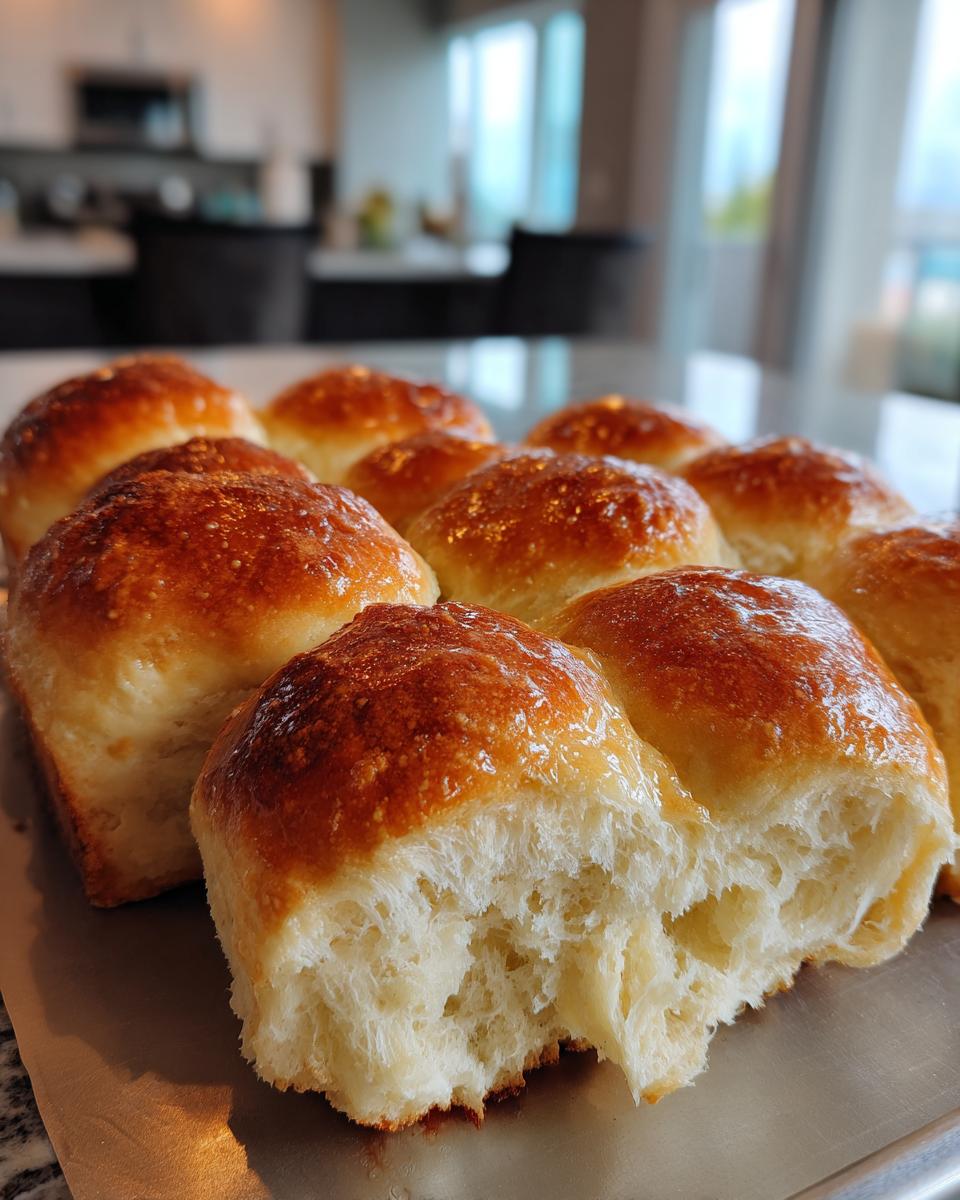
That first bite of a warm roll, straight from the oven? Pure bliss. The crust crackles slightly while the inside stays cloud-soft. Just try not to eat three before dinner like I always do!
Tips for Perfect No-Knead Dinner Rolls
After burning through countless batches (some glorious, some… well, let’s call them learning experiences), I’ve discovered the little tricks that guarantee rolls so good they’ll disappear before they cool. Here are my can’t-live-without secrets:
1. The Dough Blanket Treatment: That first rise needs serious TLC! I swear by a damp kitchen towel and plastic wrap – it creates a cozy greenhouse effect that keeps the dough from drying out. Once, I used a dry dish towel and ended up with a dough skin tougher than my grandma’s Thanksgiving turkey. Not cute!
2. Yeast Detective Work: Nothing’s sadder than dough that refuses to rise. Now I always do the “yeast test” – if it doesn’t foam after 5 minutes in warm water, it’s time for a fresh packet. Pro tip? Buy yeast in jars instead of packets – it stays fresh longer in the fridge. My current jar’s expiration date is circled in red Sharpie on my fridge door!
3. Scale Squad Goals: Eyeballing portions leads to some rolls looking overstuffed while others resemble sad pancakes. My $12 kitchen scale changed everything – each ball gets exactly 2 ounces. Suddenly, my rolls bake evenly and look bakery-worthy. Bonus? No more bickering over who got the biggest roll at dinner!
Remember – even “imperfect” batches usually taste amazing. My lopsided first attempt still got devoured by my family while I obsessively researched shaping techniques. The beauty of no-knead? It’s incredibly forgiving. Now go forth and bake with confidence!
Serving and Storing No-Knead Dinner Rolls
Oh, the glorious moment when those golden rolls come out of the oven! I always make my family wait the excruciating 5 minutes it takes for them to cool enough to handle – that’s when they’re at their absolute best. Here’s how we enjoy them, plus my tried-and-true storage tricks so none of that deliciousness goes to waste.
Perfect Pairings: These rolls were practically made for dunking! My favorite way to serve them is alongside a steaming bowl of butternut squash soup or beef stew – they’re like edible spoons that soak up every last drop. For holiday meals, we split them crosswise and make mini sandwiches with leftover turkey and cranberry sauce. And let’s be real – sometimes they don’t even make it to the table before we’ve demolished half the batch with just butter and flaky salt.
Storage Secrets: If by some miracle you have leftovers (it happens!), here’s how to keep them fresh:
- Room Temp: Tuck cooled rolls in an airtight container or ziplock bag for up to 2 days. I slide a paper towel underneath to absorb excess moisture – keeps them from getting soggy.
- Freezing: These freeze like a dream! Wrap cooled rolls individually in foil, then pop them in a freezer bag for up to 3 months. When the craving hits, unwrap and reheat at 350°F for 10 minutes straight from frozen – they’ll taste freshly baked.
- Revival Trick: For day-old rolls, I give them a quick spritz of water and 5 minutes in a 300°F oven. Works like magic to bring back that just-baked softness!
One last confession? I always hide a few rolls in the back of the bread box – my little secret stash for midnight toast with jam when everyone else is asleep. Don’t tell my kids!
No-Knead Dinner Rolls Nutrition Information
Okay, let’s talk numbers – but not too seriously! While I’m all about that delicious buttered roll life, I know some folks like to keep track. Here’s the nutritional breakdown per roll based on my standard recipe. Just remember – your exact numbers might dance around these figures depending on the specific ingredients you use (especially if you go heavy on that post-bake butter brush like I do!).
- Serving Size: 1 roll (about 2 oz)
- Calories: 150
- Total Fat: 3g (0.5g saturated, 2g unsaturated)
- Cholesterol: 0mg
- Sodium: 200mg
- Total Carbohydrates: 26g
- Dietary Fiber: 1g
- Sugars: 1g
- Protein: 4g
Now, full disclosure – when my neighbor Linda makes these with half whole wheat flour, the fiber content jumps up. And if you swap in butter instead of olive oil? Well, let’s just say the fat grams get a bit more… generous. But honestly, when you’re biting into a warm, homemade roll fresh from the oven, does it really matter? I say enjoy every fluffy bite!
Frequently Asked Questions
Over the years, I’ve gotten the same wonderful questions popping up about these no-knead dinner rolls – so let me share the answers that’ll help you bake with confidence! Here are the top three queries that always come my way:
“Can I use instant yeast instead of active dry yeast?”
Absolutely! I keep both in my pantry and use them interchangeably in this recipe. The magic ratio stays the same – 1 packet (2 1/4 teaspoons) of instant yeast works perfectly. The only difference? Instant yeast doesn’t need proofing in warm water first, so you can mix it right in with the dry ingredients. I’ve found the rising times might be slightly faster with instant yeast, so keep an eye on your dough!
“Why isn’t my dough rising?”
Oh, I feel this frustration deep in my baker’s soul! Nine times out of ten, it comes down to two things: yeast or temperature. First, check that your yeast hasn’t expired (I’ve been burned by this more than I’d like to admit!). Second, make sure your water is truly at that Goldilocks temperature – between 105-110°F. Too cold and the yeast sleeps, too hot and… well, let’s just say I’ve accidentally made yeast soup before. If your kitchen is chilly, try rising the dough in the oven with just the light on – it creates the perfect cozy environment.
“Can I prepare the dough ahead of time?”
Yes, and this is one of my favorite tricks! After mixing the dough, you can refrigerate it overnight for a slow rise. The cold actually develops deeper flavor – it’s like magic! Just let it come to room temperature for about 30 minutes before shaping. I often mix the dough before bed and wake up to perfectly risen dough ready for baking. Bonus? Fresh rolls for breakfast without the 2 AM wakeup call!
Share Your No-Knead Dinner Rolls Experience
Nothing makes me happier than seeing your versions of these no-knead rolls come to life! Over the years, I’ve gotten the most heartwarming notes from readers—like Jen from Ohio who made her first successful bread with this recipe, or college student Mark who surprised his roommates with a fresh batch on move-in day. Every photo in my inbox feels like opening a little present!
I still remember the first time my cousin texted me a blurry picture of her lopsided rolls with the caption “They taste way better than they look!” That’s the spirit! Whether your rolls come out picture-perfect or charmingly rustic, I’d love to hear about your baking adventures. Did you add a twist like roasted garlic or herbs? Maybe your kids shaped them into funny animals? (My niece once made “dinosaur rolls” that were oddly adorable.)
Some of my favorite reader moments: Sarah’s Thanksgiving table where these rolls sat next to her grandmother’s china, or the time David accidentally used sparkling water instead of tap and ended up with the fluffiest rolls imaginable. Kitchen mishaps and triumphs alike—they all become part of the story. So if you’ve tried these, I’m all ears! Your experiences make this recipe richer than any ingredient ever could.
For more baking inspiration, check out our Pinterest page!
Print
“17-Minute No-Knead Dinner Rolls That Will Amaze Everyone”
- Total Time: 2 hours 55 minutes
- Yield: 12 rolls 1x
- Diet: Vegetarian
Description
Soft and fluffy no-knead dinner rolls that require minimal effort and yield delicious results.
Ingredients
- 3 cups all-purpose flour
- 1 teaspoon salt
- 1 tablespoon sugar
- 1 packet (2 1/4 teaspoons) active dry yeast
- 1 1/4 cups warm water
- 2 tablespoons olive oil
Instructions
- In a large bowl, mix flour, salt, sugar, and yeast.
- Add warm water and olive oil. Stir until a sticky dough forms.
- Cover the bowl with a towel and let rise for 2 hours or until doubled in size.
- Divide the dough into 12 equal pieces and shape into rolls.
- Place rolls on a baking sheet, cover, and let rise for 30 minutes.
- Preheat oven to 375°F (190°C). Bake rolls for 20-25 minutes or until golden brown.
Notes
- For a richer flavor, brush rolls with melted butter after baking.
- Store leftovers in an airtight container for up to 2 days.
- Prep Time: 2 hours 30 minutes
- Cook Time: 25 minutes
- Category: Bread
- Method: Baking
- Cuisine: American
Nutrition
- Serving Size: 1 roll
- Calories: 150
- Sugar: 1g
- Sodium: 200mg
- Fat: 3g
- Saturated Fat: 0.5g
- Unsaturated Fat: 2g
- Trans Fat: 0g
- Carbohydrates: 26g
- Fiber: 1g
- Protein: 4g
- Cholesterol: 0mg