 Skip to content

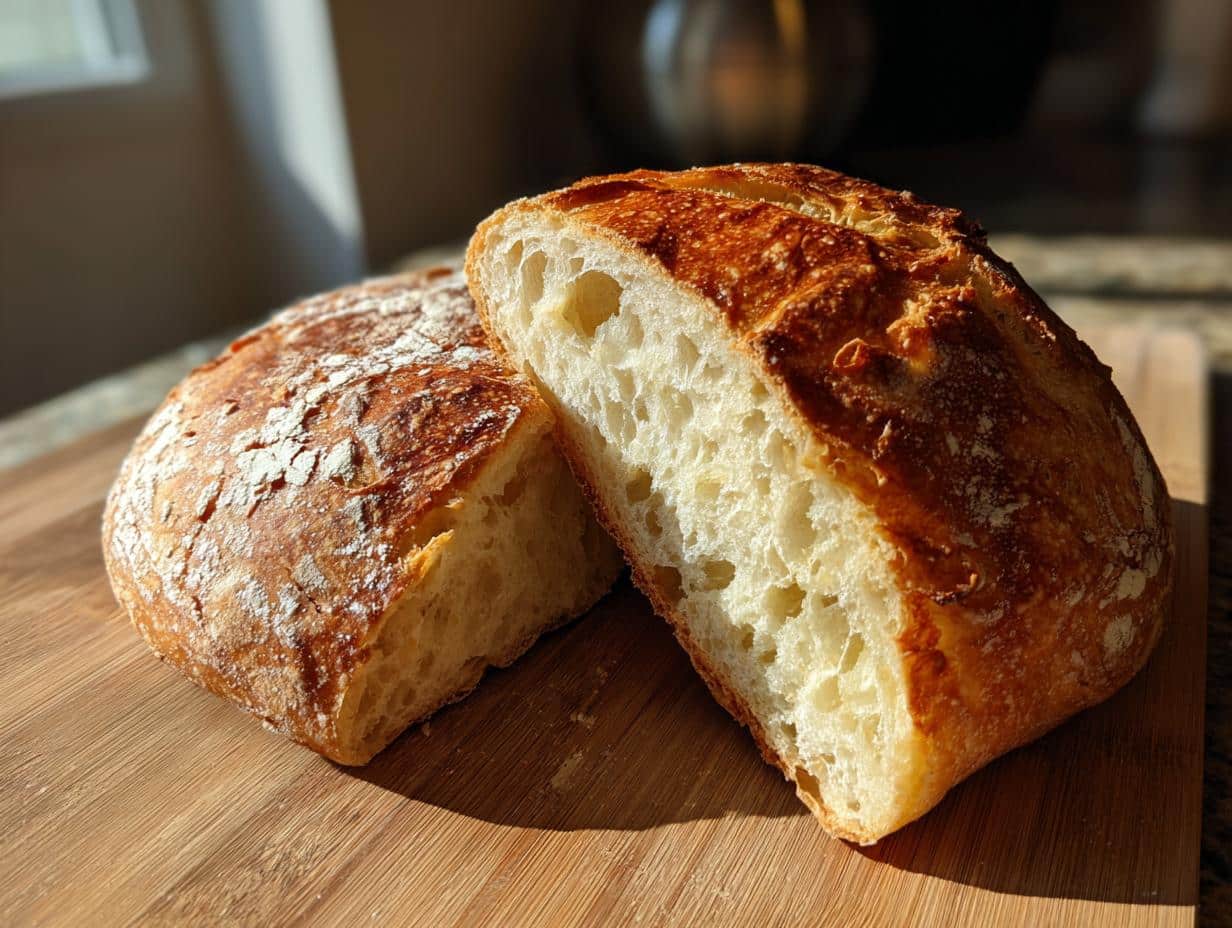
Oh my gosh, let me tell you about my sourdough journey! When I first started, I was terrified—all those fancy terms like “autolyse” and “bulk fermentation” made it seem so complicated. But guess what? Making sourdough bread for beginners is actually way simpler than you’d think. All you really need is flour, water, salt, and that bubbly little jar of sourdough starter sitting on your counter (you know, the one you’ve been nervously feeding like a pet?).
What I love most is how forgiving sourdough can be. Forget precise kneading—just fold it a few times when you remember. The dough tells you when it’s ready, not some strict timer. And that first whiff of baking bread? Absolute magic. Trust me, once you pull that golden, crackling loaf from the oven, you’ll be hooked just like I was!
Why You’ll Love This Sourdough Bread Recipe
This recipe became my go-to after countless burnt bottoms and dense loaves (we don’t talk about my first attempt). Here’s why it’s perfect for beginners:
- Just 4 ingredients – flour, water, salt, and starter. No fancy additives or commercial yeast needed!
- Forgiving process – miss a fold? No problem. The dough adapts to your schedule.
- That signature crackle – the Dutch oven method gives you that professional bakery crust every time.
- Endless customization – once you master the basics, add seeds, herbs, or even a swirl of honey.
The best part? Watching your starter bubble away like a science experiment you can eat!
Ingredients for Sourdough Bread
Here’s the beautiful simplicity of sourdough – everything you need probably already lives in your kitchen! But let me share exactly what works best:
- 500g bread flour – That’s about 3 ¾ cups, but please, please use a scale! Volume measurements can vary wildly.
- 350g water – Lukewarm (think baby bottle temperature) helps activate the starter.
- 100g active sourdough starter – This means fed 4-12 hours prior, bubbly and smelling sweet-tangy (not like vinegar!).
- 10g fine sea salt – The fine grains incorporate better than kosher salt’s big flakes.
See? No weird additives – just flour, water, and that magical starter you’ve been nurturing!
Equipment You’ll Need
Don’t stress – you likely have most of this already! Here’s what makes sourdough baking foolproof:
- Dutch oven – Creates that steamy environment for the perfect crust (I use my grandma’s old cast iron)
- Kitchen scale – Trust me, grams are your friend for consistent results
- Proofing basket – Gives your loaf those pretty spiral marks (but a bowl lined with a floured towel works too!)
- Mixing bowl – Big enough for sticky hands and enthusiastic folding
That’s it! No fancy gadgets required – just good old-fashioned baking magic.
How to Make Sourdough Bread for Beginners
Okay, let’s get our hands doughy! I promise this isn’t as intimidating as it seems – we’re basically just mixing, waiting, folding, and baking. Here’s exactly how I make my weekly loaf (with all my messy-kitchen-learned tricks included!):
Mixing the Dough
First, mix your flour and water in a big bowl until no dry spots remain – it’ll look shaggy and messy, that’s perfect! Now walk away for 30 minutes (this “autolyse” lets the flour hydrate). When you return, add your bubbly starter and salt. Squish it all together with wet hands – the dough should feel stretchy like a sticky earlobe (weird comparison, but you’ll know it when you feel it!).
Bulk Fermentation
Cover with a damp towel and let it rise at room temp for 4-6 hours. Every hour, do a “fold”: grab one edge, stretch it up, and tuck it over. Rotate the bowl and repeat 3-4 times. You’ll see the dough transform from ragged to smooth and bouncy! It’s ready when it’s puffy with bubbles peeking through (about doubled in size).
Shaping and Final Proof
Flour your counter lightly and gently dump out the dough. Fold the edges toward the center to create surface tension, then flip it seam-side up. Use your hands to drag it toward you in circular motions – this tightens the “skin.” Plop it into your floured proofing basket seam-side up! Let it proof 1-2 hours at room temp or overnight in the fridge (cold slows fermentation for more flavor).
Baking Your Sourdough Bread
Preheat your Dutch oven at 450°F (230°C) for 30 minutes – screaming hot is key! Turn your proofed dough onto parchment paper, slash the top with a razor (about 1/2″ deep), and carefully lower it into the Dutch oven. Bake covered for 20 minutes, then uncover for 20-25 more until deeply golden. That first crackle when you take off the lid? Pure bread magic!
Tips for Perfect Sourdough Bread
After countless loaves (and a few hockey pucks), here are my hard-earned secrets for sourdough success:
- Find your dough’s happy place – A slightly warm spot (near the oven or on top of the fridge) helps fermentation along beautifully.
- Starter check! Your starter should float in water before mixing – if it sinks, feed it again and wait.
- Don’t fear the stick – Wet hands prevent dough from clinging during folds (I keep a bowl of water nearby).
- Listen to the crust – That hollow sound when you tap the bottom means it’s perfectly baked!
Remember – sourdough is alive, so each bake will be deliciously unique!
Common Sourdough Bread Mistakes to Avoid
Oh honey, I’ve made ALL the mistakes so you don’t have to! Here’s what to watch out for:
- Rushing the proof – That dough needs time to develop flavor! Under-proofed bread turns out dense as a brick (ask my first three attempts).
- Flour overload – Too much flour makes dry, tough bread. Embrace the sticky – wet hands are your friend!
- Cold oven sins – That Dutch oven needs to be piping hot for proper oven spring. Preheat at least 30 minutes!
- Early slicing – I know it’s tempting, but cutting too soon turns your beautiful loaf into a gummy mess. Wait at least 2 hours!
Remember – even “failed” bread makes amazing croutons or bread pudding!
Sourdough Bread Variations
Once you’ve mastered the basic loaf, it’s time to play! My favorite Saturday morning ritual involves raiding the pantry for fun mix-ins:
- Seedy sensations – Toast sunflower or pumpkin seeds first, then fold in during shaping
- Herb garden vibes – Rosemary and thyme make the house smell like an Italian bakery
- Whole wheat wonder – Swap 100g bread flour for whole wheat (add 10g extra water)
- Sweet surprises – Cinnamon-raisin or honey-walnut for breakfast toast heaven
Pro tip: Roll additions in during the final shaping to keep them from deflating your bubbles!
Storing and Reheating Sourdough Bread
Okay, confession time – I used to keep my sourdough in plastic bags until it turned into a sad, soggy mess. Lesson learned! Here’s how to keep that beautiful loaf fresh and crusty:
At room temp, store it cut-side down on a wooden board for 2-3 days – this lets the crust breathe while the crumb stays moist. For longer storage, slice and freeze in a paper bag (then a freezer bag to prevent freezer burn). When you’re ready, just pop frozen slices straight into the toaster – they’ll come out tasting freshly baked!
If your bread goes slightly stale (it happens!), revive slices with a quick spritz of water and 5 minutes in a 350°F (175°C) oven. They’ll crisp right up! And never, ever refrigerate – that’s the fastest way to turn your masterpiece into cardboard.
Nutritional Information
Now, I’m no nutritionist (just a bread-loving home baker!), but here’s the scoop on what’s in each slice. Remember, these are rough estimates – your exact numbers will dance around depending on your flour brand, starter activity, and how thick you slice that beautiful loaf!
Per 50g slice (about 1/2-inch thick):
- 120 calories – Mostly from those wholesome carbs that make toast so darn satisfying
- 25g carbohydrates – The good kind that fuels your sourdough obsession
- 4g protein – That gluten working its magic!
- 1g fiber – Especially if you sneak in some whole wheat flour
- 0.5g fat – Basically nothing, which means extra butter is totally justified
The best nutrition fact? That unbeatable feeling when you pull your first perfect loaf from the oven – priceless!
FAQs About Sourdough Bread for Beginners
Over the years, I’ve gotten the same panicked questions from new sourdough bakers (including myself!). Here are the answers that saved my loaves from disaster:
Q: Can I use unfed starter?
Oh honey, no! Your starter should be at its peak (about 4-12 hours after feeding), bubbly like champagne and smelling sweet-tangy. Unfed starter makes sad, dense bread. If it floats in water, it’s ready to rock!
Q: Why is my dough so sticky?
Stickiness is normal! High hydration = better crumb. Wet your hands before handling it, and remember – the stickiness transforms into glorious elasticity during folds. Resist adding extra flour!
Q: How do I know when it’s proofed enough?
The poke test never fails me: Gently press the dough with a floured finger. If it springs back slowly, it’s ready. If it springs back fast, wait longer. If it stays dented…oops, over-proofed!
Q: My bread is dense – what went wrong?
Usually under-proofing or weak starter. Next time, let it rise longer in a warmer spot (70-75°F is ideal). And make sure your starter doubles in size after feeding – that’s your bread’s rising power!
Q: Can I speed up the process?
Sourdough teaches patience, friend! But in a pinch, you can bulk ferment in a 80°F spot (like a turned-off oven with the light on) for 3-4 hours. The flavor won’t be as deep, but it works!
Share Your Sourdough Success
I can’t wait to see your beautiful loaves! Snap a pic of that golden crust and share it in the comments – or ask me anything if you hit a snag. Every baker’s journey starts with that first brave attempt!
Print
Easy 4-Ingredient Sourdough Bread Recipe for Beginners
- Total Time: 7 hours
- Yield: 1 loaf 1x
- Diet: Vegetarian
Description
A simple guide to making sourdough bread for beginners. This recipe covers the basics of creating a flavorful loaf with a crisp crust and soft interior.
Ingredients
- 500g bread flour
- 350g water
- 100g active sourdough starter
- 10g salt
Instructions
- Mix flour and water in a bowl. Let it rest for 30 minutes.
- Add sourdough starter and salt. Knead until smooth.
- Cover and let the dough rise for 4-6 hours, folding every hour.
- Shape the dough into a round loaf and place it in a proofing basket.
- Let it proof for 1-2 hours at room temperature or overnight in the fridge.
- Preheat oven to 450°F (230°C) with a Dutch oven inside.
- Score the dough and bake covered for 20 minutes.
- Uncover and bake for another 20-25 minutes until golden brown.
- Cool on a wire rack before slicing.
Notes
- Use a kitchen scale for accurate measurements.
- Keep your starter active by feeding it regularly.
- Adjust baking time based on your oven.
- Prep Time: 30 minutes
- Cook Time: 45 minutes
- Category: Bread
- Method: Baking
- Cuisine: American
Nutrition
- Serving Size: 1 slice (50g)
- Calories: 120
- Sugar: 0g
- Sodium: 200mg
- Fat: 0.5g
- Saturated Fat: 0g
- Unsaturated Fat: 0.3g
- Trans Fat: 0g
- Carbohydrates: 25g
- Fiber: 1g
- Protein: 4g
- Cholesterol: 0mg


