Skip to content
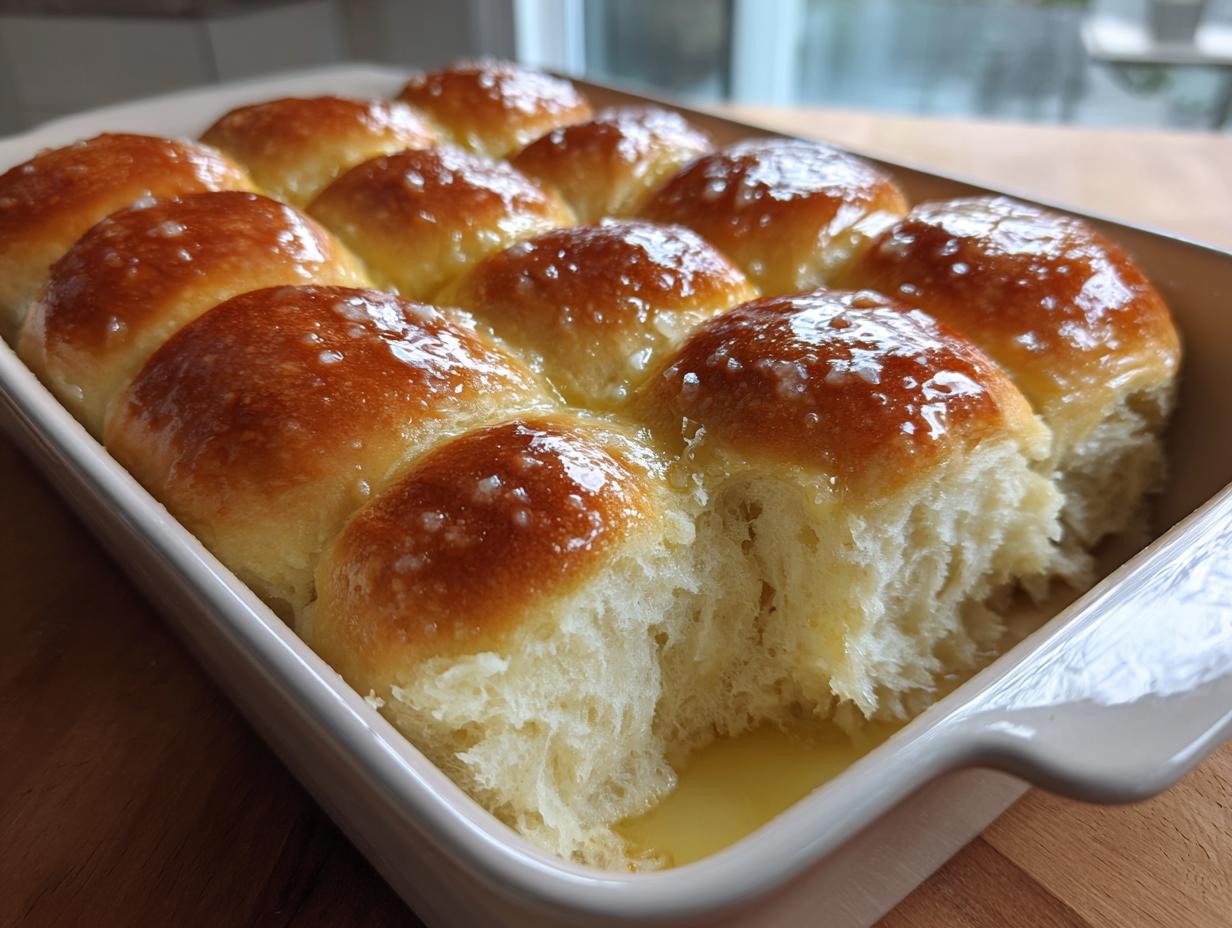
There’s nothing quite like the smell of warm, fresh-baked homemade dinner rolls – hidden recipe filling your kitchen. That golden-brown perfection, that cloud-soft texture… it takes me straight back to Sunday dinners at my grandma’s house where the rolls never lasted five minutes on the table. This foolproof version uses simple ingredients you probably have right now – flour, yeast, a bit of sugar – but the magic happens in how you treat the dough. After years of trial and error (and some very sad, dense rolls in my early attempts), I’ve perfected the method for fluffy, pull-apart perfection every time.
Why You’ll Love These Homemade Dinner Rolls – HIDDEN RECIPE
Trust me, once you try these rolls, you’ll never go back to store-bought. Here’s why:
- Cloud-soft texture that practically melts in your mouth (I dare you to eat just one!)
- Simple pantry ingredients – no fancy equipment or hard-to-find items
- Perfect for any occasion, from weeknight dinners to holiday feasts
- That irresistible homemade smell that makes everyone gather in the kitchen
My kids call these “hug in a roll” – they’re that comforting!
Ingredients for Homemade Dinner Rolls – HIDDEN RECIPE
Gather these simple ingredients – I promise you’ll be amazed at what magic they create together! The key is using fresh, quality items (yes, even that little packet of yeast matters). Here’s exactly what you’ll need:
- 3 cups all-purpose flour – plus extra for dusting (that slightly floury kitchen counter is part of the fun!)
- 1 tablespoon sugar – just enough sweetness to make the yeast happy
- 1 teaspoon salt – don’t skip this flavor booster
- 1 packet (2 1/4 teaspoons) active dry yeast – check that expiration date! Old yeast = sad flat rolls
- 1 cup warm milk (110°F) – like baby bathwater warm (I test it on my wrist)
- 1/4 cup melted butter (unsalted) – because everything’s better with butter
- 1 large egg – room temperature blends in smoother
See? Nothing fancy here. Just real ingredients that work together to create something truly special. Now let’s get our hands doughy!
How to Make Homemade Dinner Rolls – HIDDEN RECIPE
Okay, let’s get to the fun part – turning those simple ingredients into pillowy-soft rolls! Don’t let the steps intimidate you – I’ll walk you through each one with all the little tricks I’ve learned over the years.
Mixing the Dough
First, grab your biggest mixing bowl (trust me, you’ll need the space!). Whisk together the flour, sugar, salt, and yeast – I like to make a little well in the center for the wet ingredients. Pour in that warm milk (test it on your wrist – it should feel comfortably warm, not hot), melted butter, and egg. Now comes the satisfying part – stir everything together with a wooden spoon until it forms a shaggy, sticky dough. Don’t worry if it looks messy at this stage – that’s exactly how it should be!
Kneading and First Rise
Flour your clean countertop generously (I use about 1/4 cup extra flour here). Turn out the dough and start kneading – push with the heels of your hands, fold, turn, repeat. After about 5 minutes, you’ll feel the dough transform from sticky to smooth and elastic. Pop it into a greased bowl, cover with a damp kitchen towel, and let it rise in a warm spot for 1 hour. You’ll know it’s ready when it’s doubled in size and looks all puffy and happy.
Shaping and Second Rise
Now for the fun part! Punch down the dough (so satisfying!) and turn it out onto a lightly floured surface. Divide it into 12 equal pieces – I like to use a bench scraper for this. Shape each piece into a smooth ball by pulling the edges underneath (imagine forming a little dough pouch). Arrange them in a greased 9×13 baking dish, cover again with that damp towel, and let them rise for 30 minutes. They should look puffed up and touching each other when ready.
Baking the Rolls
Preheat your oven to 375°F while the rolls do their final rise. Bake for 18-20 minutes until the tops are golden brown and your kitchen smells like heaven. The second you pull them out, brush them with melted butter – this gives them that irresistible glossy finish and keeps them soft. Try to let them cool for 5 minutes before serving… if you can resist!
Pro Tips for Perfect Homemade Dinner Rolls – HIDDEN RECIPE
After making hundreds of batches (and eating most of them), here are my can’t-live-without secrets:
- Yeast check: Always test your yeast in warm milk with a pinch of sugar – if it doesn’t foam after 5 minutes, toss it and start fresh
- Temperature matters: Cold eggs or milk can slow rising – I leave mine out for 30 minutes before baking
- Butter bath: Brushing rolls with melted butter right out of the oven creates that irresistible soft crust – don’t skip this step!
- Patience pays: Let the dough rise undisturbed – peeking too often lets heat escape and slows the process
Follow these, and you’ll have bakery-quality rolls every single time!
Variations for Homemade Dinner Rolls – HIDDEN RECIPE
Oh, the possibilities! Once you’ve mastered the basic recipe, try these fun twists: brush with garlic butter before baking, knead in shredded cheddar and chives, or sprinkle everything bagel seasoning on top. My personal favorite? A pinch of rosemary in the dough—it smells like holiday magic!
Serving Suggestions
These rolls are the ultimate sidekick – perfect with hearty soups, holiday roasts, or even as slider buns for your next barbecue. I’ve been known to tear them apart warm and dunk them straight into gravy (no shame!). They also make amazing next-day breakfast sandwiches – just split, toast lightly, and pile on eggs and bacon.
Storing and Reheating Homemade Dinner Rolls – HIDDEN RECIPE
These rolls stay wonderfully soft for days! Store cooled rolls in an airtight container at room temperature for up to 3 days (if they last that long). For longer storage, freeze them in a zip-top bag for up to 1 month. To reheat, wrap in foil and warm in a 350°F oven for 10 minutes – they’ll taste fresh-baked all over again. Pro tip: Freeze individual rolls for quick single servings – perfect for unexpected guests or when that bread craving hits!
Nutrition Information
Now, I’m no nutritionist, but here’s the scoop on what’s in these heavenly rolls. Keep in mind these are estimates – your exact numbers might dance around a bit depending on your ingredients. But hey, we’re making homemade bread here – a little indulgence is part of the joy!
- Serving Size: 1 roll (because let’s be real, who stops at half?)
- Calories: 150 (totally worth every one)
- Sugar: 2g (just enough to make the yeast happy)
- Sodium: 200mg
- Fat: 5g (thank that glorious butter!)
- Saturated Fat: 3g
- Carbohydrates: 22g
- Fiber: 1g
- Protein: 4g
- Cholesterol: 25mg
Remember, homemade means you control the ingredients – unlike those store-bought rolls packed with preservatives. And between you and me? Fresh-from-the-oven happiness doesn’t fit neatly into nutrition labels anyway!
FAQs About Homemade Dinner Rolls – HIDDEN RECIPE
Got questions? I’ve got answers! Here are the most common things people ask me about this recipe:
- Can I use instant yeast instead of active dry? Absolutely! Skip the proofing step and mix it right in with the dry ingredients. You might need about 5-10 minutes less rise time – just watch for that “doubled in size” cue.
- Help! My rolls didn’t rise – what went wrong? Oh no! 90% of the time, it’s old yeast. Always check that expiration date! If your kitchen was chilly, that can slow things down too – try letting the dough rise in a barely warm oven (turn it off after heating to 100°F).
- Can I make these ahead? You bet! After the first rise, punch down the dough, cover tightly, and refrigerate overnight. The cold slows the yeast – just give it an extra 15-20 minutes for the second rise the next day.
- Why are my rolls dense? Usually means the dough was over-floured during kneading. Next time, use just enough flour to prevent sticking – a slightly sticky dough makes lighter rolls!
- Can I freeze the baked rolls? Perfectly! Cool completely, then freeze in an airtight bag for up to a month. Warm wrapped in foil at 350°F for 10-15 minutes – they’ll taste fresh-baked!
Still stumped? Shoot me a message – I’ve made every mistake so you don’t have to!
Share Your Results
There’s nothing that makes me happier than seeing your homemade dinner rolls – hidden recipe turn out beautifully! Snap a photo of those golden, buttery beauties and tag me on Instagram – I love celebrating your baking wins (and troubleshooting any flops). Did your family go crazy for them? Leave a quick review below to let me know! Every time someone shares their roll success, it reminds me why I love teaching these recipes so much. Now go enjoy those warm, fluffy clouds of deliciousness – you’ve earned it!
Print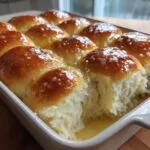
Fluffy Homemade Dinner Rolls – Hidden Recipe in 12 Steps
- Total Time: 1 hour 50 minutes
- Yield: 12 rolls 1x
- Diet: Vegetarian
Description
Soft and fluffy homemade dinner rolls perfect for any meal.
Ingredients
- 3 cups all-purpose flour
- 1 tbsp sugar
- 1 tsp salt
- 1 packet (2 1/4 tsp) active dry yeast
- 1 cup warm milk
- 1/4 cup melted butter
- 1 egg
Instructions
- Mix flour, sugar, salt, and yeast in a bowl.
- Add warm milk, melted butter, and egg. Stir until dough forms.
- Knead dough on a floured surface for 5 minutes.
- Place dough in a greased bowl, cover, and let rise for 1 hour.
- Divide dough into 12 pieces and shape into rolls.
- Place rolls in a greased baking pan and let rise for 30 minutes.
- Bake at 375°F for 18-20 minutes.
Notes
- Use fresh yeast for best results.
- Cover dough with a damp towel while rising.
- Brush rolls with melted butter after baking for extra softness.
- Prep Time: 1 hour 30 minutes
- Cook Time: 20 minutes
- Category: Bread
- Method: Baking
- Cuisine: American
Nutrition
- Serving Size: 1 roll
- Calories: 150
- Sugar: 2g
- Sodium: 200mg
- Fat: 5g
- Saturated Fat: 3g
- Unsaturated Fat: 2g
- Trans Fat: 0g
- Carbohydrates: 22g
- Fiber: 1g
- Protein: 4g
- Cholesterol: 25mg