Skip to content
There’s something magical about Halloween treats that look as spooky as they taste sweet. My Ghostly Meringues have been stealing the show at our Halloween parties for years – floating like little edible specters that vanish from the plate faster than you can say “boo!” I still remember the first time I made them, nervously watching those egg whites transform into pillowy clouds in my mixer. Now it’s my favorite kitchen magic trick. These crisp, airy bites require just four simple ingredients but deliver major wow factor. Whether you’re hosting a monster mash or just craving something delightfully eerie, these spectral sweets will haunt your dessert table in the best way possible.
Ghostly Meringue Ingredients – The Magic Potion
Here’s the beautiful thing about these spooky treats – you only need four simple ingredients to conjure up these floating phantoms! I’ve learned through many Halloween baking sessions that quality matters with meringues, so let’s talk specifics:
- 4 large egg whites (room temperature is crucial – cold whites won’t whip up properly)
- 1 cup granulated sugar (regular white sugar works best – don’t be tempted by powdered!)
- ¼ teaspoon cream of tartar (this little helper stabilizes everything)
- ½ teaspoon pure vanilla extract (the clear kind keeps our ghosts ghostly white)
A quick tip from my “oops” moments – make absolutely sure no egg yolk sneaks into your whites. Even a tiny bit can ruin your chances of getting those perfect stiff peaks. I always crack eggs into a separate bowl first, just in case!
How to Make Ghostly Meringues
Okay, let’s turn those simple ingredients into floating specters! I promise it’s easier than it looks – my 8-year-old niece helps me with these now. The key is patience (and not opening that oven door too soon!). Here’s exactly how we’ll bring these little ghosts to life:
Preparing the Meringue
First things first – grab the cleanest, driest bowl you own. I learned the hard way that even a speck of grease can ruin everything. Metal or glass works best – plastic can secretly hold onto oils. Toss in your room-temp egg whites and cream of tartar, then beat on medium until you get soft peaks (when you lift the beaters, the peaks flop over sweetly).
Now the fun part – with the mixer running, sprinkle in your sugar about a tablespoon at a time. I count to 30 between each addition – sounds tedious but trust me, this slow dance makes all the difference! Keep going until you’ve got stiff, glossy peaks that stand at attention when you lift the whisk. The mixture should feel smooth between your fingers – if you feel grit, keep mixing! Fold in the vanilla right at the end.
Shaping and Baking
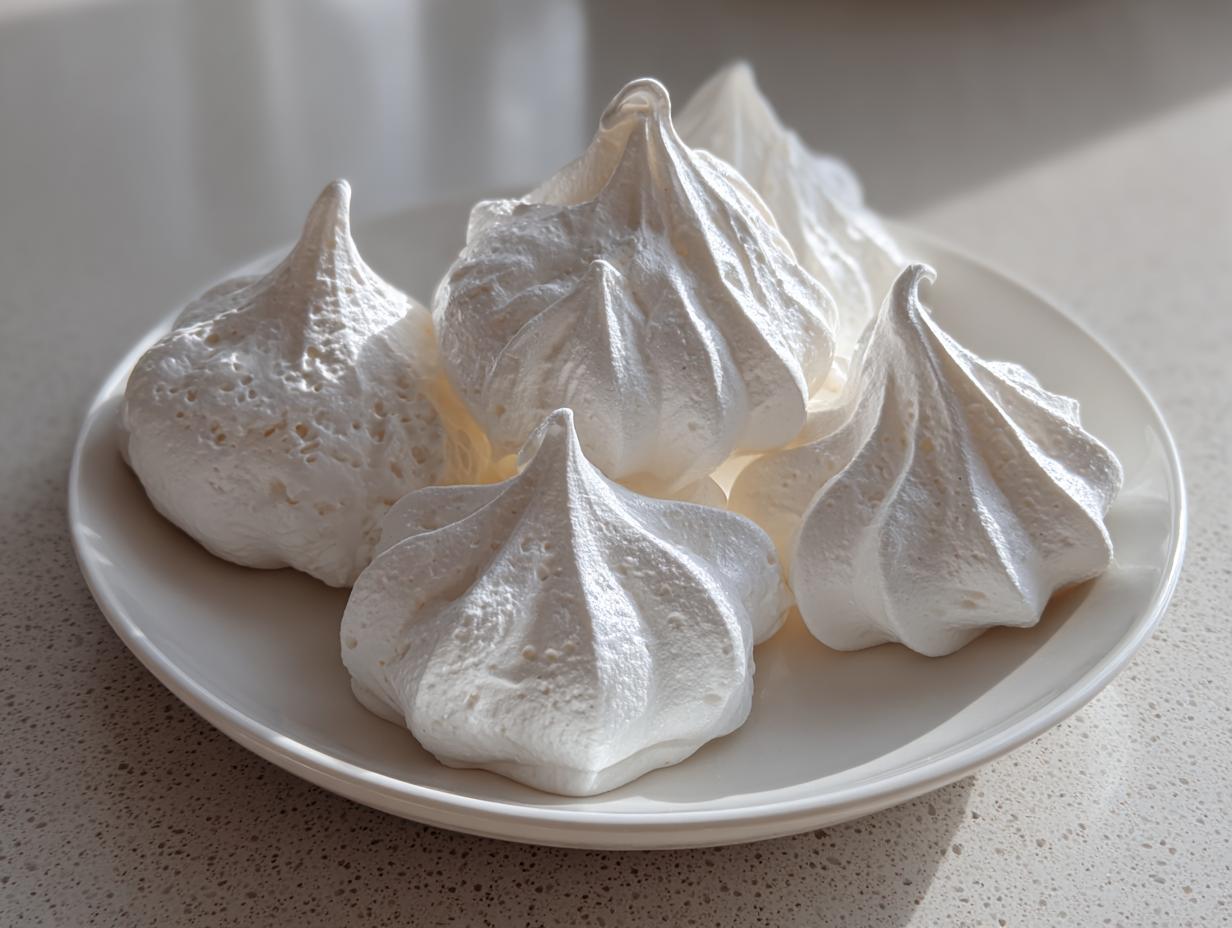
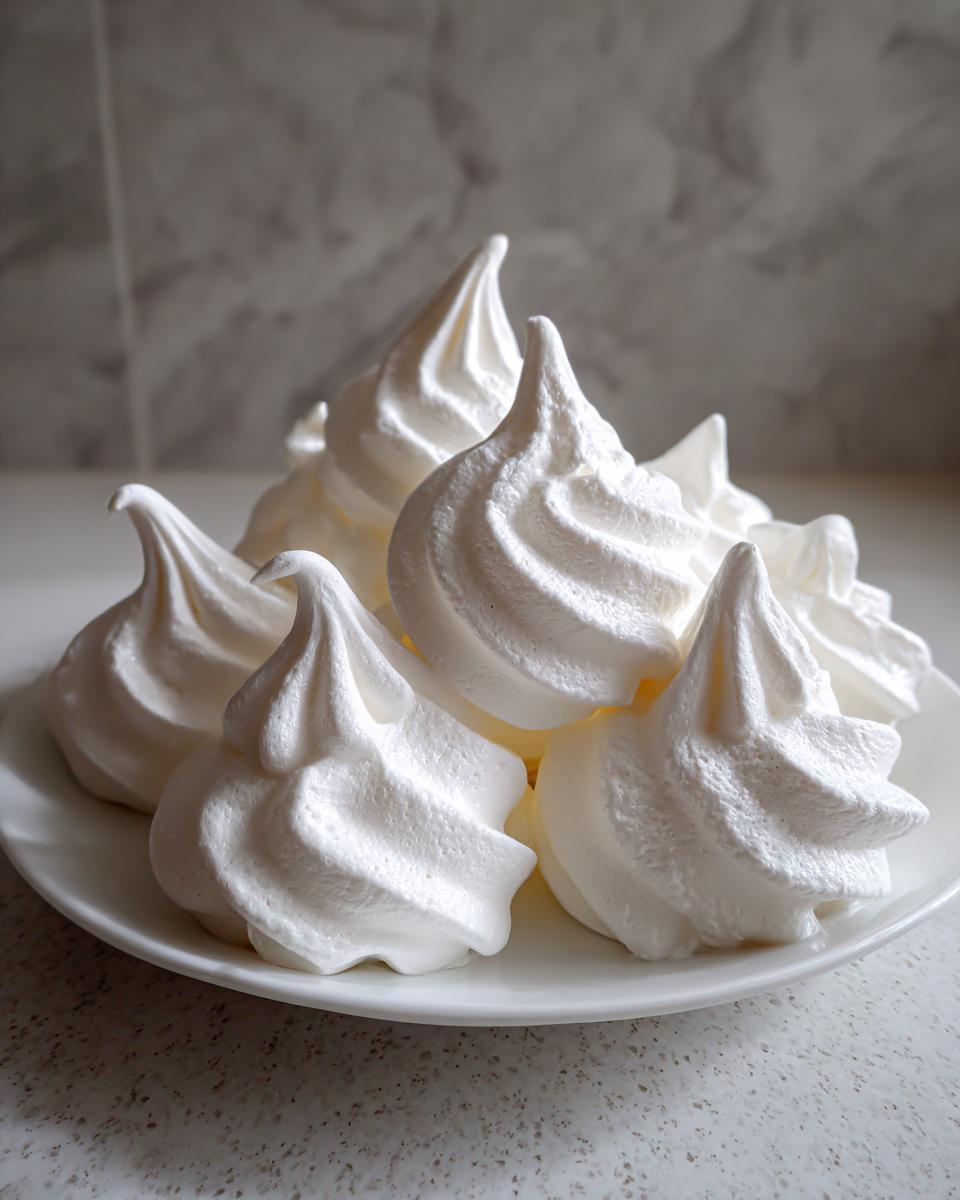
Time to pipe our ghosts! If you’ve got piping bags, great – if not, a plastic bag with the corner snipped works in a pinch. For classic ghosts, pipe tall dollops with a little flick at the top for the “tail.” Or get creative – I’ve made ghost families with different sizes! Just leave space between them – they’ll puff up slightly.
Bake at 200°F for 1.5-2 hours. The magic happens slowly here – they’re done when they lift off the parchment easily and sound hollow when tapped. Here’s my secret: turn off the oven and let them cool inside for at least an hour. This prevents cracks and keeps them perfectly crisp. The first time I rushed this step, my ghosts looked more like casualties than cute apparitions!
Why You’ll Love These Ghostly Meringues
Wait till you see people’s faces when you bring these out – they’re always a hit! Here’s why these little phantoms have become my go-to Halloween treat year after year:
- So easy a zombie could make them – Seriously, four ingredients and no fancy skills needed. If you can turn on a mixer, you’ve got this!
- Naturally gluten-free – No special flours needed, which makes them perfect for mixed crowds. My gluten-sensitive neighbor practically levitates when she sees these coming.
- Halloween magic in every bite – That crisp shell giving way to marshmallowy insides? Pure spooky perfection. Kids go wild for the ghost shapes, but adults sneak them just as much.
- Lighter than a ghost’s footprint – After all those heavy Halloween candies, these airy bites are a dream. You can eat three (or five…) without that sugar crash feeling.
Last year I made a double batch “just in case” – they were gone before the trick-or-treaters even arrived! Now that’s what I call disappearing act.
Tips for Perfect Ghostly Meringues
After making countless batches of these floating phantoms (and yes, plenty of failed attempts!), I’ve learned all the tricks to ghostly meringue success. These are my top tips to ensure your spooky treats turn out perfectly every time:
- Egg whites only, no yolks allowed! Even a speck of yolk can prevent proper whipping. I always crack eggs into a separate bowl first, then transfer the whites one by one to my mixing bowl. Better safe than sorry when summoning these spirits!
- Patience is key with the sugar – Adding it too fast can deflate your beautiful peaks. I pretend I’m feeding a shy ghost – slow and steady wins the race. The full 1.5-2 minutes between tablespoons makes all the difference.
- Let them cool completely in the turned-off oven. I know it’s tempting to peek, but sudden temperature changes make cracks (ask my first batch of “wounded ghost” meringues). They need that gentle cooldown to stay perfectly crisp.
- Airtight is right for storage. These little phantoms hate humidity! I use cookie tins lined with parchment or glass jars with tight lids. If they start to soften, a quick 10 minutes in a 200°F oven crisps them right back up.
- Rainy day? Wait for sun. Seriously, don’t attempt meringues on humid days – they’ll weep and get sticky. I learned this the hard way during a Halloween storm. Now I check the weather app before whipping!
My biggest tip? Don’t stress! Even “imperfect” ghosts still taste amazing. Some of my favorite batches had lopsided shapes that gave them extra personality – call them “friendly ghosts” and no one will notice a thing!
Storing Ghostly Meringues
Now that you’ve put all that love into creating your little edible ghosts, let’s make sure they stay as crisp and delightful as the day you made them! Proper storage is the secret to keeping these airy treats hauntingly good for days. Here’s exactly what I’ve learned through trial and (many) errors:
First rule – cool them completely before even thinking about storage. Any residual warmth will create condensation, and that’s the fast track to soggy ghost sadness. I usually leave mine in the turned-off oven overnight if I’m not in a rush – they come out perfectly dry every time.
For containers, airtight is absolutely essential. My favorites are:
- Cookie tins lined with parchment paper (great for large batches)
- Glass jars with rubber seals (I save my big pickle jars just for this!)
- Ziplock bags with all the air squeezed out (in a pinch)
Keep them at room temperature – no fridge! The cold makes them weep (learned that the hard way last Halloween). They’ll last about 1-2 weeks stored properly, though honestly mine never last that long between nibbles and sharing!
One last tip – if your kitchen tends to be humid, toss in a silica packet or a few grains of uncooked rice in the container. It helps absorb any moisture that sneaks in. Just don’t let it touch the meringues directly – we want ghostly white, not rice-speckled!
Ghostly Meringues Nutritional Information
Here’s the spooky truth about these floating phantoms – they’re surprisingly light on guilt while being heavy on Halloween fun! Just remember these numbers are estimates (ghosts are tricky to pin down, after all). Based on 12 equal servings per batch, each wispy meringue contains roughly:
- 60 calories – barely a blip on the radar compared to typical Halloween treats
- 14g sugar (all from natural sources – no added nasties!)
- 0g fat – these ghosts leave no greasy traces behind
- 1g protein courtesy of those magical egg whites
- 0mg cholesterol – perfect for haunting health-conscious folks
A quick note for my fellow ingredient detectives – since we’re using plain white sugar, these are technically not “refined sugar free.” But for special occasions like Halloween? Totally worth it for that perfect crisp texture. I’ve tried versions with coconut sugar and maple syrup, but they just don’t achieve the same ghostly white purity or airy crunch.
The best part? These disappear on your tongue almost as fast as real ghosts vanish – so you can enjoy that sweet, ethereal experience without weighing yourself down. Just maybe don’t eat the whole haunted batch in one sitting… not that I’d know anything about that!
Frequently Asked Questions
Over the years, I’ve gotten so many questions about these ghostly treats – here are answers to the ones that pop up most often:
“Can I make these ahead for my Halloween party?”
Absolutely! These are actually perfect make-ahead treats. Meringues keep beautifully for up to 2 weeks when stored properly (see my storage tips above). I often bake mine a week before Halloween – the crisp texture actually improves after a day or two! Just wait to display them until party time so they don’t absorb any kitchen smells.
“Why did my meringues weep or collapse?”
Oh honey, we’ve all been haunted by weeping meringues! Usually it’s one of three ghosts in the machine:
- Humidity – Egg whites absorb moisture from humid air like little sponges
- Underbaking – If they’re not fully dried inside, they’ll deflate as they cool
- Grease contamination – Even a speck of oil in your bowl can sabotage the whole batch
My foolproof solution? Choose a dry day, bake until crisp through, and triple-check your equipment is spotless!
“Can I add food coloring to make different colored ghosts?”
Technically yes, but I don’t recommend it for first-timers. Adding liquid coloring can deflate your meringue. If you must have purple or green ghosts, use gel food coloring and add it very sparingly at the very end of mixing. Personally, I think classic white ghosts are the most striking – especially with some edible glitter for that “ectoplasm” effect!
“What’s the best way to pipe ghost shapes?”
Here’s my piping secret: hold the bag straight up about 1/2 inch above the pan, squeeze firmly until you have a nice round base, then quickly pull up as you ease pressure to create the wispy tail. If yours aren’t perfect, no worries – just call them “casual ghosts”! Pro tip: practice your piping technique on parchment first – you can always scrape the meringue back into your bag.
“Can I freeze leftover meringues?”
Honestly? I’ve never had leftovers to freeze! But if you somehow do, freeze them in a single layer first before transferring to an airtight container. Thaw at room temperature when ready to serve. They might lose some crispness, but a quick 10-minute bake at 200°F will revive them. Though between you and me – they’re best fresh!
Share Your Spooky Creations
Now that you’ve mastered the art of ghostly meringues, I want to see your spooky masterpieces! There’s nothing I love more than waking up to photos of your floating phantoms in my inbox or social media feed. Did you make ghost families? Tiny haunted houses with meringue ghosts peeking out? Get creative with edible glitter for some ectoplasm sparkle? Snap a pic and tag me – I’ll feature my favorites in my monthly newsletter!
Last year, one reader made an entire graveyard scene with tombstone cookies and meringue ghosts rising from the “ground” – I still think about that brilliant idea! Another sent me photos of their kid decorating the ghosts with mini chocolate chip eyes (adorable alert!). Whether yours turn out picture-perfect or charmingly lopsided (my early batches certainly were!), share the fun. Use #GhostlyMeringues so we can all ooh and ahh over your edible apparitions. Who knows – your creation might inspire next year’s Halloween baking adventure!
P.S. If you run into any haunted baking troubles, just whisper my name three times… or better yet, drop me a message. I love helping fellow meringue enthusiasts conquer their kitchen ghosts!
Print
Spooky Ghostly Meringues That Will Haunt Your Taste Buds
- Total Time: 2 hours 15 minutes
- Yield: 12 meringues 1x
- Diet: Vegetarian
Description
Crisp, light, and airy meringues with a ghostly white appearance. Perfect for Halloween or any spooky-themed event.
Ingredients
- 4 large egg whites
- 1 cup granulated sugar
- 1/4 teaspoon cream of tartar
- 1/2 teaspoon vanilla extract
Instructions
- Preheat your oven to 200°F (95°C). Line a baking sheet with parchment paper.
- Beat egg whites and cream of tartar until soft peaks form.
- Gradually add sugar while continuing to beat until stiff peaks form.
- Fold in vanilla extract.
- Pipe or spoon the meringue onto the baking sheet in ghost shapes.
- Bake for 1.5 to 2 hours until crisp. Turn off the oven and let them cool inside.
Notes
- Ensure no egg yolk gets into the whites.
- Use a clean, dry bowl for best results.
- Store in an airtight container to keep them crisp.
- Prep Time: 15 minutes
- Cook Time: 2 hours
- Category: Dessert
- Method: Baking
- Cuisine: International
Nutrition
- Serving Size: 1 meringue
- Calories: 60
- Sugar: 14g
- Sodium: 15mg
- Fat: 0g
- Saturated Fat: 0g
- Unsaturated Fat: 0g
- Trans Fat: 0g
- Carbohydrates: 14g
- Fiber: 0g
- Protein: 1g
- Cholesterol: 0mg