Skip to content
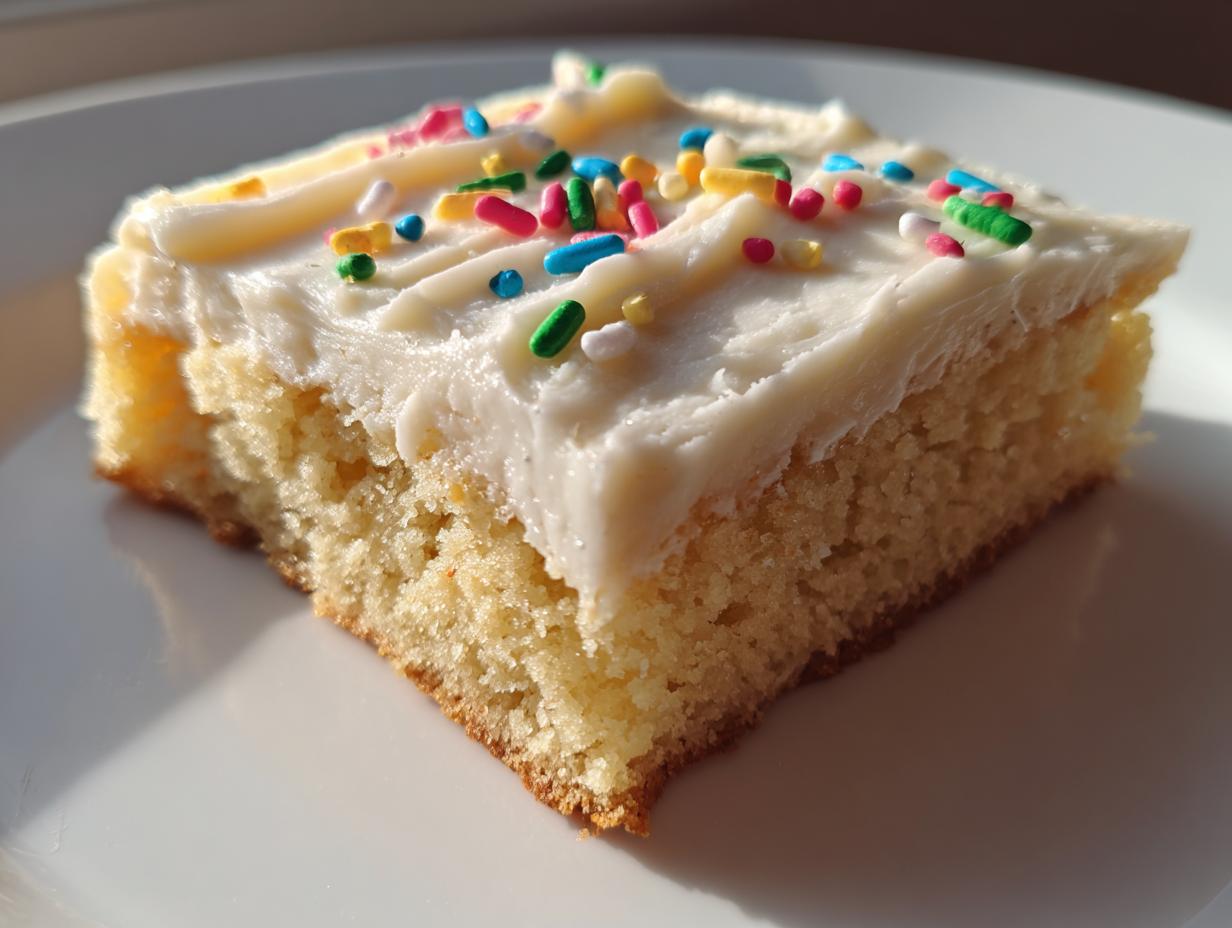
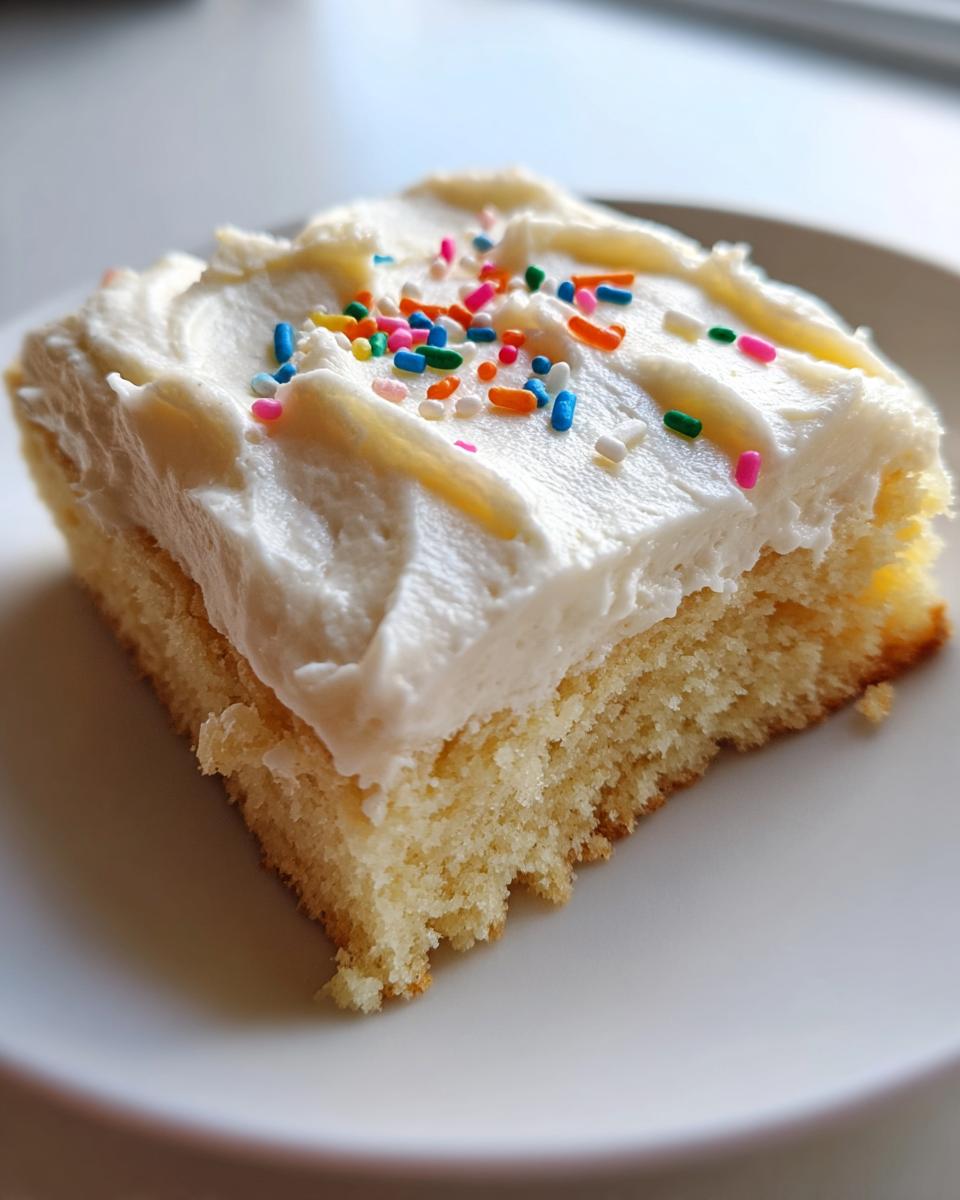
Oh my goodness, if there’s one dessert that’s guaranteed to disappear the second it hits the table, it’s these Harvest Frosted Sugar Cookie Bars. I swear, every time I make them—whether it’s for a holiday potluck, a school bake sale, or just because I’m craving something sweet—they vanish before I can even snap a photo! The base is perfectly soft and chewy, like biting into a cloud of sugar cookie heaven, and that creamy frosting on top? Absolute magic. My kids call them “the happy bars” because they never fail to bring smiles. And honestly, the best part? They’re so easy, even my buttercream-challenged sister can’t mess them up!
Why You’ll Love These Harvest Frosted Sugar Cookie Bars
Listen, these aren’t just any cookie bars – they’re little squares of pure joy that’ll make you the star of every gathering. Here’s why they’ve become my go-to recipe for over a decade:
- One-bowl wonder: You don’t need fancy equipment – just a bowl and spoon to whip up the dough (I’ve even done it with a fork in a pinch!)
- Foolproof texture: They bake up perfectly soft in the middle with just the right chew – no flat, crunchy cookie disasters here
- Instant crowd-pleaser: The combo of buttery cookie base and sweet frosting makes them disappear faster than you can say “seconds please”
- Dress them up or down: Change the sprinkles to match any season – orange and black for Halloween, pastels for Easter, or red and green for Christmas
- Perfect for impatient bakers (like me!): Unlike traditional cut-out cookies, there’s no rolling or chilling required – just spread and bake
Ingredients for Harvest Frosted Sugar Cookie Bars
Now, let’s talk ingredients – and trust me, you’ll probably have most of these in your pantry already! The beauty of these bars is their simplicity, but every single component plays a special role in creating that perfect texture and flavor. Here’s what you’ll need:
- 1 cup unsalted butter, softened – This is key! Leave it out for about 30 minutes until it’s soft enough that your finger leaves an indent, but not so soft it’s greasy
- 1 1/2 cups granulated sugar – Regular white sugar works best here for that classic sugar cookie taste
- 2 large eggs – Room temperature eggs blend in smoother – I just set mine out with the butter
- 1 teaspoon vanilla extract – The good stuff makes a difference! I use pure vanilla rather than imitation
- 2 3/4 cups all-purpose flour – No need to sift, just fluff it up with a fork before measuring
- 1/2 teaspoon baking powder – Our little rising agent secret – don’t skip this!
- 1/2 teaspoon salt – Balances all that sweetness perfectly
For the frosting (which, let’s be honest, is half the magic):
- 2 cups powdered sugar – No need to pack it, just spoon it into your measuring cup
- 3 tablespoons milk – Whole milk makes the creamiest frosting, but any kind works
- 1 teaspoon vanilla extract – Same good quality as in the cookie base
- Food coloring (optional) – My kids love when I make pastel pink or sky blue frosting
- Sprinkles (optional) – The more colorful, the better in my house!
See? Nothing fancy – just good, simple ingredients that come together to make something absolutely magical. Now let’s get mixing!
How to Make Harvest Frosted Sugar Cookie Bars
Alright friends, let’s get into the good stuff! These bars come together in just a few simple steps, but I’ve got some tried-and-true tricks to share that’ll guarantee perfection every time. Grab your apron and let’s bake some happiness!
Baking the Cookie Base
First things first – preheat that oven to 375°F (190°C). While it’s heating up, grab your 9×13-inch pan and grease it really well – I like to use butter and a light dusting of flour, but baking spray works great too!
- In a large bowl, cream together the softened butter and sugar until it’s light and fluffy – this should take about 2-3 minutes with a hand mixer. You’ll know it’s ready when the mixture turns pale yellow and looks almost like whipped cream.
- Add the eggs one at a time, beating well after each addition, then mix in the vanilla. Resist the urge to rush this step – properly incorporated eggs mean a better texture!
- In another bowl, whisk together the flour, baking powder, and salt. Gradually add this to the wet ingredients, mixing just until combined. The dough should be thick but spreadable – if it feels too sticky, you can chill it for 15 minutes.
- Spread the dough evenly in your prepared pan using a spatula or your fingers (lightly dampened hands work wonders here). Try to get it as even as possible so everything bakes uniformly.
- Bake for 20-25 minutes until the edges just start turning golden brown. The center might look slightly underdone – that’s perfect! It’ll set as it cools.
Preparing the Frosting
While your cookie base is cooling (and trust me, you’ll want to wait until it’s completely cool!), let’s make that dreamy frosting:
- In a medium bowl, whisk together the powdered sugar, milk, and vanilla. Start with just 2 tablespoons of milk and add more as needed – you want it thick but spreadable.
- If using food coloring, add just a drop at a time until you reach your desired color. I like pastel shades for these bars – they look so pretty!
- Pro tip: If your frosting seems too thin, add more powdered sugar a tablespoon at a time. Too thick? Add milk a teaspoon at a time until perfect.
Assembling and Serving
Now for the fun part – turning these into gorgeous frosted bars!
- Make absolutely sure your cookie base is completely cool to the touch before frosting – I usually wait at least 30 minutes. Warm cookies make melty frosting nightmares!
- Spread the frosting evenly over the cooled cookie base using an offset spatula or butter knife. Work gently to avoid pulling up crumbs.
- Immediately add sprinkles if using – they stick best when the frosting is fresh. My kids love helping with this part!
- Let the frosting set for about 15 minutes before cutting into squares. Use a sharp knife and wipe it clean between cuts for perfect edges.
- Serve and watch them disappear! These are best enjoyed the same day but will keep (if they last that long) in an airtight container for up to 3 days.
See? Easy peasy! Now you’ve got a batch of irresistible cookie bars that’ll make you the most popular baker in town. Just try not to eat them all yourself – I speak from experience!
Tips for Perfect Harvest Frosted Sugar Cookie Bars
After making these bars more times than I can count, I’ve picked up some tricks that’ll take yours from good to “oh-my-gosh-give-me-the-recipe” amazing:
- Butter temperature matters: Too cold and it won’t cream properly, too warm and your bars will spread too much. It should give slightly when pressed but still hold its shape.
- Chill that dough: If your kitchen’s warm, pop the dough in the fridge for 15 minutes before spreading – it’ll be way easier to handle.
- Frosting thickness: Want clean slices? Make the frosting slightly thicker than you think – it holds its shape better when cutting.
- Storage secret: Layer wax paper between bars when storing to prevent sticking. They keep best at room temperature – the fridge makes them dry out.
- Even baking: Rotate your pan halfway through baking for perfectly even color – my oven’s always hotter in the back!
Trust me, these little tweaks make all the difference!
Variations for Harvest Frosted Sugar Cookie Bars
One of my favorite things about this recipe is how easily you can switch it up to match your mood or the season! Here are some of our family’s tried-and-true twists that keep these bars exciting every time we make them:
Flavor Twists
- Lemon Sunshine: Add 1 tablespoon of fresh lemon zest to the frosting for a bright, citrusy pop. My neighbor calls this version “summer in a square”!
- Almond Dream: Swap half the vanilla extract for almond extract in both the cookie base and frosting – it tastes just like those fancy bakery cookies.
- Chocolate Drizzle: Melt 1/4 cup chocolate chips and drizzle over the frosting before adding sprinkles. Kids go wild for this one!
Seasonal Sprinkles
- Harvest Fest: Mix autumn-colored sprinkles with a pinch of cinnamon in the frosting for that cozy fall feeling.
- Winter Wonderland: Use white nonpareils and a drop of blue food coloring for frosty-looking bars perfect for holiday cookie swaps.
- Spring Fling: Pastel sprinkles and a touch of rose water in the frosting make these bars Easter basket-worthy.
Texture Play
- Crispy Edges Lover: Bake in a metal pan instead of glass and add 2 extra minutes for slightly crispier edges (my husband’s favorite way).
- Chewy Center Fan: Underbake by 1-2 minutes and chill before cutting for extra fudgy middles.
- Candy Crunch: Press crushed candy canes, toffee bits, or chopped nuts into the frosting before it sets.
The best part? You can mix and match these ideas to create your own signature version. Last Christmas, I did almond frosting with crushed peppermint on top, and let me tell you – Santa definitely came back for seconds!
Storage and Reheating
Okay, let’s talk about keeping these heavenly Harvest Frosted Sugar Cookie Bars fresh (if there are any leftovers, that is – no judgment here!). Having made these dozens of times, I’ve learned exactly how to keep them tasting like they just came out of the oven:
- Room temp is best: Store cooled bars in an airtight container at room temperature for up to 3 days. The frosting stays perfect this way – no sweating or melting!
- Layer with care: If stacking, place parchment or wax paper between layers to prevent sticking. Those sprinkles can get a little grabby!
- Frosting first aid: If your frosting seems soft after storing, pop the container in the fridge for 15 minutes before serving to firm it up.
- No microwave magic: These bars don’t need reheating – they’re meant to be enjoyed at room temp. But if you must, 5 seconds in the microwave max or you’ll have a melty mess.
- Travel tip: Taking these to a party? Transport them in their baking pan with foil over the top – the edges stay protected and they’re easier to cut fresh at your destination.
Pro tip from my many baking fails: The bars actually taste better the next day as the flavors meld – just keep them covered tight. The frosting might lose some shine after day two, but the taste stays amazing. Now you’ve got the inside scoop on keeping these treats perfect from first bite to last!
Frequently Asked Questions
Over the years, I’ve gotten so many questions about these Harvest Frosted Sugar Cookie Bars – and honestly, I love chatting about them! Here are the answers to the most common things people ask me:
Can I use salted butter instead of unsalted?
Absolutely! I prefer unsalted because it lets me control the salt level, but salted butter works in a pinch. Just reduce the added salt in the recipe to 1/4 teaspoon. The bars might taste slightly more savory, but still delicious!
Why are my bars crumbly when I cut them?
Oh no! Usually this means either the dough was overmixed (developing too much gluten) or they baked a bit too long. Next time, mix just until ingredients combine, and check your oven temp with a thermometer – ovens often run hot. Letting them cool completely before cutting helps too – I know it’s hard to wait!
Can I make these Harvest Frosted Sugar Cookie Bars ahead?
You bet! The cookie base keeps well for 2 days unfrosted at room temp (wrap tightly in foil). Frost them the day you plan to serve for best texture. The frosting can be made 1 day ahead and kept covered in the fridge – just stir well before using.
How do I get perfectly even frosting?
My trick? Make the frosting slightly thicker than you think you need, then use an offset spatula dipped in hot water (dried quickly). The warm metal glides smoothly for professional-looking results. Don’t stress about perfection though – homemade charm is part of the appeal!
Can I freeze these cookie bars?
I don’t recommend freezing the frosted bars – the texture changes too much. But the unfrosted cookie base freezes beautifully for up to 3 months! Just thaw at room temp and frost when ready to serve. Perfect for last-minute guests or sudden cookie cravings!
Still have questions? Drop them in the comments – I’m happy to help troubleshoot your baking adventures! Nothing makes me happier than hearing about your own Harvest Frosted Sugar Cookie Bar successes.
Nutritional Information
Okay, let’s talk numbers – but remember, we’re baking for joy here, not dieting! Here’s the nutritional breakdown per bar (based on cutting the pan into 24 equal squares):
- Calories: 180
- Sugar: 15g
- Sodium: 60mg
- Fat: 7g (4g saturated, 2g unsaturated)
- Carbohydrates: 27g
- Protein: 2g
- Cholesterol: 30mg
A quick disclaimer from my kitchen to yours: These values are estimates based on standard ingredients. Your exact numbers might vary depending on the brands you use and any substitutions or additions (those sprinkles add minimal calories but maximum happiness!). I always recommend enjoying treats mindfully – savor each bite of these Harvest Frosted Sugar Cookie Bars rather than counting every crumb!
Pro tip: If you’re watching sugar intake, you can reduce the frosting amount by half or try dusting with powdered sugar instead – but honestly? Life’s too short for unfrosted cookie bars in my book!
Share Your Creation!
Okay, now it’s your turn! I’d absolutely love to see how your Harvest Frosted Sugar Cookie Bars turn out. Did you try any fun variations? Maybe rainbow sprinkles for a birthday or crushed candy canes for the holidays? Snap a photo and share it with me – I get way too excited seeing all your creative twists!
Drop a comment below to let me know how they turned out. Was the texture perfect? Did your family go crazy for them? Any brilliant modifications I should try? Your feedback helps make these recipes even better for everyone.
And hey – if you loved these bars as much as we do, would you do me a huge favor? Share this recipe with your fellow dessert lovers! Pin it, tweet it, or just text it to your best baking buddy. Nothing makes me happier than knowing these sweet little squares are bringing joy to kitchens everywhere. You can also find more inspiration on Pinterest!
Happy baking, friends! May your cookie bars be as sweet as the memories you’ll make sharing them.
Print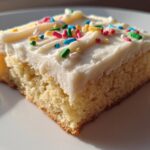
Irresistible Harvest Frosted Sugar Cookie Bars – 24 Sweet Bites of Joy
- Total Time: 40 minutes
- Yield: 24 bars 1x
- Diet: Vegetarian
Description
Soft and chewy sugar cookie bars topped with a creamy frosting, perfect for any occasion.
Ingredients
- 1 cup unsalted butter, softened
- 1 1/2 cups granulated sugar
- 2 large eggs
- 1 teaspoon vanilla extract
- 2 3/4 cups all-purpose flour
- 1/2 teaspoon baking powder
- 1/2 teaspoon salt
- 2 cups powdered sugar
- 3 tablespoons milk
- 1 teaspoon vanilla extract
- Food coloring (optional)
- Sprinkles (optional)
Instructions
- Preheat oven to 375°F and grease a 9×13-inch baking pan.
- In a large bowl, cream butter and sugar until light and fluffy.
- Add eggs and vanilla, mixing well.
- Stir in flour, baking powder, and salt until combined.
- Spread dough evenly in the prepared pan.
- Bake for 20-25 minutes or until edges are lightly golden. Cool completely.
- In a bowl, whisk powdered sugar, milk, and vanilla until smooth. Add food coloring if desired.
- Spread frosting over cooled bars and add sprinkles. Cut into squares.
Notes
- Store in an airtight container for up to 3 days.
- For thicker frosting, use less milk.
- Chill dough for 30 minutes for easier spreading.
- Prep Time: 15 minutes
- Cook Time: 25 minutes
- Category: Dessert
- Method: Baking
- Cuisine: American
Nutrition
- Serving Size: 1 bar
- Calories: 180
- Sugar: 15g
- Sodium: 60mg
- Fat: 7g
- Saturated Fat: 4g
- Unsaturated Fat: 2g
- Trans Fat: 0g
- Carbohydrates: 27g
- Fiber: 0g
- Protein: 2g
- Cholesterol: 30mg