Skip to content
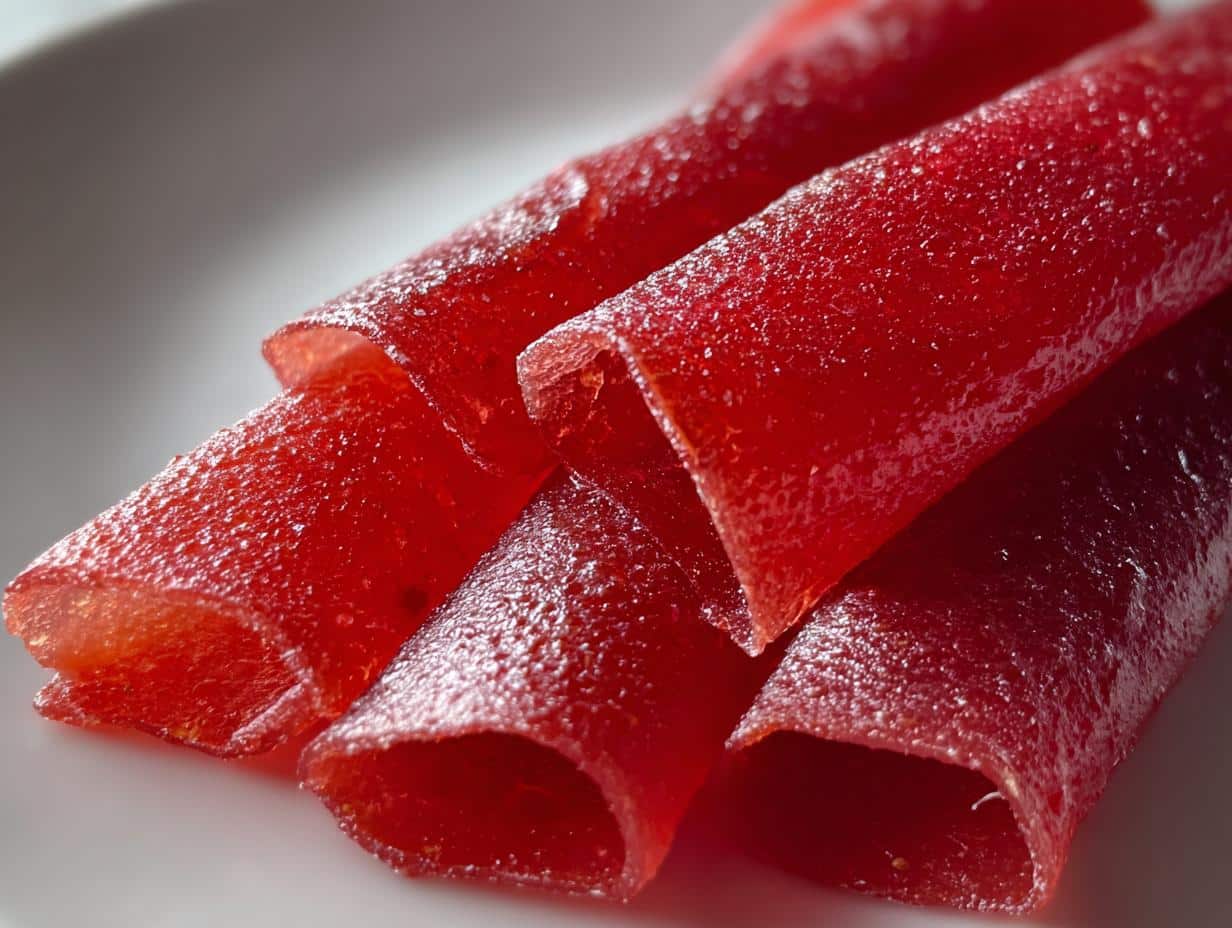
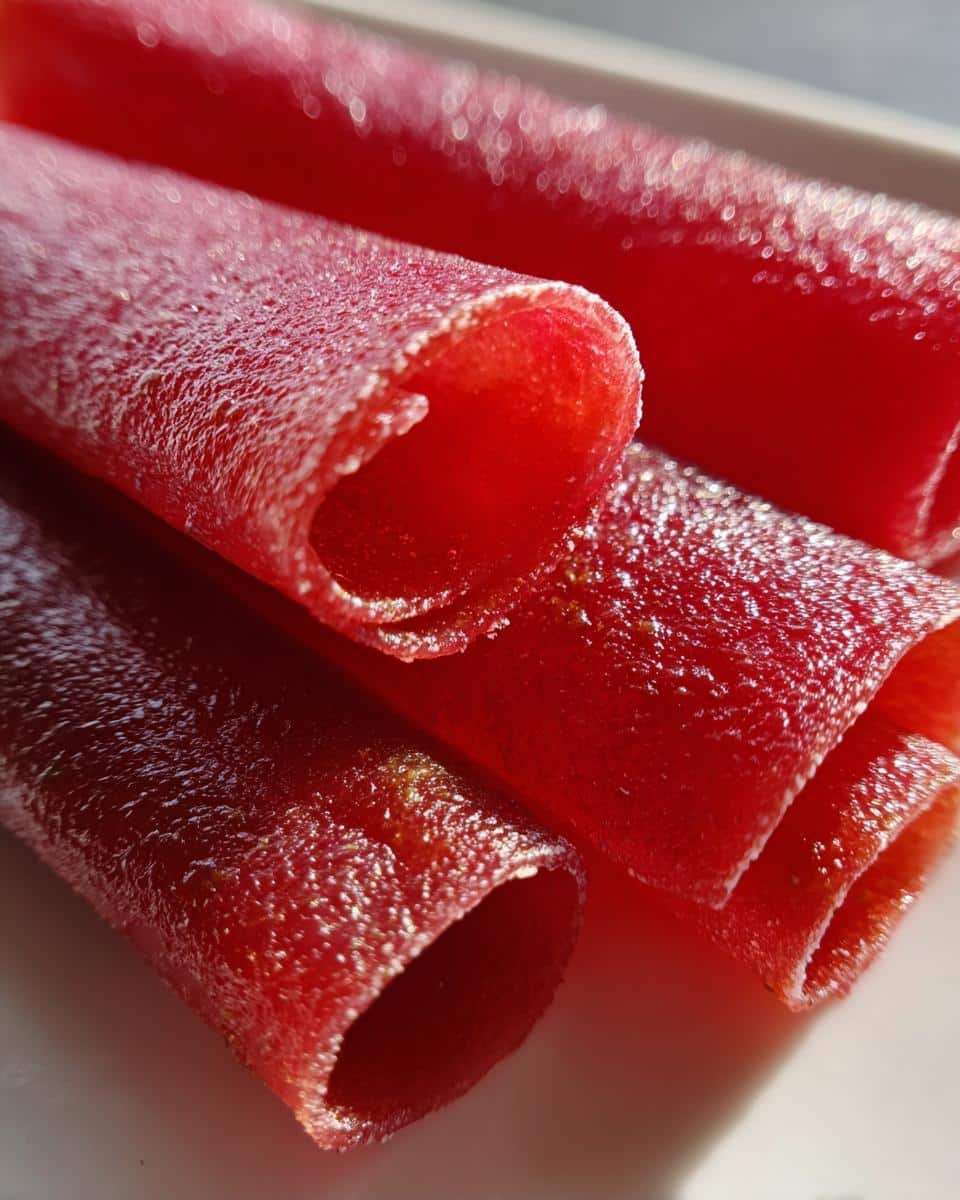
Remember those sticky-fingered afternoons as a kid, peeling neon-colored fruit roll-ups off plastic wrappers? Oh, how I loved them! But as a mom now, I cringe at the ingredient lists – all that corn syrup and artificial who-knows-what. So I set out to create Homemade Fruit Roll-Ups that could satisfy my toddler’s sweet tooth while keeping this health-conscious mama happy. After countless batches (some disasters, some happy accidents), I perfected this ridiculously simple recipe using just fresh berries, a splash of lemon, and optional honey. No dehydrator needed – just your oven and some patience while your kitchen fills with the sweetest, fruity aroma. Trust me, watching your little one’s eyes light up as they unfurl these naturally sweet strips makes every minute worth it!
Why You’ll Love These Homemade Fruit Roll-Ups
Let me tell you why this recipe is about to become your go-to snack solution – and why my toddler literally claps when she sees me pulling out the baking sheet:
- No sugar guilt: Just pure fruit sweetness (and a hint of honey if you want). No sneaky corn syrup or unpronounceable additives!
- Toddler-tested: The perfect finger-food texture – sturdy enough for little hands but melts softly in their mouths.
- Foolproof prep: Four ingredients, one blender, and your oven does most of the work while you sip coffee.
- Customizable: Swap fruits based on what’s ripe or on sale – I’ve even snuck in veggies like sweet potato puree!
Honestly? The way these make your house smell like a fruit stand is just a bonus.
Ingredients for Homemade Fruit Roll-Ups
- 2 cups fresh strawberries, hulled (about 10 oz)
- 1 cup fresh raspberries
- 1 tablespoon lemon juice (fresh squeezed is best!)
- 1 tablespoon honey (optional, but great for extra sweetness)
Ingredient Notes & Substitutions
Here’s why these simple ingredients work magic: Hulled strawberries blend smoother, but frozen berries work in a pinch (just thaw first). The lemon juice isn’t just for flavor – it keeps the color vibrant! If you’re avoiding honey, try maple syrup or skip it entirely with super ripe fruit. Raspberries add natural pectin for that perfect chewy texture, but blackberries make a fun swap.
Equipment Needed
You’ll just need a few basic kitchen tools for these Homemade Fruit Roll-Ups:
- A good blender (my trusty old one works fine!)
- Baking sheet with rimmed edges
- Parchment paper (don’t skip this – trust me!)
- A silicone spatula for spreading
That’s it! No fancy dehydrator needed.
How to Make Homemade Fruit Roll-Ups – Step-by-Step
Okay, let’s get to the fun part! Making these Homemade Fruit Roll-Ups is easier than you think – I’ll walk you through each step just like I do with my best mom-friends when they come over for our weekly “snack prep” playdates.
Preparing the Fruit Mixture
First, toss those gorgeous berries into your blender (no need to be precise – I often eyeball it). Add the lemon juice and honey if you’re using it. Now, here’s my secret: pulse a few times first to break up the fruit before letting it rip on high for about 30 seconds. You want it completely smooth – no chunks! Give it a taste. Too tart? Add another teaspoon of honey. Too thick? A splash of water helps. The consistency should be like a thick smoothie.
Spreading and Baking
Line your baking sheet with parchment – seriously, don’t try foil like I did that one disastrous time! Pour your fruity blend onto the center. Use the back of a spoon or spatula to spread it evenly, about 1/8-inch thick. This part takes patience – aim for even coverage without seeing parchment peeking through. Pop it in your preheated 170°F oven and resist opening the door! They’ll need 4-5 hours to dry properly. You’ll know they’re ready when the surface isn’t sticky to touch but still slightly pliable.
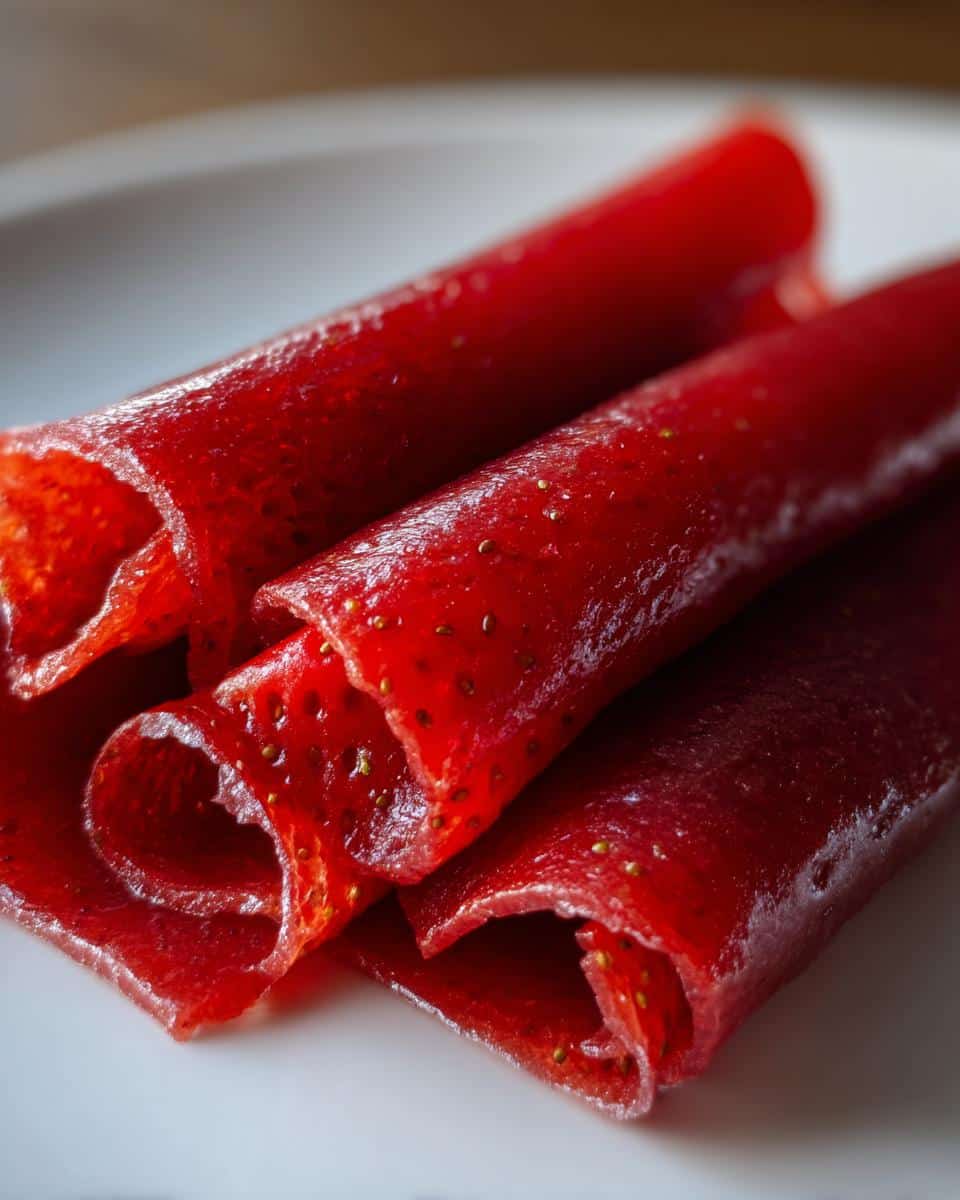
Cutting and Rolling
Here’s where the magic happens! Let your Homemade Fruit Roll-Ups cool completely on the pan – about 20 minutes. Then, use kitchen scissors to cut into strips (I make mine about 1-inch wide by 6-inches long). Carefully peel them up and roll loosely – no need to be perfect! Pro tip: If they stick, slide a butter knife gently underneath. Store in an airtight container with parchment between layers. My toddler loves “helping” with this part… though more strips end up in her mouth than the container!
The whole process is seriously satisfying – like edible arts and crafts. And that moment when you peel up your first perfect roll-up? Pure kitchen triumph!
Tips for Perfect Homemade Fruit Roll-Ups
After making dozens (okay, maybe hundreds) of batches, here are my hard-earned secrets for foolproof Homemade Fruit Roll-Ups every time:
- Ripe fruit is non-negotiable – underripe berries just won’t sweeten up enough no matter how long they bake.
- Parchment paper wrinkles? Lightly spray it with oil first – the fruit puree will glide on smoothly.
- Too sticky? They likely needed more time. Pop them back in the oven for 30-minute increments until perfect.
- Rolling trouble? If they crack, spritz lightly with water and wait a minute – they’ll become pliable again.
My biggest tip? Bake them in the morning so you can enjoy that amazing fruity scent all day!
Variations for Homemade Fruit Roll-Ups
The beauty of these Homemade Fruit Roll-Ups? You can get creative with flavors! Here are some of our family’s favorite combos:
- Tropical Twist: Swap berries for equal parts mango and pineapple – tastes like sunshine!
- Apple Pie: Use applesauce mixed with cinnamon and a pinch of nutmeg.
- Berry Medley: Try blackberries, blueberries, and strawberries together.
- Secret Veggie: Blend in cooked carrot or beet puree with raspberries (shh…they’ll never know!).
Just keep the total fruit amount about 3 cups and adjust sweetness to taste. The possibilities are endless!
Storing and Serving Suggestions
These Homemade Fruit Roll-Ups store beautifully in an airtight container at room temperature for up to a week (if they last that long!). I like layering them between parchment in a cookie tin – perfect for tossing in lunchboxes alongside cheese sticks or yogurt. They also make adorable edible ribbons when wrapped around fruit kabobs for parties!
Nutritional Information for Homemade Fruit Roll-Ups
Each naturally sweet roll-up packs about 35 calories with 8g carbs (mostly from the fruit’s natural sugars), 1g fiber, and zero fat. Exact amounts vary slightly based on your fruit’s ripeness and whether you add honey. But honestly? When something’s this pure and simple, I don’t stress about numbers – I just watch my kiddo’s berry-stained grin!
FAQs About Homemade Fruit Roll-Ups
Can I use frozen fruit for these roll-ups?
Absolutely! Frozen berries work great – just thaw and drain any excess liquid before blending. The texture might be slightly different, but the taste will still be wonderful.
How thin should I spread the mixture?
Aim for about 1/8-inch thickness – like a thin pancake batter. I use the back of a spoon to check consistency. Too thick and they’ll take forever to dry; too thin and they might become brittle.
Why did my roll-ups turn out sticky?
They probably needed more drying time. The edges often dry first, so check the center – it should feel leathery, not tacky. If needed, pop them back in the oven for another 30 minutes.
Can I make these without honey?
Of course! Super ripe fruit is sweet enough on its own. My toddler actually prefers them without any added sweetener now that her taste buds have adjusted.
Share Your Homemade Fruit Roll-Ups Experience
I’d love to hear how your fruit roll-ups turned out! Did your little ones go crazy for them? Any fun flavor combos you tried? Drop me a note below – every kitchen story makes me smile! You can also find more delicious recipes and ideas on our Pinterest page.
Print
3-Ingredient Homemade Fruit Roll-Ups Your Toddler Will Crave
- Total Time: 4-5 hours 10 minutes
- Yield: 12 roll-ups 1x
- Diet: Vegetarian
Description
Homemade Fruit Roll-Ups are a naturally sweet and healthy snack option perfect for toddlers. Made with fresh fruit and no added sugars, these roll-ups are easy to prepare and fun to eat.
Ingredients
- 2 cups fresh strawberries, hulled
- 1 cup fresh raspberries
- 1 tablespoon lemon juice
- 1 tablespoon honey (optional)
Instructions
- Preheat oven to 170°F (75°C). Line a baking sheet with parchment paper.
- Blend strawberries, raspberries, lemon juice, and honey (if using) in a blender until smooth.
- Pour the mixture onto the prepared baking sheet and spread evenly.
- Bake for 4-5 hours or until the mixture is dry to the touch.
- Let cool, then cut into strips and roll up.
Notes
- Use ripe fruit for the best sweetness.
- Store in an airtight container for up to 1 week.
- Adjust baking time based on thickness.
- Prep Time: 10 minutes
- Cook Time: 4-5 hours
- Category: Snack
- Method: Baking
- Cuisine: American
Nutrition
- Serving Size: 1 roll-up
- Calories: 35
- Sugar: 6g
- Sodium: 0mg
- Fat: 0g
- Saturated Fat: 0g
- Unsaturated Fat: 0g
- Trans Fat: 0g
- Carbohydrates: 8g
- Fiber: 1g
- Protein: 0g
- Cholesterol: 0mg