Skip to content
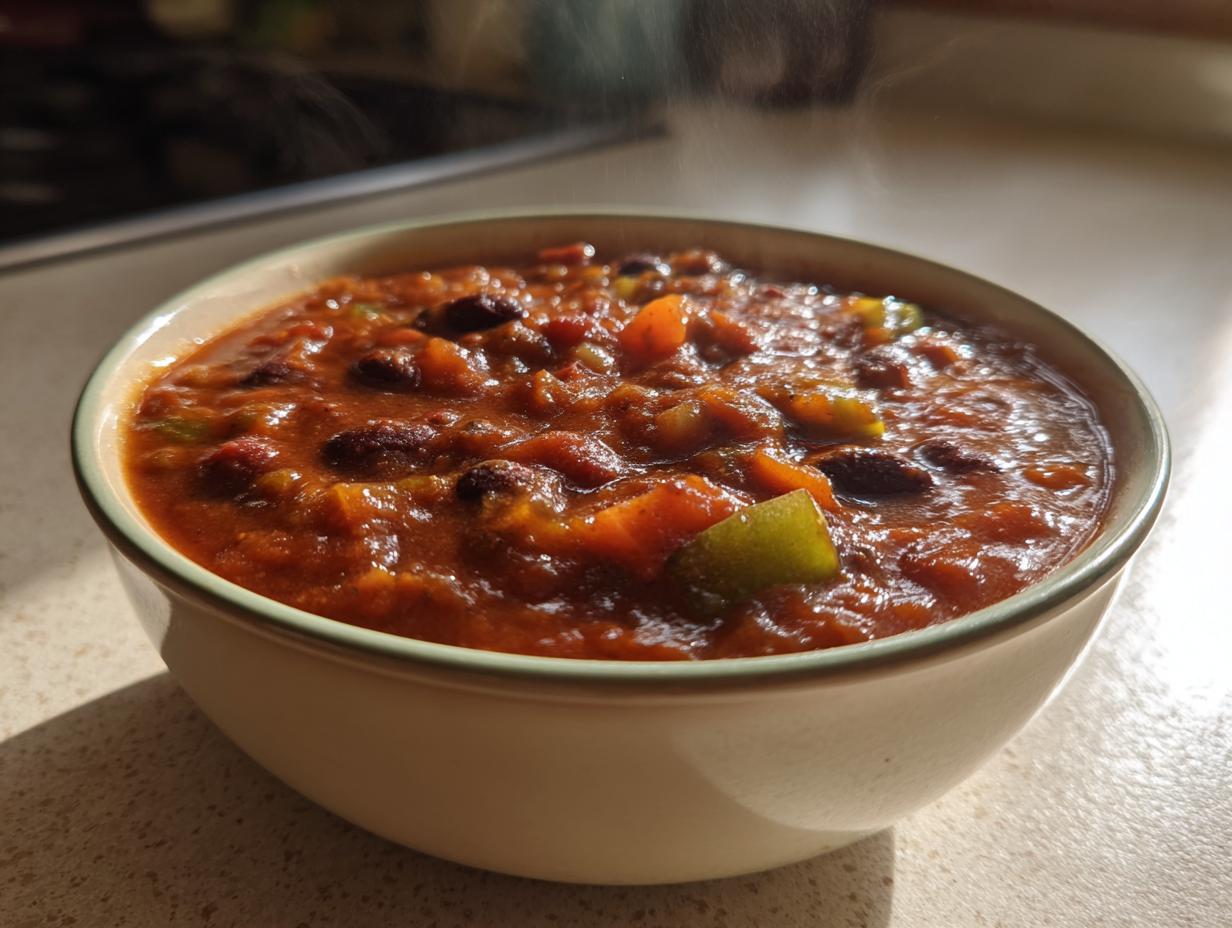
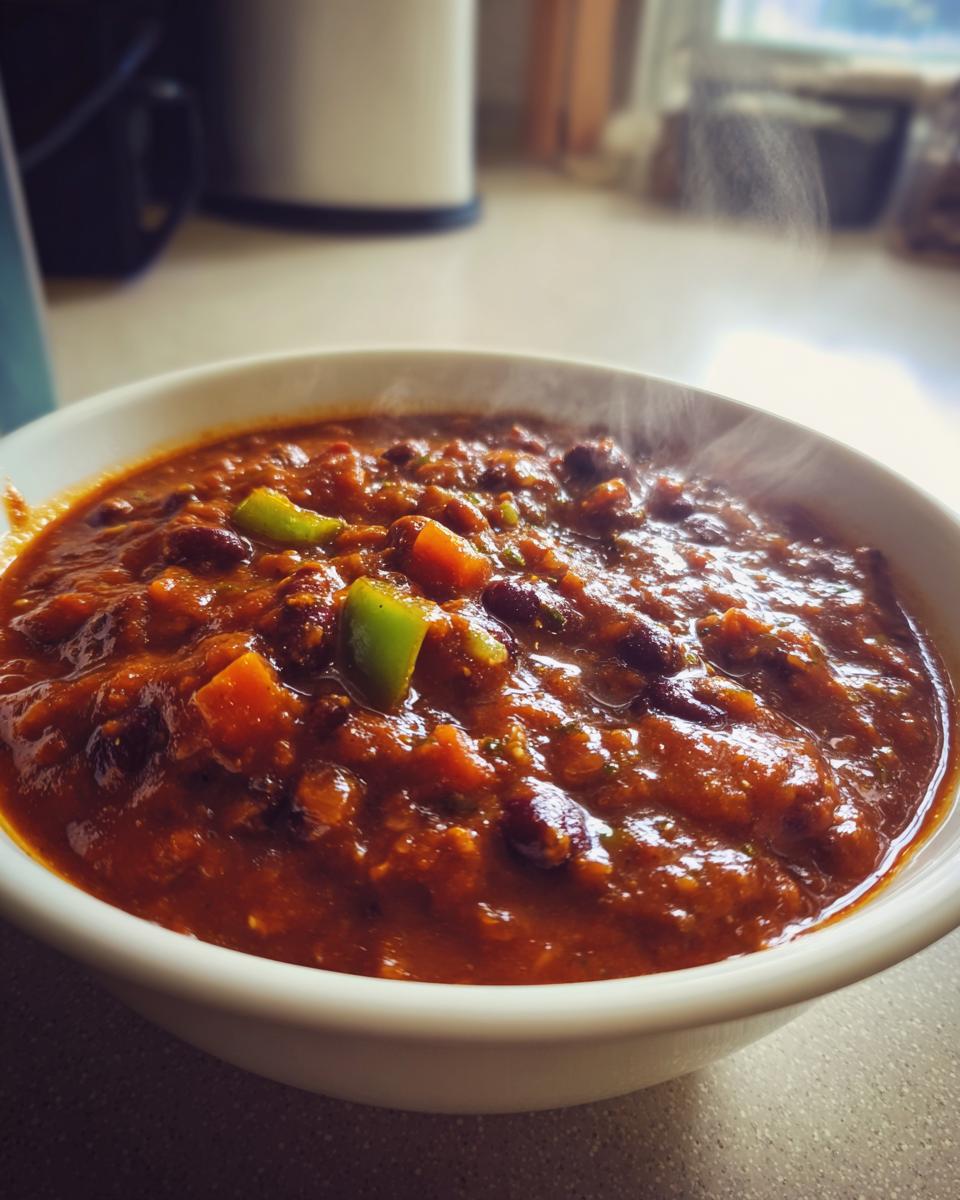
Picture this: It’s a chilly Sunday afternoon, and my tiny apartment smells like heaven—onions sizzling in olive oil, garlic turning golden, and a big pot of my homemade vegetarian chili bubbling away on the stove. This isn’t just any chili, my friend. It’s the kind of dish that makes you want to curl up on the couch with a fuzzy blanket and a bowl so big it could double as a serving platter. I’ve been making this exact recipe for years, tweaking it here and there until it became my ultimate comfort food. The best part? It’s stupidly easy to throw together, packed with protein from all those beautiful beans, and totally customizable depending on what’s lurking in your fridge. Whether you’re feeding a crowd or just yourself (hello, amazing leftovers!), this vegetarian chili never lets me down.
Why You’ll Love This Homemade Vegetarian Chili
Listen, I know everyone claims their chili is the best, but trust me—this homemade vegetarian chili is special. Here’s why:
- Quick & easy: From chopping to serving, it’s ready in 30 minutes flat. Perfect for those “I forgot to meal prep” nights.
- Flavor bomb: The combo of chili powder, cumin, and smoked paprika gives it that deep, rich taste you’d swear came from meat.
- Protein powerhouse: Between the black beans and kidney beans, each bowl packs 12g of plant-based protein.
- Your kitchen, your rules: Throw in extra veggies, swap spices, or crank up the heat—it’s endlessly adaptable.
Seriously, this chili tastes like it simmered all day, but shhh—I won’t tell if you don’t.
Ingredients for Homemade Vegetarian Chili
Here’s everything you’ll need to make this cozy pot of goodness. I’m super specific about measurements because, trust me, that’s what makes this chili just right every single time:
- 1 tablespoon olive oil (or any neutral oil you have on hand)
- 1 onion, diced (yellow or white works best here)
- 2 cloves garlic, minced (or 1 teaspoon garlic powder in a pinch)
- 1 bell pepper, diced (any color – I usually grab whatever’s on sale)
- 1 carrot, diced (about ½ cup – don’t skip this! It adds natural sweetness)
- 1 can (15 oz) black beans, drained and rinsed (liquid makes the chili weirdly soupy)
- 1 can (15 oz) kidney beans, drained and rinsed (or pinto beans if that’s what’s in your pantry)
- 1 can (15 oz) diced tomatoes (fire-roasted are my favorite for extra depth)
- 2 cups vegetable broth (low-sodium so you can control the salt)
- 2 tablespoons chili powder (the backbone flavor – don’t skimp!)
- 1 teaspoon cumin (it’s not chili without that earthy warmth)
- 1 teaspoon paprika (regular or smoked – your choice!)
- Salt and pepper to taste (I always add this at the very end)
Ingredient Notes & Substitutions
No canned tomatoes? Use 2 cups fresh diced tomatoes (just simmer a bit longer). Out of vegetable broth? Water works in a pinch – just add an extra pinch of salt. For extra smokiness, try adding a chipotle pepper in adobo sauce (but careful – they’re spicy!). And if you’re like me and always forget to buy fresh garlic, 1 teaspoon garlic powder = about 2 cloves fresh.
Equipment Needed for Homemade Vegetarian Chili
Good news! You probably already have everything you need to make this chili. Here’s the short and sweet list:
- Large pot or Dutch oven (at least 4 quarts – this makes a big batch!)
- Wooden spoon or sturdy spatula (for all that stirring and scraping)
- Chef’s knife and cutting board (for prepping all those fresh veggies)
- Can opener (unless you’re using fresh tomatoes and soaked beans)
- Measuring spoons (those spices need to be just right)
That’s it! No fancy gadgets needed – just like Grandma used to make (if Grandma was a busy vegetarian).
How to Make Homemade Vegetarian Chili
Okay, let’s get cooking! This homemade vegetarian chili comes together in three simple steps that even my kitchen-averse roommate could follow. Just follow along – I promise it’s easier than folding a fitted sheet!
Step 1: Sauté the Vegetables
First, grab that trusty pot and heat your olive oil over medium heat. You’ll know it’s ready when a tiny piece of onion sizzles immediately. Toss in your diced onions and give them a good stir – we’re looking for them to turn translucent, not brown (about 3 minutes). Now add the minced garlic and stir constantly for just 30 seconds until fragrant – any longer and it might burn! Throw in the bell pepper and carrot next, stirring occasionally until they start to soften (about 5 minutes). This trio forms the flavor base of your chili, so don’t rush this step!
Step 2: Add Beans and Liquids
Here’s where the magic happens! Make sure those canned beans are properly drained and rinsed (trust me, that starchy liquid makes the texture weird). Dump in the black beans, kidney beans, diced tomatoes with their juices, and vegetable broth. Give everything a good stir – I like to scrape up any browned bits from the bottom of the pot for extra flavor. The liquid should just cover the ingredients – if it looks too thick, add a splash more broth.
Step 3: Season and Simmer
Now for the flavor party! Sprinkle in your chili powder, cumin, and paprika. Here’s my pro tip: start with half the spices, stir, then taste and add more as needed. Bring everything to a lively boil, then immediately reduce to a gentle simmer (that’s when you see occasional bubbles breaking the surface). Let it bubble away uncovered for 20 minutes – this lets the flavors marry and the liquid reduce to that perfect chili consistency. Give it a final taste and adjust salt and pepper right before serving. Oh, and don’t forget to turn off the burner – I may or may not have learned that lesson the hard way!
Tips for Perfect Homemade Vegetarian Chili
After making this chili more times than I can count (and eating plenty of trial batches), here are my absolute must-know tricks for chili perfection:
- Taste as you go: Always check the seasoning about 5 minutes before serving – the flavors really pop at the end!
- Need it thicker? Mix 1 tablespoon cornstarch with 2 tablespoons cold water, then stir it in during the last 5 minutes of simmering.
- Better the next day: If you can wait, refrigerate it overnight – the flavors deepen beautifully.
- Don’t skimp on simmer time: Those 20 minutes are crucial for the carrots to soften and flavors to marry.
- Acid is magic: A splash of lime juice or vinegar at the end brightens everything up.
Oh, and one bonus tip from my last kitchen disaster – if it gets too spicy, stir in a spoonful of peanut butter to mellow it out. You’re welcome!
Serving Suggestions for Homemade Vegetarian Chili
Now for the fun part – dressing up your bowl of homemade vegetarian chili! I always set out a little topping bar because, let’s be honest, half the joy is in the garnishes. My must-haves:
- Creamy dream team: Avocado slices, sour cream, or shredded cheese (cheddar and Monterey Jack are my faves)
- Fresh pops: Chopped cilantro, green onions, or a squeeze of lime
- Crunch factor: Tortilla chips or oyster crackers for texture
And don’t forget the sides – warm cornbread or crusty bread is perfect for soaking up every last drop. For a full meal, I’ll sometimes serve it over baked potatoes or rice too. Honestly? It’s so good I’ve eaten it straight from the pot with a spoon. No judgment here!
Storage & Reheating Instructions
Here’s the beautiful thing about this homemade vegetarian chili – it gets even better as leftovers! Store cooled chili in an airtight container in the fridge for up to 3 days. When reheating, I prefer the stovetop (medium-low heat with a splash of water to loosen it up), but the microwave works in a pinch – just stir every 30 seconds to avoid hot spots. Pro tip: If it thickens too much in the fridge, add a splash of broth or water when reheating to bring it back to perfect chili consistency.
Homemade Vegetarian Chili Variations
Here’s what I love about this homemade vegetarian chili – it’s like your favorite pair of jeans that you can dress up or down depending on your mood! When I’m feeling adventurous (or just cleaning out the fridge), I’ll throw in some fun extras:
- Extra veggies: Toss in a handful of corn kernels or diced zucchini during the last 10 minutes of cooking
- Spice it up: Add a diced jalapeño with the onions or a pinch of cayenne for serious heat
- Smoky twist: A teaspoon of smoked paprika or a splash of liquid smoke gives that campfire flavor
- Umami boost: Stir in a tablespoon of soy sauce or miso paste for depth
- Protein power: Crumble in some tofu or add cooked lentils for extra heartiness
The possibilities are endless – that’s the beauty of homemade vegetarian chili! Just remember to taste as you go when experimenting.
Nutritional Information
Here’s the scoop on what’s in each comforting bowl of this homemade vegetarian chili (based on my exact recipe, but remember – nutrition varies based on your ingredients and serving sizes!):
- Calories: About 250 per serving
- Protein: 12g (thank you, mighty beans!)
- Fiber: 12g (that’s nearly half your daily need!)
- Sugar: Just 5g (mostly from those sweet carrots and tomatoes)
It’s naturally low in fat (only 3g per serving) and completely cholesterol-free. Not too shabby for something that tastes this indulgent, right?
Frequently Asked Questions
Over the years I’ve made this homemade vegetarian chili, I’ve gotten the same great questions from friends and family. Here are the answers you need for chili success!
Can I freeze this vegetarian chili?
Absolutely! Let it cool completely, then portion into freezer-safe containers (leave some space at the top). It keeps beautifully for up to 3 months. Thaw overnight in the fridge before reheating – you might just need to add a splash of broth to loosen it up.
How can I make my chili spicier?
My favorite ways: add a diced jalapeño with the onions, throw in ¼ teaspoon cayenne with the other spices, or stir in a minced chipotle pepper in adobo sauce (careful – they pack heat!). Always taste as you go – you can add spice but can’t take it away!
Can I use dried beans instead of canned?
Sure thing! You’ll need about ¾ cup dried beans (soaked overnight and cooked) to replace each can. Just make sure they’re fully tender before adding to the chili – undercooked beans are no one’s friend.
Why does my chili taste bland?
Chances are it just needs more salt! Wait until the end to season, then add a pinch at a time until the flavors pop. If it’s still flat, a splash of vinegar or squeeze of lime can brighten everything up beautifully.
Share Your Homemade Vegetarian Chili Experience
Did you make this chili? I’d love to hear how it turned out! Drop a comment below with your favorite tweaks or toppings – my kitchen is always open for recipe gossip. Happy cooking!
Print
12g Protein Homemade Vegetarian Chili Recipe – Comfort in a Bowl
- Total Time: 30 minutes
- Yield: 4 servings 1x
- Diet: Vegetarian
Description
A hearty and flavorful vegetarian chili made with beans, vegetables, and spices.
Ingredients
- 1 tablespoon olive oil
- 1 onion, diced
- 2 cloves garlic, minced
- 1 bell pepper, diced
- 1 carrot, diced
- 1 can (15 oz) black beans, drained
- 1 can (15 oz) kidney beans, drained
- 1 can (15 oz) diced tomatoes
- 2 cups vegetable broth
- 2 tablespoons chili powder
- 1 teaspoon cumin
- 1 teaspoon paprika
- Salt and pepper to taste
Instructions
- Heat olive oil in a large pot over medium heat.
- Add onion, garlic, bell pepper, and carrot. Cook until softened.
- Stir in black beans, kidney beans, diced tomatoes, and vegetable broth.
- Add chili powder, cumin, paprika, salt, and pepper.
- Bring to a boil, then reduce heat and simmer for 20 minutes.
- Serve hot with your favorite toppings.
Notes
- You can add corn or zucchini for extra vegetables.
- Adjust spices to your taste.
- Store leftovers in the fridge for up to 3 days.
- Prep Time: 10 minutes
- Cook Time: 20 minutes
- Category: Main Dish
- Method: Stovetop
- Cuisine: American
Nutrition
- Serving Size: 1 bowl
- Calories: 250
- Sugar: 5g
- Sodium: 400mg
- Fat: 3g
- Saturated Fat: 0.5g
- Unsaturated Fat: 2g
- Trans Fat: 0g
- Carbohydrates: 45g
- Fiber: 12g
- Protein: 12g
- Cholesterol: 0mg