Skip to content
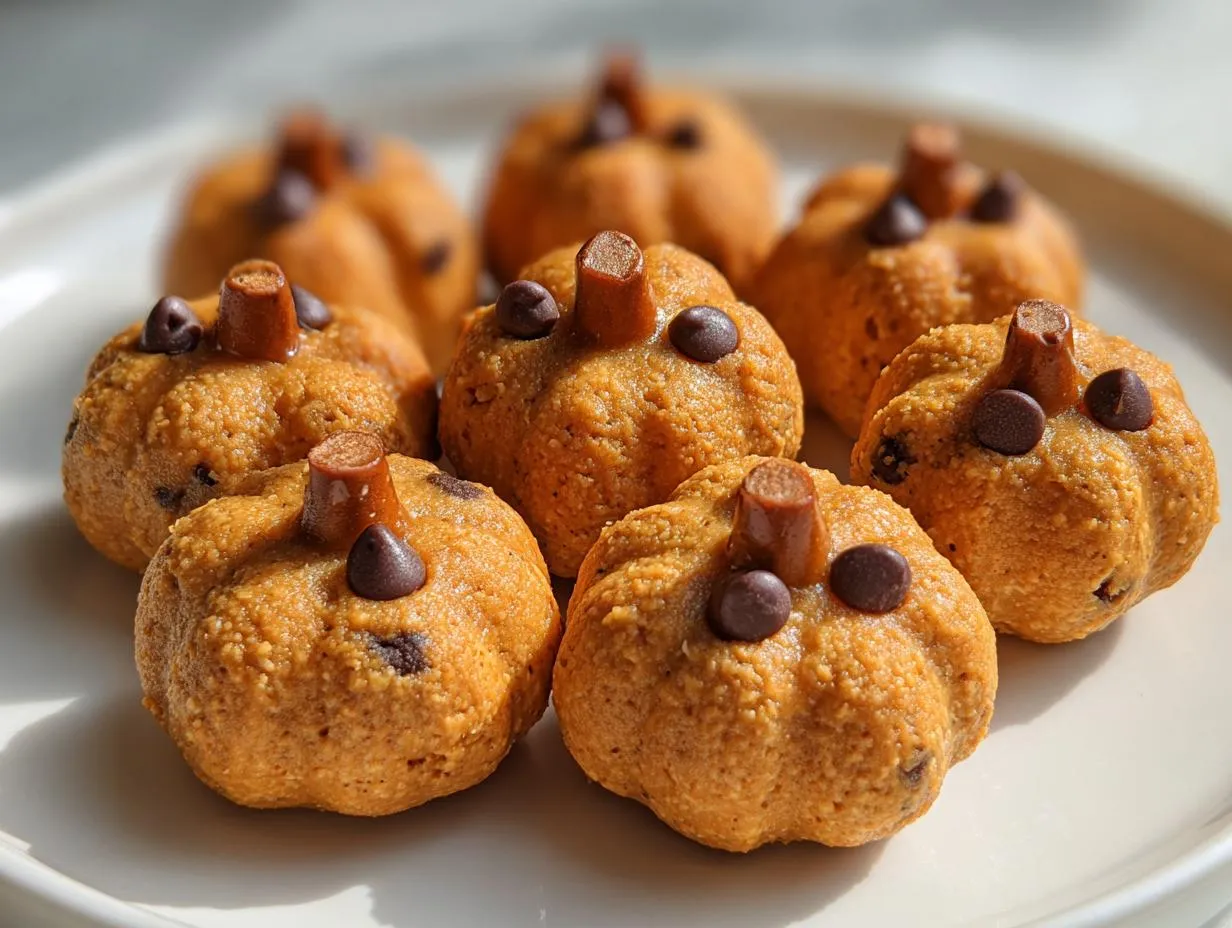
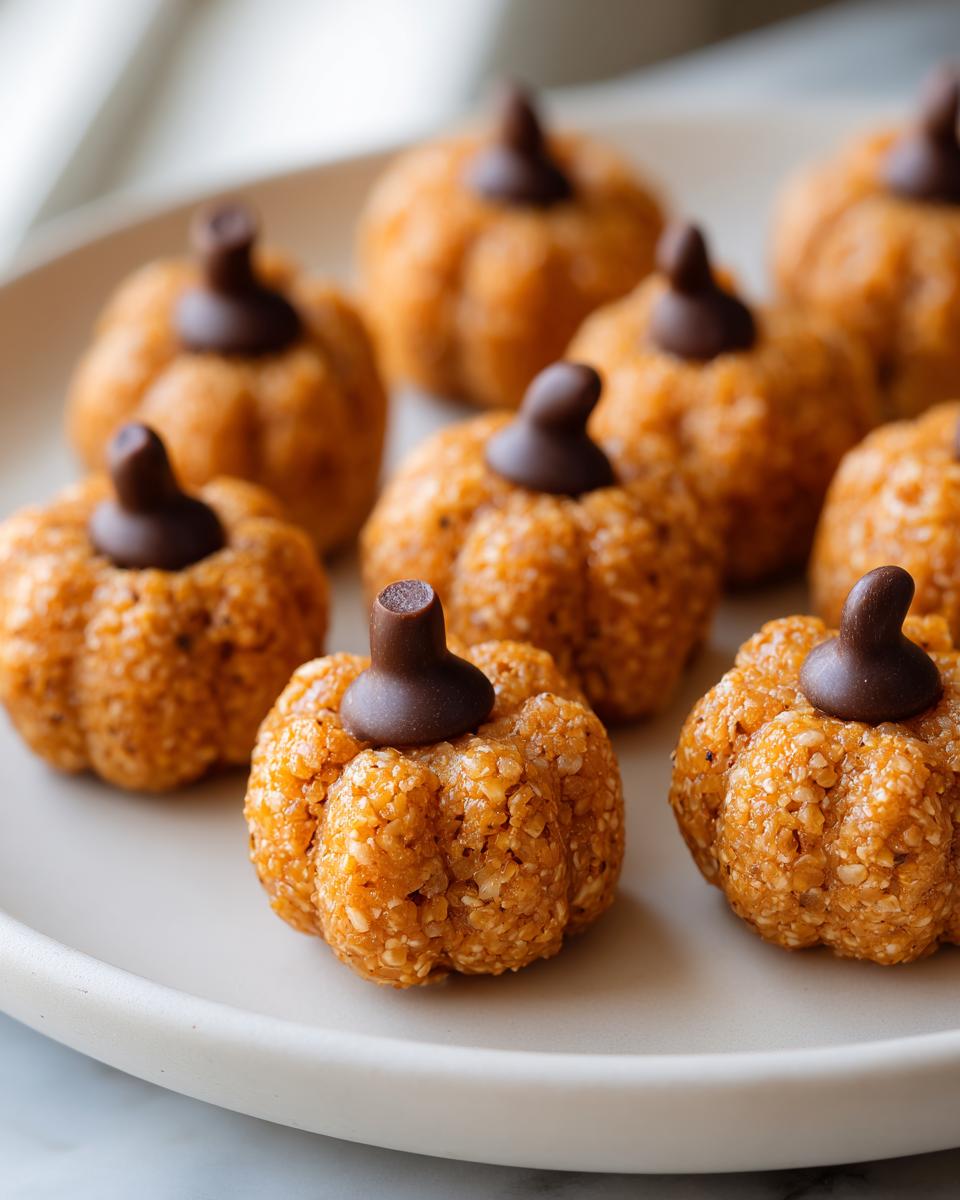
Oh my gosh, you guys—have I got the cutest Halloween treat for you! These peanut butter pumpkins are my absolute go-to when I need something festive, fun, and, best of all, no-bake. Seriously, my kids and I whip these up every October, giggling the whole time as we shape them into little orange pumpkins. It’s become our little tradition—almost as sacred as trick-or-treating! The best part? They’re so easy even my 5-year-old can help (though fair warning: there’s usually more peanut butter on her face than in the bowl). If you’re looking for a simple, adorable, and downright delicious treat that’ll steal the show at any fall gathering, you’re in the right place. Let’s make some magic!
Why You’ll Love These Peanut Butter Pumpkins
Trust me, these little guys are total crowd-pleasers—here’s why:
- No oven required—just mix, shape, and chill!
- Ready in under an hour (most of that’s just chilling time!)
- Perfect for little hands to help shape and decorate
- Endlessly customizable—go classic orange or get creative with sprinkles
- Tastes like childhood with that irresistible peanut butter-honey combo
Honestly? They disappear faster than Halloween candy at my house.
Ingredients for Peanut Butter Pumpkins
Here’s everything you’ll need to create these adorable treats:
- 1 cup creamy peanut butter (the regular kind, not natural—trust me, it makes a difference)
- 1/4 cup honey (local is my favorite for that extra floral kick)
- 1/2 cup packed powdered sugar
- 1/4 tsp vanilla extract (the real stuff, please!)
- 1/4 cup mini chocolate chips (for those cute little stems)
- Orange food coloring (optional but so fun for that pumpkin look)
- Small pretzel sticks (broken into tiny pieces for stems)
Ingredient Notes & Substitutions
Want to mix things up? Try almond butter instead of peanut butter for a nutty twist—just know it’ll be a bit looser. Maple syrup works beautifully in place of honey if you prefer. And if you only have natural peanut butter, no worries! Just reduce the honey by half since it’s already runnier. Oh, and if you’re out of mini chocolate chips? Regular ones chopped small work in a pinch!
Equipment You’ll Need
Good news—you probably already have everything required for these peanut butter pumpkins in your kitchen right now! Here’s what I grab:
- A medium mixing bowl (I love my trusty Pyrex one)
- Parchment paper or a silicone mat for easy cleanup
- A small cookie scoop (or just use your hands—a little messy, but fun!)
That’s it! No fancy gadgets needed for this simple treat.
How to Make Peanut Butter Pumpkins
Okay, let’s get our hands messy and make some adorable peanut butter pumpkins! This process is so simple, but I’ve learned a few tricks over the years to make them absolutely perfect every time. Just follow these easy steps:
Step 1: Mix the Base
First, grab that trusty mixing bowl and dump in your peanut butter, honey, powdered sugar, and vanilla. Now here’s the key—mix it really well! I usually stir for a good 2-3 minutes until it transforms from crumbly to smooth and dough-like. If your mixture seems too sticky, add a bit more powdered sugar. Too dry? A teaspoon of honey will fix it right up!
Step 2: Shape the Pumpkins
Time to get creative! Pinch off small pieces (about 1 tablespoon each) and roll them between your palms to form perfect little balls. Want those vibrant orange pumpkins? Now’s when you’d knead in a few drops of food coloring until evenly distributed. Pro tip: lightly damp hands prevent sticking when rolling!
Step 3: Add the Finishing Touches
Here comes the magic—turn those balls into pumpkins! Gently press a mini chocolate chip into the top of each one for the stem. Then take a tiny piece of pretzel stick and nestle it right next to the chocolate chip. Voila! Instant pumpkin charm. Pop them in the fridge for 30 minutes to set—if you can resist eating them right away!
Tips for Perfect Peanut Butter Pumpkins
After making these adorable treats more times than I can count, I’ve picked up some foolproof tricks:
- Chill the mixture for 10 minutes if it’s too sticky to handle—it makes shaping those perfect pumpkin balls so much easier!
- Mini chocolate chips are must—regular-sized ones overwhelm our little pumpkin friends
- Dampen your hands slightly when rolling to prevent sticking (but not too wet or the sugar will dissolve!)
- If your food coloring bleeds, pat the pumpkins dry with a paper towel before adding decorations
- For extra shine, brush with a tiny bit of honey before serving
Remember—these are supposed to be fun, not perfect! Even lopsided pumpkins taste delicious.
Serving & Storage Suggestions
These peanut butter pumpkins taste best straight from the fridge—the chill makes them extra satisfying! Store leftovers in an airtight container (if you have any) for up to a week. I love serving them with crisp apple slices for that perfect sweet-crunchy combo. They also make adorable additions to lunchboxes—just tuck them in with a freezer pack to keep them firm!
Peanut Butter Pumpkins Variations
Oh, the fun you can have with these little guys! Once you’ve mastered the classic version, try these tasty twists:
- Chocolate lovers: Mix in 1 tbsp cocoa powder with the dry ingredients for a chocolate-peanut butter combo that’ll make you swoon
- Festive sprinkles: Roll the shaped pumpkins in orange sprinkles before adding stems for extra Halloween sparkle
- Nutty crunch: Stir in 2 tbsp finely chopped peanuts for texture that’ll surprise and delight
- Spiced version: Add 1/4 tsp pumpkin pie spice to the mix for that cozy fall flavor
My kids beg for a different version every year—last October we did “zombie pumpkins” with green food coloring! What will you create?
Nutritional Information
Just a heads up—the exact numbers will depend on your specific ingredients, but here’s the general breakdown per pumpkin: about 120 calories, 7g fat, and 4g protein. They’re sweet but pack some protein punch too!
FAQs About Peanut Butter Pumpkins
Can I use crunchy peanut butter instead of creamy?
Absolutely! The texture will just be a bit different—you’ll get cute little peanut flecks in your pumpkins. I actually love the extra crunch, but for shaping, creamy does hold together slightly better. If using crunchy, you might need to add an extra tablespoon of powdered sugar to help bind everything.
How long do these peanut butter pumpkins last?
Stored properly in an airtight container in the fridge, they’ll stay fresh for about a week—if they last that long! The honey acts as a natural preservative. You can also freeze them for up to 2 months (just thaw in the fridge overnight before serving).
Can I make these without food coloring?
Of course! They’ll still be delicious—just more “ghost pumpkin” colored. For a natural orange hue, try mixing in a bit of pumpkin puree (just reduce the honey slightly) or a pinch of turmeric. Though fair warning—my kids insist the bright orange makes them taste better!
What if my mixture is too sticky to shape?
Don’t panic! Just pop it in the fridge for 10-15 minutes to firm up. You can also dust your hands with powdered sugar while shaping to prevent sticking. I’ve been there—some batches just need a little extra TLC!
Share Your Creations!
I’d love to see your peanut butter pumpkin masterpieces! Tag me on Instagram @MyKitchenAdventures so I can ooh and aah over your creations—nothing makes me happier than seeing your twists on my recipes! You can also find more inspiration on Pinterest.
Print
Irresistible Peanut Butter Pumpkins in 3 Easy Steps
- Total Time: 45 minutes (includes chilling)
- Yield: 12 pumpkins 1x
- Diet: Vegetarian
Description
A simple and fun treat perfect for Halloween or fall gatherings. These peanut butter pumpkins are easy to make and require no baking.
Ingredients
- 1 cup creamy peanut butter
- 1/4 cup honey
- 1/2 cup powdered sugar
- 1/4 tsp vanilla extract
- 1/4 cup mini chocolate chips
- Orange food coloring (optional)
- Small pretzel sticks (for stems)
Instructions
- Mix peanut butter, honey, powdered sugar, and vanilla extract in a bowl until well combined.
- Add a few drops of orange food coloring if desired and mix until evenly colored.
- Shape the mixture into small pumpkin-sized balls and place them on a parchment-lined tray.
- Press a mini chocolate chip into the top of each pumpkin for the stem.
- Insert a small piece of pretzel stick into the top to resemble a pumpkin stem.
- Chill in the refrigerator for 30 minutes to set before serving.
Notes
- Use natural peanut butter for a smoother texture.
- Adjust sweetness by adding more or less powdered sugar.
- Store leftovers in an airtight container in the fridge for up to a week.
- Prep Time: 15 minutes
- Cook Time: 0 minutes
- Category: Dessert
- Method: No-Bake
- Cuisine: American
Nutrition
- Serving Size: 1 pumpkin
- Calories: 120
- Sugar: 8g
- Sodium: 50mg
- Fat: 7g
- Saturated Fat: 2g
- Unsaturated Fat: 4g
- Trans Fat: 0g
- Carbohydrates: 12g
- Fiber: 1g
- Protein: 4g
- Cholesterol: 0mg