Skip to content
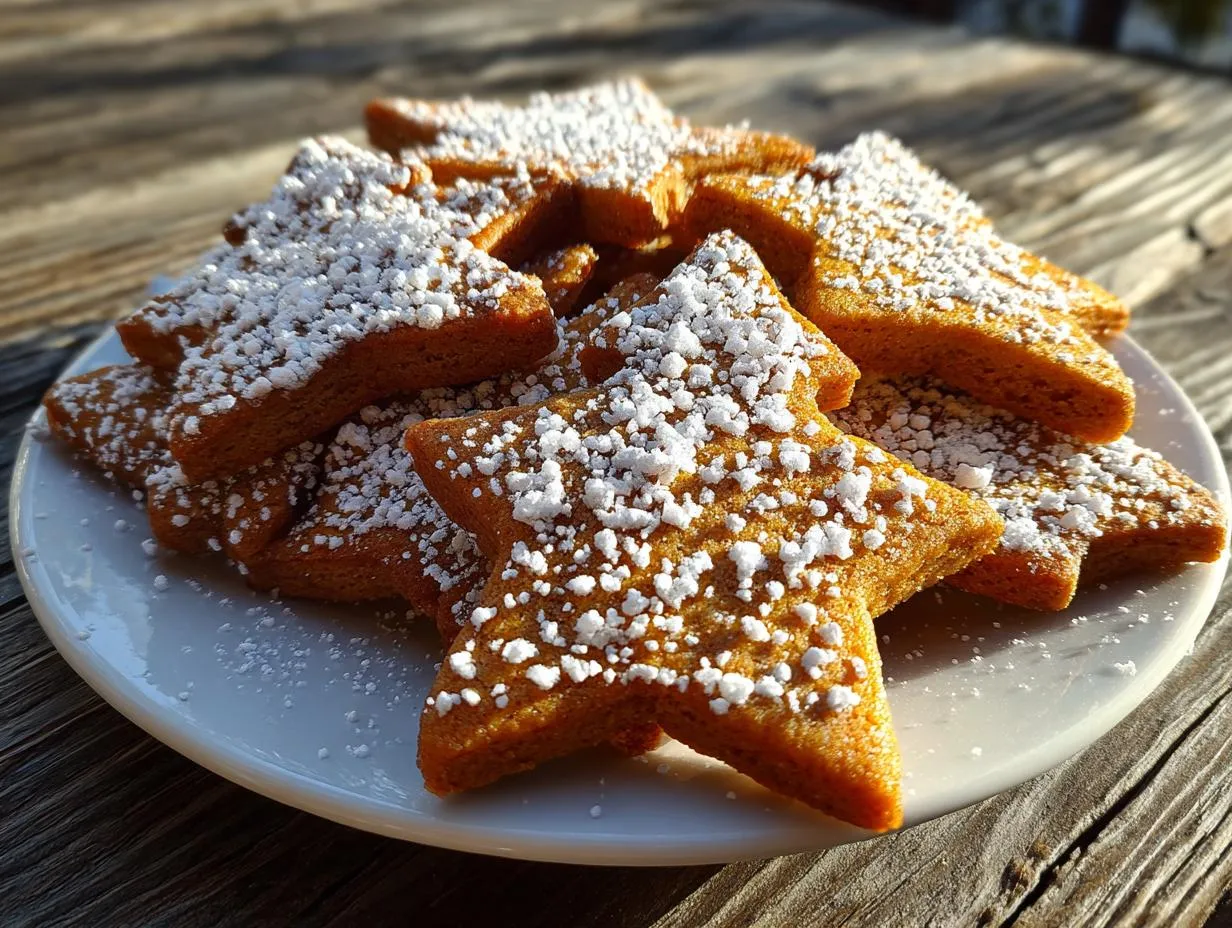
Nothing says holidays like the smell of warm gingerbread cookies baking in the oven. I still remember my first attempt at decorating these spiced beauties – flour everywhere, icing dripping off the edges, and my family laughing as we tried (and failed) to make perfect snowflakes. But that messy kitchen full of laughter? That’s the magic of gingerbread cookies for decorating.
This hidden recipe has been my go-to for years because these cookies hold their shape like champs while packing that classic gingerbread flavor. The secret? Just enough molasses to give them depth without making them too soft, plus a spice blend that’ll make your whole house smell like Christmas. Trust me, once you try rolling out this dough and seeing those crisp edges hold their shape, you’ll never go back to store-bought cookie kits again.
Why You’ll Love These Gingerbread Cookies for Decorating
Oh, where do I even start? These aren’t just any gingerbread cookies – they’re the kind that make your kitchen smell like a holiday dream and turn cookie decorating into pure joy. Here’s why they’ve become my absolute must-bake every year:
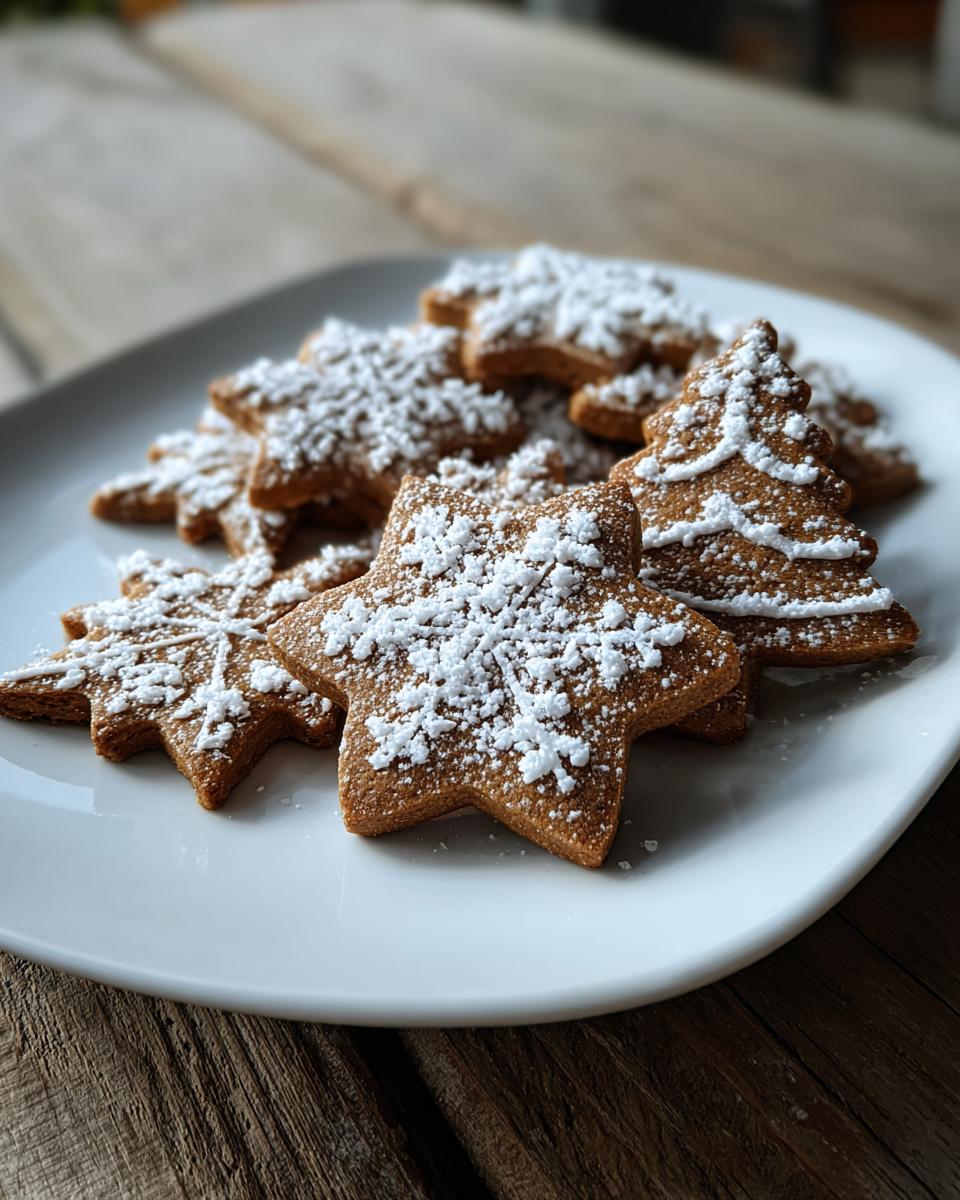
- They hold their shape like champs – no more sad, puffy blobs where snowflakes used to be! Cut out stars, trees, or even intricate houses, and they’ll bake up just how you shaped them.
- That spiced flavor? Perfection. The blend of ginger, cinnamon, and cloves gives that classic warmth without being overpowering – just enough to make you go “Mmm” with every bite.
- Holiday magic in every batch. From Christmas morning to cookie exchanges, these instantly make any gathering feel festive. Bonus? Kids and adults alike go crazy for decorating them.
- Dough that actually behaves – it rolls like a dream, doesn’t stick like crazy, and chills beautifully so you can bake in batches.
Seriously, one whiff of these baking, and you’ll understand why this recipe never leaves my holiday rotation!
Ingredients for Gingerbread Cookies for Decorating
Alright, let’s talk ingredients – because using the right stuff makes all the difference with these cookies. I’ve learned (the hard way!) that precision matters when you want that perfect crisp-but-chewy texture and deep spiced flavor. Here’s exactly what you’ll need:
- 3 cups all-purpose flour – spooned and leveled, please! No scooping straight from the bag.
- 1 tsp baking soda – fresh is best for maximum rise
- 2 tsp ground ginger – the star of the show
- 1 tsp ground cinnamon – for that warm hug flavor
- 1/2 tsp ground cloves – just enough to make it interesting
- 1/4 tsp salt – balances all that sweetness
- 3/4 cup unsalted butter, softened – leave it out for 30 minutes, not melted!
- 3/4 cup packed brown sugar – press it firmly into your measuring cup
- 1 large egg – room temperature blends easier
- 1/2 cup molasses – don’t skip this! It’s what gives that rich, almost smoky depth
- 1 tsp vanilla extract – the quiet hero that ties everything together
See that molasses? That’s what makes these cookies special – it’s like liquid gold for gingerbread. Just try using blackstrap molasses once, and you’ll never go back to the light stuff!
How to Make Gingerbread Cookies for Decorating
Okay, let’s get down to the fun part – making these gorgeous cookies! I’ve made this recipe dozens of times, and I’ve learned all the little tricks to get them perfect. Just follow these steps, and you’ll have gingerbread magic in no time.
Preparing the Dough
First things first – grab your biggest mixing bowl and let’s cream that butter and sugar. I use my trusty hand mixer on medium speed until the mixture turns light and fluffy – about 2 minutes should do it. This step is crucial for getting that perfect cookie texture!
Next, beat in the egg, molasses, and vanilla. Oh, and here’s my little secret – I always warm the molasses jar in hot water first. It pours so much easier that way! Mix until everything is completely combined, scraping down the sides as needed.
Now for the dry ingredients – whisk them together in a separate bowl first (this prevents those dreaded spice clumps!). Add them to the wet ingredients about a cup at a time, mixing just until combined after each addition. Whatever you do, don’t overmix here! The dough should come together nicely but still be slightly sticky.
Shaping and Baking
Divide your dough into two equal discs – this makes rolling much easier later. Wrap them tightly in plastic wrap and chill for at least 2 hours. I know, waiting is hard, but trust me, this step is what gives you those crisp edges!
When you’re ready to bake, preheat your oven to 350°F and line your baking sheets with parchment paper. Lightly flour your surface and rolling pin, then roll the dough to about 1/4-inch thickness. Too thin and they’ll burn; too thick and they won’t crisp up properly.
Cut out your shapes and carefully transfer them to the baking sheets, leaving about an inch between cookies. Bake for 8-10 minutes – you’ll know they’re done when the edges look set but the centers still feel slightly soft. Let them cool completely on the baking sheets before decorating – this helps them firm up perfectly!
Tips for Perfect Gingerbread Cookies for Decorating
After years of trial and error (and a few cookie disasters!), I’ve picked up some foolproof tricks for gingerbread that holds its shape and looks gorgeous. First – don’t skip the chilling time! That 2-hour fridge nap makes all the difference for clean cuts. If you’re in a rush, pop the rolled dough in the freezer for 15 minutes before cutting.
When rolling, keep your surface and pin lightly floured – but not too much or your cookies will taste like raw flour. I like to flip the dough occasionally while rolling to prevent sticking. And here’s my favorite trick: if the dough gets too soft while you’re working, just slide the whole sheet onto a baking pan and chill it for 5 minutes.
Space those cookies properly on the baking sheet – they need room to breathe! Overcrowding leads to uneven baking. For decorating, royal icing is worth the extra effort – it dries hard and gives that professional look. Let your cookies cool completely before piping, or your icing will melt right off!
Decorating Your Gingerbread Cookies
Now for the best part – turning those golden-brown cookies into edible works of art! My absolute favorite icing is classic royal icing – it dries smooth and hard, perfect for intricate designs. Just thin it slightly with water for flooding and keep some thick for piping outlines. Pro tip: add a tiny bit of lemon juice to prevent that chalky aftertaste.
Don’t have time for fancy piping? A simple powdered sugar glaze works wonders too. Sprinkle on some colored sugars or edible glitter while it’s still wet for instant holiday magic. And remember – let your decorated cookies dry completely (at least 4 hours) before stacking or packaging. Nothing worse than smudged snowflakes!
Storing and Freezing Gingerbread Cookies for Decorating
Here’s the good news – these gingerbread cookies keep beautifully! Undecorated cookies stay fresh in an airtight container for about a week (if they last that long!). Just layer them between parchment paper so they don’t stick together. Decorated with royal icing? They’ll keep just as long – the icing actually helps preserve them!
Want to get ahead? The dough freezes like a dream. Wrap those chilled discs tightly in plastic, then pop them in a freezer bag for up to 3 months. Thaw overnight in the fridge before rolling. You can also freeze baked cookies – just wait to decorate them after thawing. No reheating needed, though a quick 5 minutes in a 300°F oven will revive that fresh-baked smell if you’re serving them later.
Gingerbread Cookies for Decorating FAQs
Over the years, I’ve gotten so many questions about these cookies – here are the answers to the ones that pop up most often!
Can I use honey instead of molasses?
Oh honey, no! (See what I did there?) Molasses gives gingerbread its signature deep flavor and color. Honey will make your cookies taste completely different – and they might spread too much. If you’re in a pinch, try dark corn syrup mixed with a teaspoon of extra spices, but really – hunt down that molasses!
How do I prevent my cookies from spreading?
Three magic words: chill your dough! That 2-hour rest in the fridge is non-negotiable. Also, make sure your butter is softened but not melted, and don’t skip the parchment paper on your baking sheets. If they’re still spreading, try adding an extra tablespoon of flour to your dough.
What’s the best icing for decorating?
Hands down, royal icing is my go-to. It dries hard so you can stack cookies, and it pipes beautifully for detailed designs. If you want something simpler, a powdered sugar glaze (just milk and powdered sugar) works too – add a splash of vanilla or almond extract for extra flavor!
Can I make the dough ahead?
Absolutely! The dough keeps wonderfully in the fridge for up to 3 days, or freeze it for 3 months. Just let it thaw in the fridge overnight before rolling. Baked cookies (undecorated) freeze great too – perfect for getting a jumpstart on holiday baking!
Nutritional Information
Just so you know what you’re biting into – these nutritional values are estimates per cookie (based on getting 24 from the batch). Each little piece of gingerbread joy comes in at about 120 calories, with 8g sugar and 4.5g fat. They’ve got just enough molasses to give you that iron boost too!
Remember, these numbers can change based on your cookie size and decorations. But let’s be real – when you’re decorating gingerbread cookies with loved ones, you’re making memories more than counting calories!
Share Your Creations
I’d love to see what magic you create with these cookies! Snap a photo of your decorated gingerbread masterpieces and tag me – nothing makes me happier than seeing your holiday creativity in action. Whether it’s perfect little snowflakes or gloriously messy first attempts, every cookie tells a story worth sharing! You can find more inspiration and share your own creations on Pinterest.
Print
“7 Secrets to Perfect Gingerbread Cookies for Decorating”
- Total Time: 2 hours 30 minutes
- Yield: 24 cookies 1x
- Diet: Vegetarian
Description
Classic gingerbread cookies perfect for decorating. These cookies hold their shape well and have a warm, spiced flavor.
Ingredients
- 3 cups all-purpose flour
- 1 tsp baking soda
- 2 tsp ground ginger
- 1 tsp ground cinnamon
- 1/2 tsp ground cloves
- 1/4 tsp salt
- 3/4 cup unsalted butter, softened
- 3/4 cup packed brown sugar
- 1 large egg
- 1/2 cup molasses
- 1 tsp vanilla extract
Instructions
- Whisk flour, baking soda, ginger, cinnamon, cloves, and salt in a bowl.
- Cream butter and brown sugar until fluffy. Beat in egg, molasses, and vanilla.
- Gradually mix in dry ingredients until combined.
- Divide dough into two discs, wrap in plastic, and chill for 2 hours.
- Preheat oven to 350°F (175°C). Roll dough to 1/4-inch thickness on floured surface.
- Cut into shapes and place on parchment-lined baking sheets.
- Bake for 8-10 minutes until edges are firm.
- Cool on wire racks before decorating.
Notes
- Dough can be made ahead and refrigerated for up to 3 days.
- For crispier cookies, roll dough thinner.
- Use royal icing for best decorating results.
- Store decorated cookies in airtight container for up to 1 week.
- Prep Time: 20 minutes
- Cook Time: 10 minutes per batch
- Category: Dessert
- Method: Baking
- Cuisine: American
Nutrition
- Serving Size: 1 cookie
- Calories: 120
- Sugar: 8g
- Sodium: 60mg
- Fat: 4.5g
- Saturated Fat: 2.8g
- Unsaturated Fat: 1.5g
- Trans Fat: 0g
- Carbohydrates: 19g
- Fiber: 0.5g
- Protein: 1.5g
- Cholesterol: 15mg