Skip to content
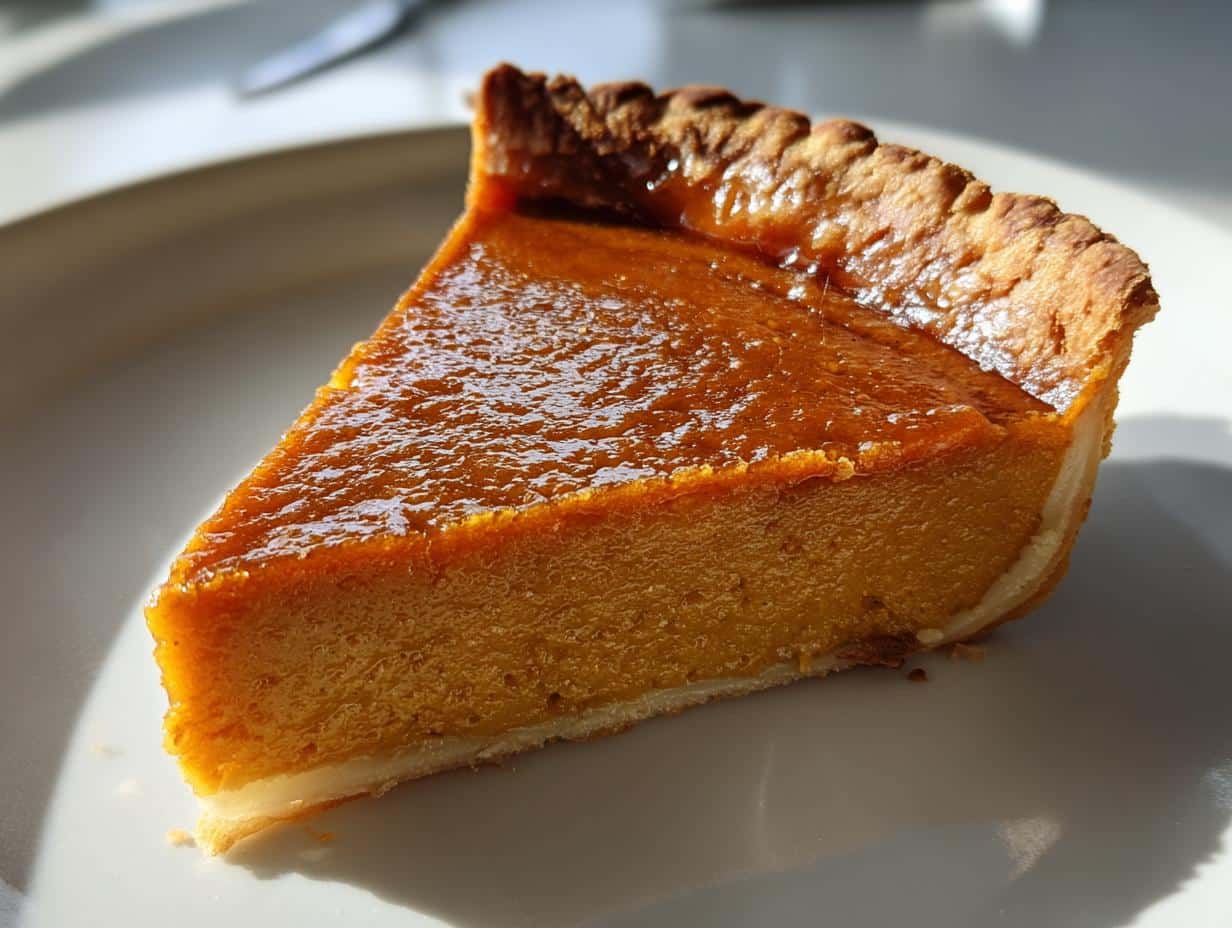
Is there anything more comforting than the smell of a Perfect Pumpkin Pie baking in the oven? Every fall, I get giddy when I pull out my favorite pie dish—it’s like welcoming back an old friend. I learned this recipe from my mom, who insisted on making it from scratch every Thanksgiving. “No shortcuts,” she’d say, whisking those warm spices into the pumpkin filling. And she was right—the balance of cinnamon, ginger, and cloves with that creamy, velvety texture? Absolute magic. Whether it’s for a holiday table or just a cozy weeknight treat, this pie tastes like autumn in every bite. Let’s make it together!
Ingredients for Perfect Pumpkin Pie
Gathering the right ingredients makes all the difference between a good pumpkin pie and a perfect one. Here’s what you’ll need—and why each one matters:
- 1 (9-inch) unbaked pie crust – Homemade is wonderful if you’ve got the time (my flaky butter crust never fails), but a quality store-bought one works beautifully too. Just make sure it’s chilled until you’re ready to use it!
- 1 (15 oz) can pumpkin puree – Not pumpkin pie filling! Look for 100% pure pumpkin. Libby’s is my go-to—it has the perfect consistency and rich flavor.
- 3 large eggs – Room temperature eggs blend smoother into the filling. I leave mine out for 30 minutes before baking.
- 1 cup granulated sugar – Some recipes use brown sugar, but I find white sugar lets the pumpkin and spices shine brighter.
- 1 tsp ground cinnamon – The warm, familiar backbone of our spice blend.
- 1/2 tsp ground ginger – Adds a little zing that plays so nicely with the pumpkin.
- 1/4 tsp ground cloves – Just enough to deepen the flavor without overpowering.
- 1/2 tsp salt – Balances all that sweetness—don’t skip it!
- 1 (12 oz) can evaporated milk – The secret to that creamy, custardy texture we all love. Whole milk or half-and-half just don’t give the same rich results.
See? Nothing fancy—just good, honest ingredients that come together to make something truly special. Now let’s get mixing!
How to Make Perfect Pumpkin Pie
Alright, let’s dive into making this beauty! I promise it’s easier than you think—just follow these steps carefully, and you’ll have a pumpkin pie worthy of any holiday table. The key is starting with a hot oven, mixing that filling until it’s silky smooth, and knowing exactly when to pull it out for that perfect jiggle.
Preparing the Crust
First things first: let’s get that crust ready. Gently unroll your chilled pie crust into a 9-inch pie dish (no stretching—we want it to stay tender!). Press it firmly into the bottom and sides, leaving about a half-inch overhang. Now comes my favorite part: crimping the edges! I use my thumb and forefinger to create little scallops all around. Not only does this look pretty, but it helps prevent shrinking during baking. Pop the crust in the fridge while you make the filling—this helps keep it flaky.
Mixing the Filling
Oh, this part smells heavenly! In a big bowl, whisk together the pumpkin puree and eggs until completely smooth—no streaks! Then add the sugar, cinnamon, ginger, cloves, and salt. Whisk, whisk, whisk until it’s all one gorgeous orange color. Now slowly pour in the evaporated milk while stirring constantly. The mixture should be velvety with no lumps. Pro tip: I always give it one final pass through a fine mesh strainer to guarantee ultra-smooth filling. Takes 10 extra seconds but makes such a difference!
Baking the Pie
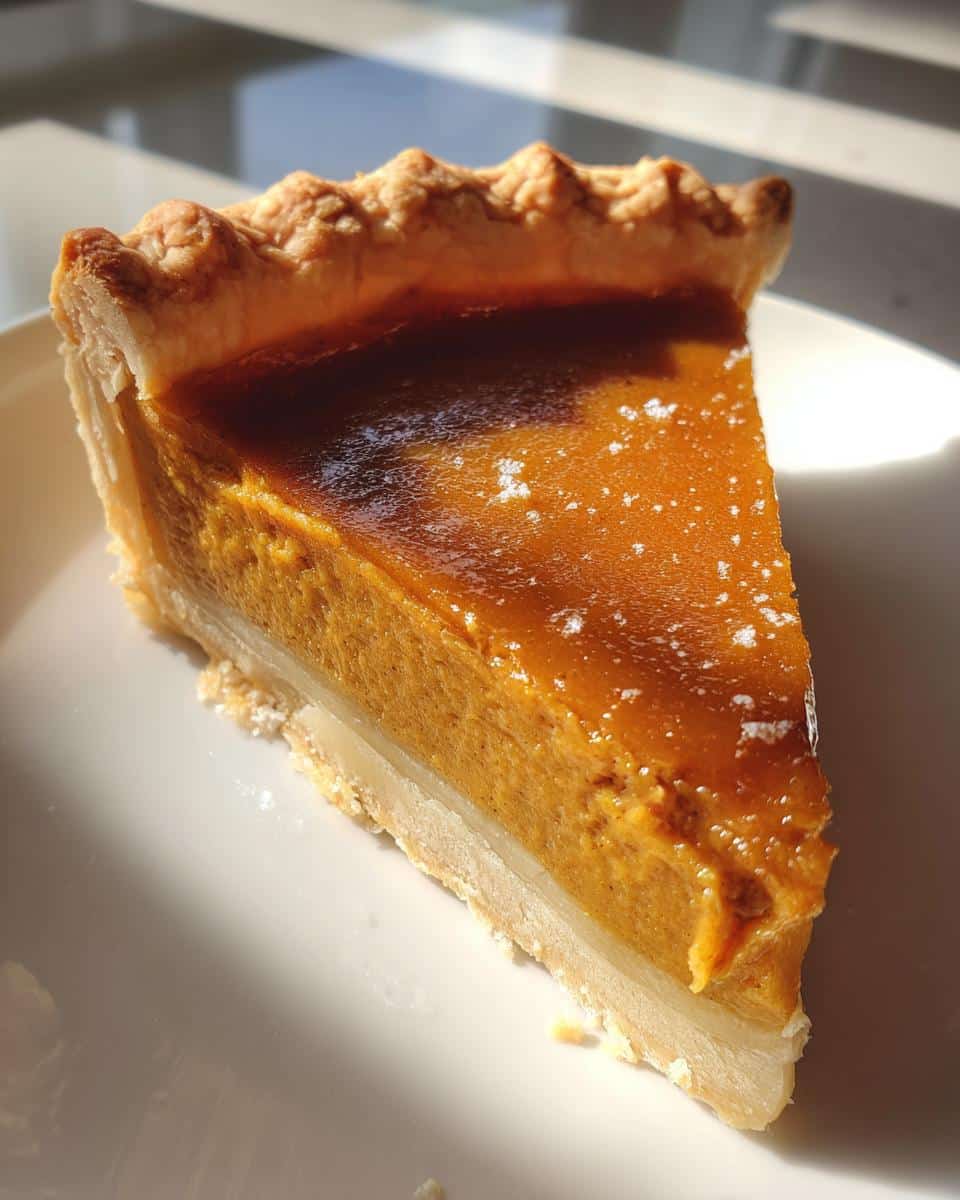
Here’s where the magic happens! Preheat your oven to 425°F—this initial high heat helps set the crust. Carefully pour the filling into your chilled crust (it should come right up to the edge). Bake for exactly 15 minutes, then without opening the door, reduce heat to 350°F and bake for another 40-45 minutes. The pie is done when the edges are set but the center still has a slight jiggle (like jello!). Resist the urge to overbake—it’ll firm up as it cools. Let it rest on a wire rack for at least 2 hours before slicing. I know, the wait is torture, but trust me, it’s worth it for clean slices!
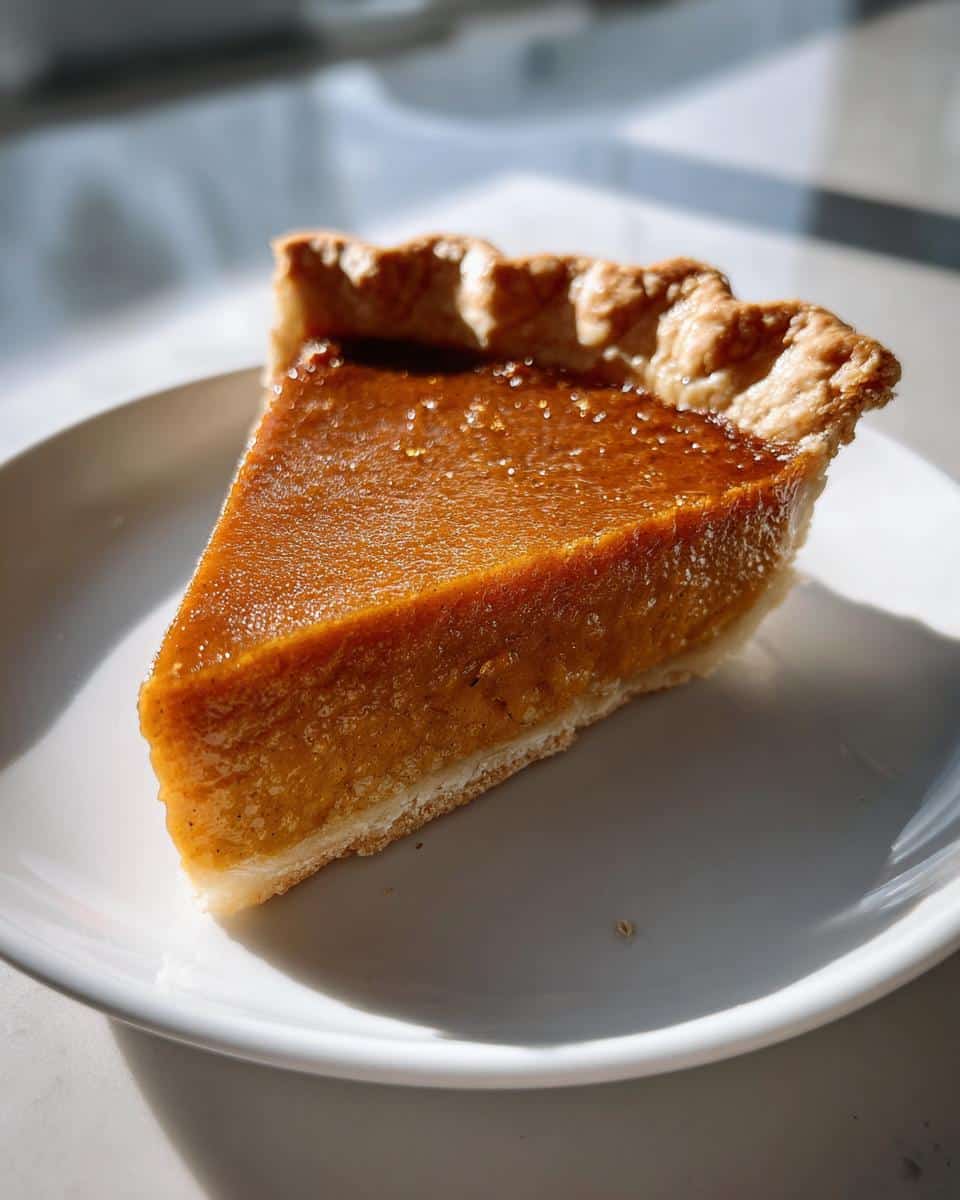
See those golden edges? That heavenly spice scent filling your kitchen? You just made pumpkin pie perfection. Now go find the whipped cream—you’ve earned it!
Why You’ll Love This Perfect Pumpkin Pie
Listen, I know there are a million pumpkin pie recipes out there—but this one? It’s the one you’ll come back to year after year. Here’s why it’s got a permanent spot in my recipe box (and probably will in yours too!):
- Creamiest texture you’ll ever taste – That evaporated milk does something magical, creating a silky custard that melts in your mouth without being too dense or too loose. Every forkful is pure comfort.
- Warm spices that sing – Not just cinnamon—ginger and cloves join the party for layers of flavor that make your kitchen smell like a cozy autumn afternoon. It’s nostalgic without tasting like potpourri!
- Unbelievably easy – No fancy techniques here. Just whisk, pour, bake. Even if you’ve never made a pie before, you’ve got this. (And if you cheat with a store-bought crust? I won’t tell.)
- The ultimate crowd-pleaser – Thanksgiving, Friendsgiving, or just because—this pie disappears fast. My uncle once ate three slices and then asked for the recipe. Need I say more?
- Better the next day – Like a good stew, the flavors deepen overnight. Make it ahead so all you have to do on the big day is slice and serve with a dollop of whipped cream.
Seriously, once you try this version, you’ll understand why my family demands it every holiday. It’s like hugging your taste buds with a warm blanket!
Tips for the Perfect Pumpkin Pie
After making more pumpkin pies than I can count (and eating even more!), I’ve picked up some game-changing tricks that guarantee stellar results every time. These are the little things my grandma taught me—the kind of wisdom that turns a good baker into a pie whisperer!
Handle the filling with care
Here’s the golden rule: mix until just combined. Overzealous stirring leads to too much air in the batter, which can cause cracks as the pie cools. I whisk my filling until it’s smooth as satin, then give it one last gentle stir before pouring. And those room-temperature eggs I mentioned earlier? They incorporate way more evenly than cold ones straight from the fridge—no weird streaks or curdling!
Baking secrets for flawless texture
Two words: temperature control. Starting hot (425°F) sets the crust quickly so it stays flaky, then reducing to 350°F lets the filling cook gently without overbrowning. If the edges start getting too dark before the center sets, tent them with foil. And that slight jiggle in the middle when you pull it out? That’s your cue to stop—it’ll firm up perfectly as it cools. Impatience is the enemy here!
The patience payoff
I know it’s tempting to dig in right away, but letting the pie cool completely (at least 2 hours!) makes all the difference. Cutting too soon turns those beautiful slices into pumpkin soup. For ultra-neat cuts, I run my knife under hot water between slices. And here’s my favorite trick: bake the pie the day before serving. Not only does this solve timing stress, but the flavors develop even deeper, richer notes overnight.
Remember—great pumpkin pie isn’t about perfection. A few cracks? Extra whipped cream covers that right up. What matters is that buttery crust giving way to spiced custard that tastes like home. Now go forth and bake with confidence!
Ingredient Substitutions & Notes
Look, I’m all about staying true to Grandma’s recipe—but life happens! Maybe you’re out of evaporated milk or cooking for a friend with dietary needs. Don’t panic! Here are my tried-and-true swaps that still deliver amazing results (just between us, some might even become permanent changes in your book!).
Pumpkin Puree Alternatives
Fresh pumpkin puree? Absolutely! Roast a small sugar pumpkin (not the big carving kind—too watery!) until fork-tender, scoop out the flesh, and blend until smooth. You’ll need about 1 3/4 cups to replace the can. But heads up—fresh pumpkin makes a slightly lighter filling, so bake 5 minutes longer. In a pinch, butternut squash works surprisingly well too—just add an extra 1/4 tsp cinnamon to compensate for its milder flavor.
Dairy-Free Options That Actually Work
For my lactose-intolerant friends, coconut milk is my top pick. Use full-fat canned coconut milk instead of evaporated milk—the richness mimics the original beautifully. You’ll catch a subtle tropical note, but the spices still shine through. Oat milk or almond milk can sub in too, but mix in 1 tbsp cornstarch to help thicken the filling. And vegan butter makes a darn good crust—just keep it ice-cold when working with it.
Spice Swaps & Sweetener Twists
Out of cloves? A pinch of allspice or nutmeg fills in nicely. If you’re using brown sugar instead of white (maybe 3/4 cup packed), reduce the cinnamon slightly since brown sugar already has molasses warmth. Maple syrup lovers—replace up to half the sugar with the good stuff, but lower the oven temp by 25°F since it browns faster. My cousin swears by adding a shot of bourbon to the filling… and honestly? It’s incredible for adult gatherings.
One non-negotiable: Whatever substitutions you make, always taste the filling before baking! Adjust spices or sweetness until it makes you do that happy little taste-test dance. That’s how you know it’s right.
Serving & Storing Perfect Pumpkin Pie
Okay, the hard part’s over—now for the best part: eating that glorious pie! But let me share how to make every slice shine and keep leftovers tasting fresh (if you’re lucky enough to have any). Because let’s be real—a perfect pumpkin pie deserves perfect presentation!
The Whipped Cream Rule
I firmly believe pumpkin pie and whipped cream were made for each other. My go-to is simple: heavy cream whipped with a spoonful of powdered sugar and a splash of vanilla. For extra flair, fold in a pinch of cinnamon or orange zest. Pile it high right before serving—none of that sad little dollop nonsense! And if you really want to wow guests, pipe rosettes around the edges. Pro tip: Chilling your bowl and beaters for 10 minutes first makes the cream whip up faster and fluffier.
Slicing Without the Slump
Ever cut into a beautiful pie only to get a sad, crumbly mess? Here’s how my grandma taught me: Use a thin, sharp knife dipped in hot water and wiped clean between cuts. Start with small slices—the filling holds its shape better that way. Slide a pie server underneath at a slight angle to lift out perfect wedges. If your first piece isn’t Instagram-worthy, just cover the gap with extra whipped cream (my favorite “oops” fix!).
Keeping It Fresh
Leftovers? (Ha, good one.) But seriously—if by some miracle there’s pie remaining, loosely cover it with plastic wrap or foil and refrigerate. It’ll keep beautifully for 3 days, though the crust loses some crispness. My trick? Revive slices by warming them in a 300°F oven for 5 minutes. For longer storage, freeze individual slices on a parchment-lined tray before wrapping tightly—they’ll last 2 months! Thaw overnight in the fridge when that pumpkin craving strikes in July.
One last thing—always let the pie sit at room temperature for 20 minutes before serving. Cold dulls the spices, but that little rest brings all the flavors back to life. Now go grab a fork—you’ve earned this!
Perfect Pumpkin Pie Nutritional Information
Now, I’m no nutritionist, but I know folks like having a general idea of what they’re enjoying—especially during the holidays when we’re indulging a bit more than usual! Keep in mind these numbers are estimates (your slice might vary depending on crust thickness or brand of ingredients). Here’s the scoop per generous slice:
- Calories: About 320 – Think of it as energy for those post-dinner board games!
- Fat: 12g (5g saturated) – That’s the butter in the crust doing its flaky magic.
- Carbs: 45g – Mostly from the pumpkin and sugar—nature’s candy plus a little extra sweetness.
- Fiber: 2g – Thank the pumpkin for that little boost.
- Protein: 6g – Eggs and milk team up to give each slice some staying power.
- Sugar: 28g – Yes, it’s a dessert—but the spices make every bite worth it!
Important note: These values change if you tweak the recipe (like using coconut milk or less sugar). My philosophy? Enjoy a slice mindfully, savor every bite, and maybe take an extra walk through those autumn leaves afterward. Life’s too short not to enjoy grandma-approved pumpkin pie!
Common Questions About Perfect Pumpkin Pie
Over the years, I’ve gotten every pumpkin pie question under the sun—from frantic Thanksgiving texts to neighbors popping over with “quick baking emergencies.” Here are the answers to the ones I hear most, straight from my flour-dusted notebook (and a few hard-learned lessons!):
Can I freeze pumpkin pie?
Absolutely! Let it cool completely first, then wrap it tighter than a Christmas present—first in plastic, then foil. It’ll keep for 2 months in the freezer. Thaw overnight in the fridge when ready to serve. The texture changes slightly, but here’s my trick: pop it in a 300°F oven for 10 minutes to revive the crust’s crispness. Works like magic!
How do I prevent cracks in my pie?
Oh, the heartbreak of that first crack! The key is gentle baking—don’t overmix the filling (which traps air bubbles), and resist overbaking. That jiggle test I mentioned? Golden rule. If cracks still happen (they sometimes do!), a fluffy cloud of whipped cream covers them right up. My aunt calls them “flavor vents”—see? Problem solved!
Fresh pumpkin vs canned—what’s better?
Honestly? For consistency and ease, I’m team canned (Libby’s never lets me down). Fresh pumpkin tastes wonderful but requires more prep and can vary in water content. If you go fresh, roast (don’t boil!) sugar pumpkins, drain excess liquid, and expect a slightly lighter-colored filling. Both make delicious pies—just know what you’re signing up for!
Why did my pie turn out watery?
Three likely culprits: 1) Underbaking (the center should still jiggle slightly when done, but not slosh), 2) Not cooling completely before slicing (that 2-hour wait is torture but crucial), or 3) Using pumpkin pie mix instead of pure pumpkin. If it happens, strain out a slice’s filling and rebake it in a ramekin—instant pumpkin custard!
Can I make this ahead?
Praise the baking gods—yes! The pie actually tastes better on day two as flavors meld. Bake it the night before, cool completely, then cover loosely at room temp if serving within 24 hours, or refrigerate for longer storage. Just don’t add whipped cream until serving. Pro tip: The crust stays crispiest when stored in the pie dish, not pre-sliced.
Still have questions? Slide into my DMs—I live for pumpkin pie troubleshooting! Nothing makes me happier than helping someone pull off their perfect pie moment.
Did you make this Perfect Pumpkin Pie? I’d love to hear how it turned out for you! Drop a comment below and tell me—did the spices hit just right? Did your family go wild for it? Snap a photo of your masterpiece (even if it cracked—those are just “rustic charm”!) and tag me on social. This recipe’s been my pride and joy for years, and nothing makes me happier than seeing it become part of your traditions too. Oh, and if you gave it your own twist (bourbon? coconut milk? extra ginger?), spill the details—I’m always hunting for new ideas! Happy baking, friends!
For more delicious recipes and inspiration, follow us on Pinterest!
Print
Perfect Pumpkin Pie Recip
- Total Time: 1 hour 10 mins
- Yield: 8 servings 1x
- Diet: Vegetarian
Description
A classic pumpkin pie with a smooth, spiced filling and flaky crust. Perfect for Thanksgiving or any fall gathering.
Ingredients
- 1 (9-inch) unbaked pie crust
- 1 (15 oz) can pumpkin puree
- 3 large eggs
- 1 cup granulated sugar
- 1 tsp ground cinnamon
- 1/2 tsp ground ginger
- 1/4 tsp ground cloves
- 1/2 tsp salt
- 1 (12 oz) can evaporated milk
Instructions
- Preheat oven to 425°F (220°C).
- Place the pie crust in a 9-inch pie dish and crimp the edges.
- In a large bowl, whisk pumpkin puree, eggs, sugar, cinnamon, ginger, cloves, and salt.
- Gradually stir in evaporated milk until smooth.
- Pour filling into the unbaked pie crust.
- Bake for 15 minutes, then reduce heat to 350°F (175°C) and bake for 40-45 minutes.
- Let cool before serving.
Notes
- Use homemade or store-bought pie crust.
- Let the pie cool completely to set the filling.
- Serve with whipped cream if desired.
- Prep Time: 15 mins
- Cook Time: 55 mins
- Category: Dessert
- Method: Baked
- Cuisine: American
Nutrition
- Serving Size: 1 slice
- Calories: 320
- Sugar: 28g
- Sodium: 280mg
- Fat: 12g
- Saturated Fat: 5g
- Unsaturated Fat: 6g
- Trans Fat: 0g
- Carbohydrates: 45g
- Fiber: 2g
- Protein: 6g
- Cholesterol: 80mg