Skip to content
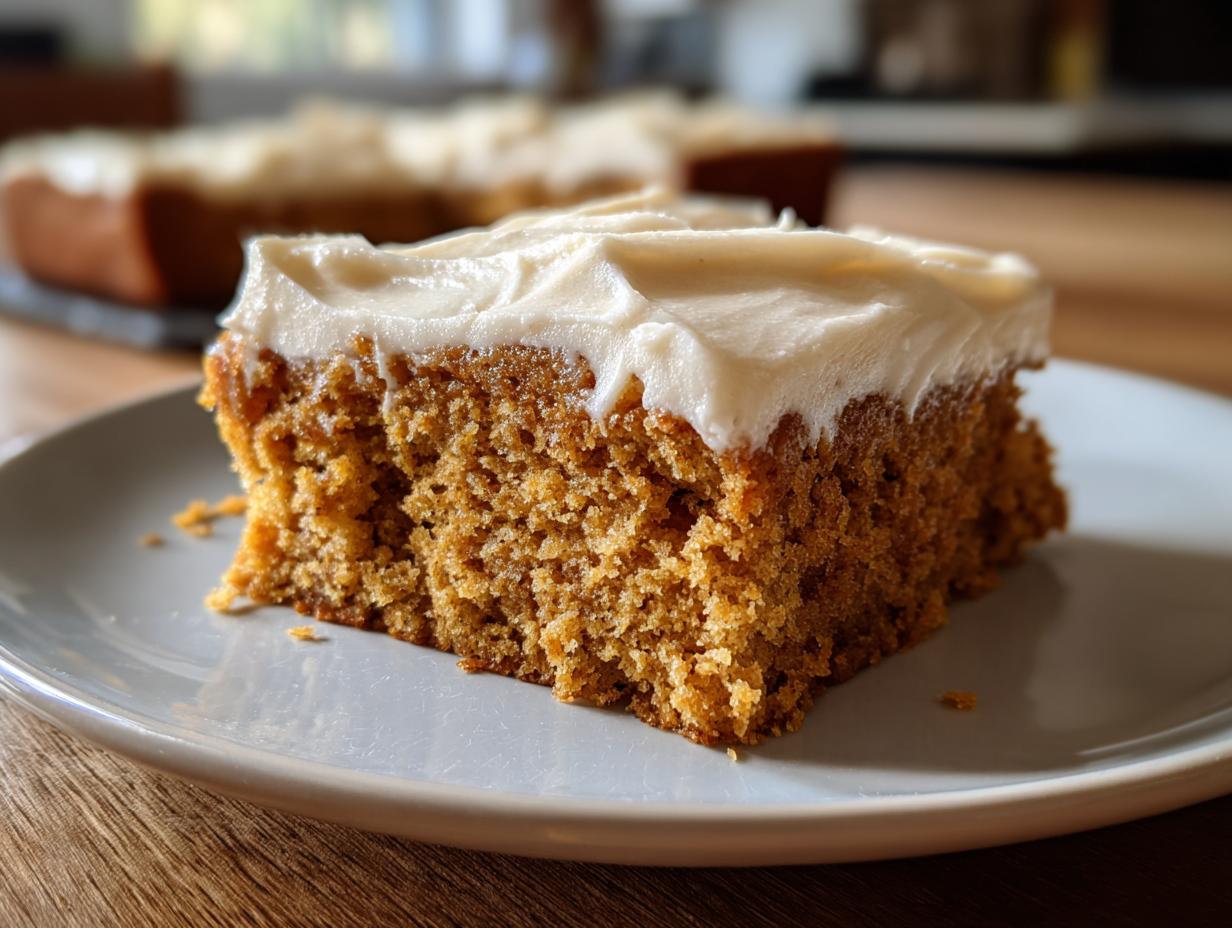
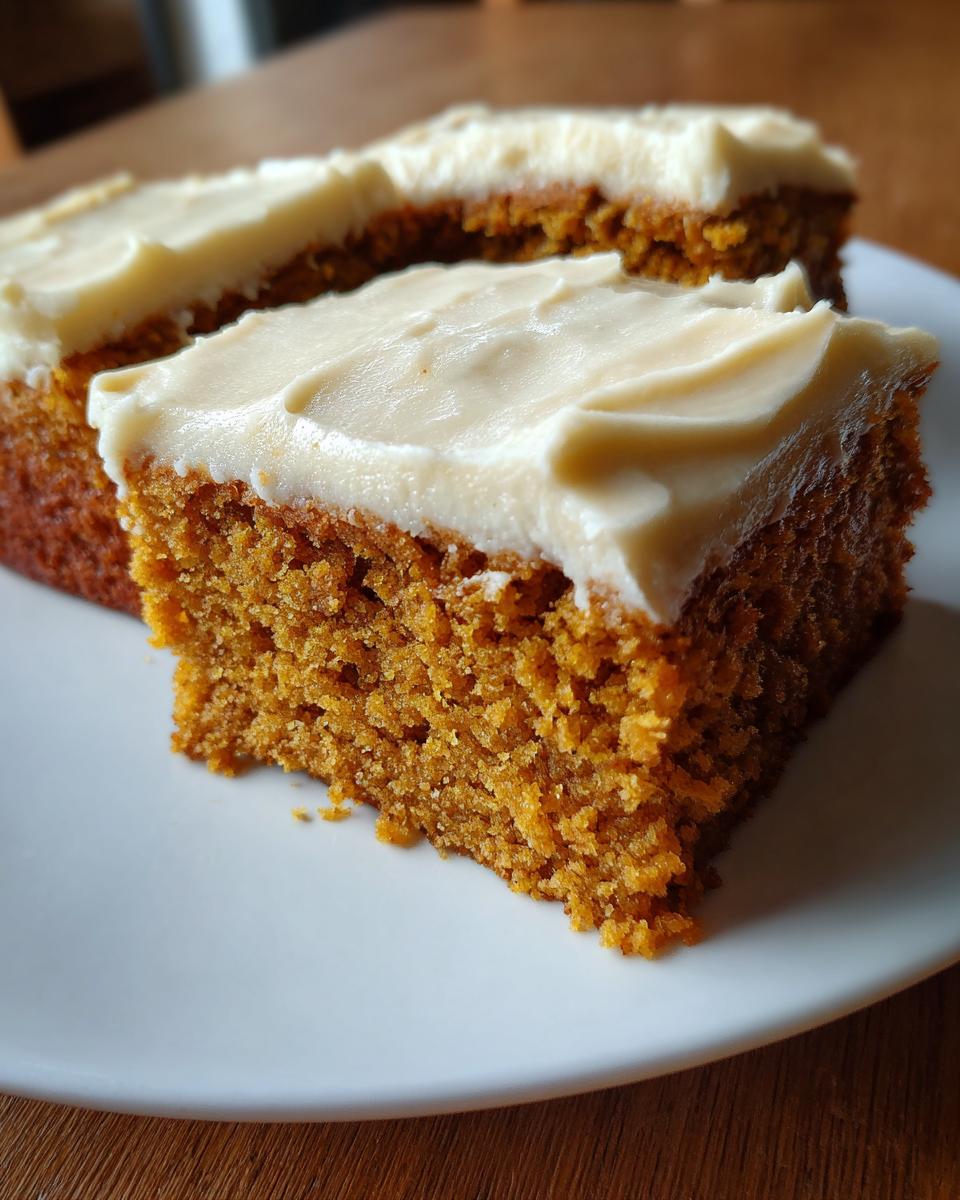
There’s something magical about pulling a pan of Pumpkin Bars with Brown Butter Frosting out of the oven as the leaves start to turn. The scent of cinnamon and nutmeg fills the kitchen, promising that first bite of moist, spiced pumpkin goodness topped with that rich, nutty frosting. I’ve been making this recipe for years – it’s my go-to when the family gathers for Thanksgiving or when I need to bring a dessert that’ll disappear fast. My aunt actually taught me the brown butter trick when I was sixteen (“It’s all in the nose, honey – wait for that toasty smell!”), and now I can’t imagine these bars without it. They’re tender but sturdy enough to hold that luscious frosting, with just the right balance of sweetness and warm fall spices. Trust me, once you try these, you’ll understand why they’re always the first dessert gone at potlucks!
Why You’ll Love These Pumpkin Bars with Brown Butter Frosting
Let me count the ways these pumpkin bars will steal your heart (and probably your willpower)!
- Foolproof baking: No fancy techniques here—just simple mixing and baking. Even my nephew nailed these on his first try!
- That brown butter magic: The frosting tastes like fall in a bowl—nutty, rich, and with a depth regular buttercream just can’t match.
- Perfect texture: They’re moist without being gooey, sturdy enough to hold frosting but still melt-in-your-mouth tender.
- Crowd-pleaser guarantee: I’ve yet to meet someone who doesn’t go back for seconds (or thirds… no judgment).
- Better the next day: Like most pumpkin treats, the flavors deepen overnight—if you can wait that long!
Ingredients for Pumpkin Bars with Brown Butter Frosting
Gathering the right ingredients makes all the difference with these pumpkin bars – trust me, I’ve learned the hard way! Here’s everything you’ll need, separated into dry and wet ingredients so you can mix like a pro:
For the Pumpkin Bars:
Dry Ingredients:
- 1 cup all-purpose flour (spooned & leveled)
- 1 teaspoon baking powder
- ½ teaspoon baking soda
- 1 teaspoon ground cinnamon
- ½ teaspoon ground nutmeg
- ¼ teaspoon salt
Wet Ingredients:
- 2 large eggs (room temperature works best)
- 1 cup granulated sugar
- 1 cup canned pumpkin puree (not pumpkin pie filling – there’s a big difference!)
- ½ cup vegetable oil
- 1 teaspoon vanilla extract
For the Brown Butter Frosting:
- ½ cup (1 stick) unsalted butter
- 2 cups powdered sugar
- 2 tablespoons milk (whole milk makes it extra creamy)
- 1 teaspoon vanilla extract
A quick note about the pumpkin – I’ve tried fresh puree before, but honestly? The canned stuff gives more consistent results and saves so much time. Just make sure you grab the plain puree, not the pre-spiced pie filling!
How to Make Pumpkin Bars with Brown Butter Frosting
Okay, let’s get baking! I promise this is easier than it looks – just follow these steps and you’ll have perfect pumpkin bars every single time.
- Preheat that oven! Start by heating your oven to 350°F (175°C). Grease your 9×13-inch baking pan really well – I like using butter or baking spray. Trust me, nothing’s worse than bars that stick!
- Mix your dry ingredients: In a medium bowl, whisk together the flour, baking powder, baking soda, cinnamon, nutmeg, and salt until they’re completely combined. See those little cinnamon specks? That’s where the magic starts!
- Beat the wet ingredients: In a large bowl, beat the eggs and sugar together until they’re nice and smooth. Add the pumpkin puree (the real star here!), oil, and vanilla. Keep mixing until everything looks like a bright orange dream.
- Combine carefully: Gradually add your dry ingredients to the wet mixture. I do this in about 3 batches, mixing just until combined after each addition. Overmixing makes tough bars, and we want tender, right?
- Bake to perfection: Pour that gorgeous orange batter into your prepared pan and smooth the top. Bake for 25-30 minutes – you’ll know they’re done when the edges pull slightly from the pan and a toothpick comes out clean. The top should spring back when lightly touched!
- Cool completely: This is the hardest part – let those bars cool completely in the pan on a wire rack. I know, I know, you want to frost them NOW, but patience pays off with perfect frosting application!
Making the Brown Butter Frosting
Here comes the showstopper! Brown butter frosting might sound fancy, but it’s actually super simple. Just follow your nose – literally!
- Brown the butter: Melt the butter in a light-colored saucepan over medium heat. Keep stirring occasionally – first it’ll foam, then you’ll see golden brown bits forming at the bottom. The moment it smells nutty (like toasted pecans!), take it off the heat. This usually takes about 5-7 minutes. Careful – it goes from perfect to burnt fast!
- Let it cool slightly: Pour the browned butter into a heatproof bowl and let it cool for about 10 minutes. You want it warm but not hot when you add the other ingredients.
- Make it creamy: Whisk in the powdered sugar, milk, and vanilla until smooth. If it’s too thick, add milk ½ teaspoon at a time. Too thin? More powdered sugar to the rescue! The perfect consistency should spread easily but hold its shape.
- Frost those bars: Once your bars are completely cool (I mean it – no cheating!), spread the frosting evenly over the top. Pro tip: If your frosting starts to set before you’re done, just give it a quick stir to loosen it up again.
See? Told you it wasn’t complicated! Now comes the best part – cutting into squares and watching everyone’s eyes light up when they taste that brown butter goodness.
Tips for Perfect Pumpkin Bars with Brown Butter Frosting
After making these bars more times than I can count, I’ve learned a few tricks that make all the difference:
- Room temp eggs are key: They incorporate better into the batter for an even texture. Cold eggs can make your bars dense—I learned this the hard way at my first Thanksgiving attempt!
- Set a timer for browning butter: That nutty aroma comes fast once the butter starts to brown. I keep a light-colored saucepan just for this—it helps me spot the golden color before it burns.
- Cooling is non-negotiable: Warm bars melt the frosting into a gooey mess. I usually wait at least 2 hours (or distract myself with dishes while they cool).
- Undercook slightly: Pull them out when the toothpick has a few moist crumbs—they’ll keep cooking as they cool, staying extra tender.
Bonus tip: If your frosting gets too thick, a splash of warm milk brings it right back to spreadable perfection!
Storing and Serving Pumpkin Bars with Brown Butter Frosting
Now let’s talk about keeping these beauties fresh – and more importantly, how to serve them for maximum deliciousness! Here’s what I’ve learned after years of making (and devouring) these pumpkin bars:
For storage, always use an airtight container at room temperature. I like stacking them with parchment paper between layers – it keeps the frosting from sticking to the next bar. They’ll stay perfect for about 3 days this way. And here’s my unpopular opinion: don’t refrigerate them! The fridge turns the texture weirdly dense and makes the frosting harden too much. Room temp is the way to go.
When it comes to serving, I take them straight from the container to the plate – no need to warm them up. The flavors really shine at room temperature. If you’re taking them to a party (prepare for recipe requests!), I like to arrange them on a cute platter with some fall sprinkles or edible flowers for a festive touch. For special occasions, I’ll dust a little extra cinnamon on top right before serving – it makes the whole presentation smell amazing!
One last pro tip: If you need to make them ahead, bake the bars and store them unfrosted for up to 2 days. Then make the brown butter frosting fresh when you’re ready to serve – the nutty aroma will wow everyone as soon as you walk in the door!
FAQ About Pumpkin Bars with Brown Butter Frosting
I get asked about these pumpkin bars all the time – here are the answers to the questions that pop up most often in my kitchen (and my inbox)!
Can I use fresh pumpkin instead of canned?
You can, but I don’t recommend it unless you’re really committed! Fresh pumpkin puree tends to be more watery, which throws off the texture. If you insist, roast sugar pumpkin cubes first, then drain the puree in cheesecloth overnight. Honestly? The canned stuff gives perfect results every time with way less work.
Help! My frosting turned out grainy – what went wrong?
Don’t panic! This usually happens if the powdered sugar wasn’t fully incorporated. Try sifting your sugar first, and make sure your browned butter is warm (not hot) when you mix everything. If it’s already grainy, a quick zap in the microwave for 5-10 seconds followed by vigorous whisking can save it!
Can I freeze these pumpkin bars?
Absolutely! Freeze them unfrosted for up to 3 months – just wrap tightly in plastic wrap then foil. Thaw at room temperature before frosting. The frosting itself doesn’t freeze well, so always make that fresh. Pro tip: Cut the bars before freezing so you can grab just a few at a time!
Why did my bars sink in the middle?
This usually means either the oven wasn’t hot enough when you put them in (always preheat!) or you opened the door too early. Resist peeking for at least 20 minutes! Also check your baking powder isn’t expired – that little leavening agent does important work.
Can I make these gluten-free?
Yes! I’ve had great results swapping the all-purpose flour for a 1:1 gluten-free blend. Just make sure it contains xanthan gum. The texture comes out slightly more delicate, but still delicious. My celiac friend says they’re her favorite fall treat!
Nutritional Information
Okay, let’s be real – we’re not eating pumpkin bars for their health benefits, but I know some of you like to keep track! Here’s the nutritional breakdown per bar (based on cutting the pan into 24 squares). Remember, these are estimates – your exact numbers might vary depending on specific ingredients or if you sneak an extra spoonful of frosting (no judgment here!).
- Calories: 180
- Sugar: 15g
- Sodium: 85mg
- Fat: 8g (3g saturated, 4g unsaturated)
- Carbohydrates: 25g
- Fiber: 1g
- Protein: 2g
- Cholesterol: 25mg
A few things to note: Using different brands of pumpkin puree or adjusting the sugar amounts will change these numbers slightly. And hey – pumpkin’s packed with vitamin A, so we’re basically eating vegetables here, right? (Okay, maybe not, but a girl can dream!)
Alright, now it’s your turn to bake up some magic! I can’t wait for you to taste these pumpkin bars with that incredible brown butter frosting. When you make them (because you totally should!), snap a pic and tag me – I love seeing your creations. And hey, if you tweak the recipe, let me know what genius changes you made! Happy baking, friends!
For more delicious recipes and baking inspiration, be sure to follow us on Pinterest.
Print
Irresistible Pumpkin Bars with Brown Butter Frosting – 3 Must-Try Tips
- Total Time: 40 mins
- Yield: 24 bars 1x
- Diet: Vegetarian
Description
Delicious pumpkin bars topped with rich brown butter frosting, perfect for fall or any occasion.
Ingredients
- 1 cup all-purpose flour
- 1 tsp baking powder
- 1/2 tsp baking soda
- 1 tsp ground cinnamon
- 1/2 tsp ground nutmeg
- 1/4 tsp salt
- 2 large eggs
- 1 cup granulated sugar
- 1 cup canned pumpkin puree
- 1/2 cup vegetable oil
- 1 tsp vanilla extract
- 1/2 cup unsalted butter (for frosting)
- 2 cups powdered sugar (for frosting)
- 2 tbsp milk (for frosting)
- 1 tsp vanilla extract (for frosting)
Instructions
- Preheat your oven to 350°F (175°C). Grease a 9×13-inch baking pan.
- In a medium bowl, whisk together flour, baking powder, baking soda, cinnamon, nutmeg, and salt.
- In a large bowl, beat eggs, sugar, pumpkin puree, oil, and vanilla until smooth.
- Gradually mix dry ingredients into the wet ingredients until combined.
- Pour batter into the prepared pan and bake for 25-30 minutes or until a toothpick comes out clean.
- Let the bars cool completely.
- For the frosting, melt butter in a saucepan over medium heat until golden brown. Remove from heat and let cool slightly.
- Whisk in powdered sugar, milk, and vanilla until smooth.
- Spread frosting over the cooled bars and cut into squares.
Notes
- Store in an airtight container for up to 3 days.
- For best results, use pure canned pumpkin, not pumpkin pie filling.
- Adjust frosting thickness with more milk or powdered sugar if needed.
- Prep Time: 15 mins
- Cook Time: 25 mins
- Category: Dessert
- Method: Baking
- Cuisine: American
Nutrition
- Serving Size: 1 bar
- Calories: 180
- Sugar: 15g
- Sodium: 85mg
- Fat: 8g
- Saturated Fat: 3g
- Unsaturated Fat: 4g
- Trans Fat: 0g
- Carbohydrates: 25g
- Fiber: 1g
- Protein: 2g
- Cholesterol: 25mg