Skip to content
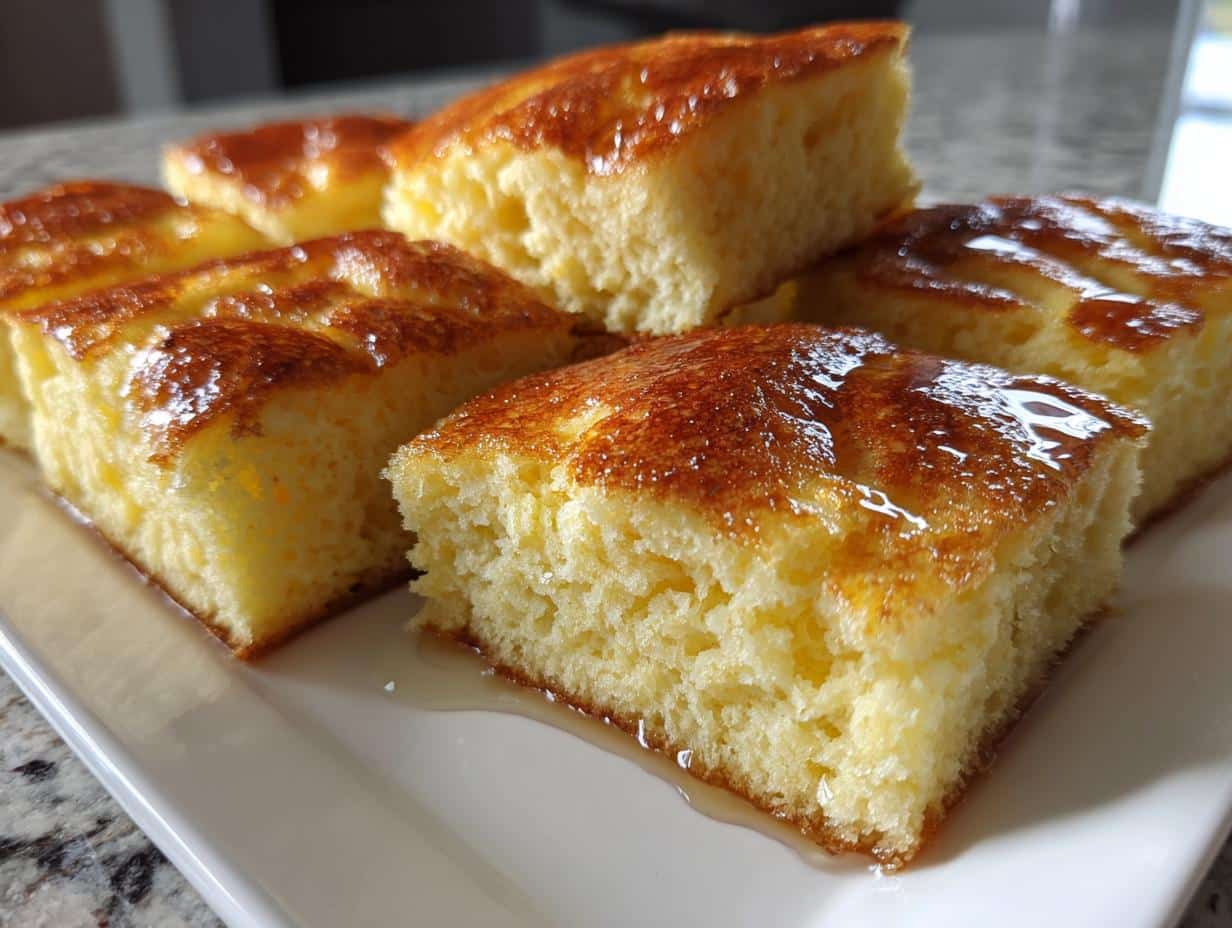
Have you ever stood flipping pancakes one by one while your family hovers hungrily around the stove? That was me every Sunday morning – until I discovered sheet pan pancakes! This genius method lets you bake a whole batch of fluffy golden pancakes at once with barely any effort. My kids still remember the first time I slid that giant pancake masterpiece onto the table – their eyes got as big as the pancake squares cut for them. Now it’s our go-to for sleepover breakfasts, holiday mornings, or when we just want something special without the fuss. Trust me, once you try baking pancakes this way, you’ll never go back to standing over a griddle again!
Why You’ll Love Sheet Pan Pancakes
Let me tell you why this recipe became my weekend game-changer:
- Zero flipping frustration: No more babysitting individual pancakes – just pour, bake, and relax with your coffee
- Cleanup in a snap: One pan, one mixing bowl, and done (parchment paper is your friend!)
- Feeds a hungry crowd: Perfect for sleepovers, brunch parties, or my brood of pancake monsters
- Customizable canvas: Everyone gets their favorite toppings – chocolate chips for the kids, berries for me
- Meal prep magic: Makes fantastic leftovers that reheat beautifully all week
Honestly, the hardest part is deciding which syrup to use first!
Ingredients for Sheet Pan Pancakes
Here’s everything you’ll need to make these foolproof sheet pan pancakes (I bet you have most in your pantry already!):
Dry Ingredients:
- 2 cups all-purpose flour (see notes below for GF options)
- 2 tbsp sugar – just enough for a hint of sweetness
- 1 tbsp baking powder – our rising superstar
- 1/2 tsp salt – balances all the flavors
Wet Ingredients:
- 1 3/4 cups milk (whole milk makes them extra rich)
- 2 large eggs, beaten (room temp works best)
- 1/4 cup melted butter, cooled (don’t skip this – it gives that golden crisp edge!)
- 1 tsp vanilla extract – my secret flavor booster
Ingredient Notes & Substitutions
Baking powder is non-negotiable – it makes our pancakes rise beautifully. For dietary needs: swap milk for almond milk, use gluten-free 1:1 flour, or replace butter with coconut oil. The batter should be thick but pourable – add a splash more milk if needed.
Equipment You’ll Need
Don’t worry – this isn’t one of those recipes that requires fancy gadgets! Here’s the shortlist of what I grab every time I make sheet pan pancakes (you probably have everything already):
- Rimmed sheet pan (18×13 inch): The star of the show! The edges keep all that delicious batter right where it belongs
- Parchment paper: My lifesaver for easy cleanup and perfect release every time (no pancake casualties!)
- 2 mixing bowls: One for dry ingredients, one for wet – I use my trusty Pyrex ones
- Whisk: A simple wire whisk blends everything perfectly without overmixing
- Rubber spatula: For scraping every last bit of batter onto the pan (waste not, want not!)
That’s it! No special tools needed – just the basics that make breakfast magic happen. Now let’s get baking!
How to Make Sheet Pan Pancakes
Okay, friends – let’s turn that batter into golden pancake perfection! I’ve made this so many times I could do it in my sleep, but I’ll walk you through each step like I’m right there in the kitchen with you (coffee in hand, of course).
Step 1: Prep the Batter
First things first – preheat that oven to 425°F (trust me, this step matters!). While it heats, let’s make magic happen in two bowls:
- Dry team: Grab your big mixing bowl and whisk together the flour, sugar, baking powder and salt. No lumps allowed! I like to give it about 30 seconds of vigorous whisking – you’ll see the baking powder disappear into the flour.
- Wet squad: In your other bowl, whisk the milk, eggs, melted (but not hot!) butter and vanilla until it’s all one happy liquid. Pro tip: if your butter is still warm from melting, let it cool a minute so it doesn’t scramble the eggs – been there, done that!
- The big mix: Now pour the wet ingredients into the dry. Here’s the key – stir just until combined, even if you see a few small lumps. Overmixing makes tough pancakes, and we want fluffy clouds of joy! The batter will be thick but spreadable – perfect.
Step 2: Bake to Perfection
Here’s where the sheet pan shines! Line your pan with parchment paper (no sticking = no stress) and pour in all that glorious batter.
- Spread it right: Use your spatula to gently push the batter to all corners. It should be about 1/2 inch thick – don’t worry if it’s not perfectly even, mine never is!
- Add your flair: Now’s the time to sprinkle on chocolate chips, blueberries, or whatever makes your heart happy. The batter will hold them right where you put them.
- Bake time magic: Slide it into your preheated oven and set a timer for 12 minutes. When you smell that buttery vanilla goodness, peek in – you want golden edges and a top that springs back when lightly touched. Might take up to 15 minutes depending on your oven.
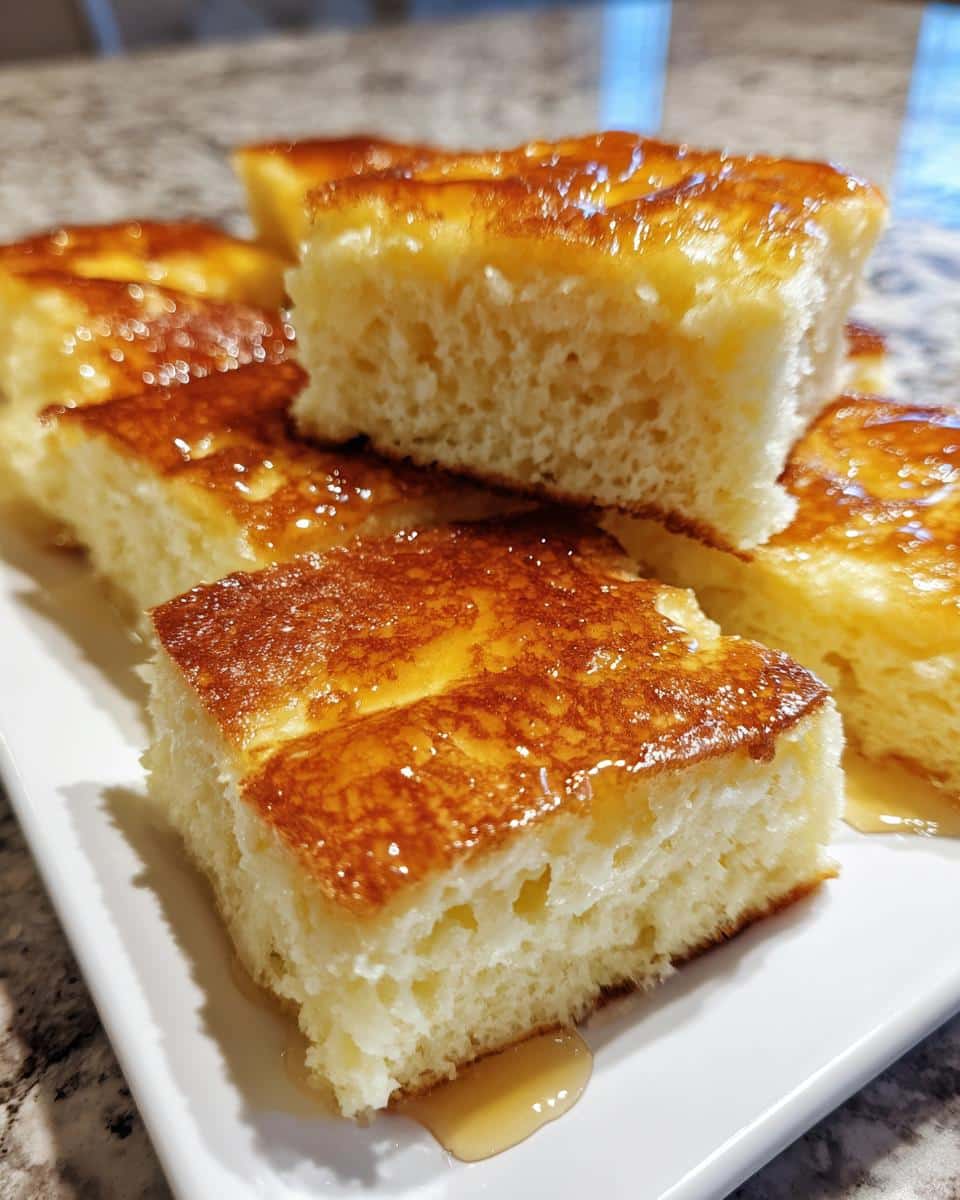
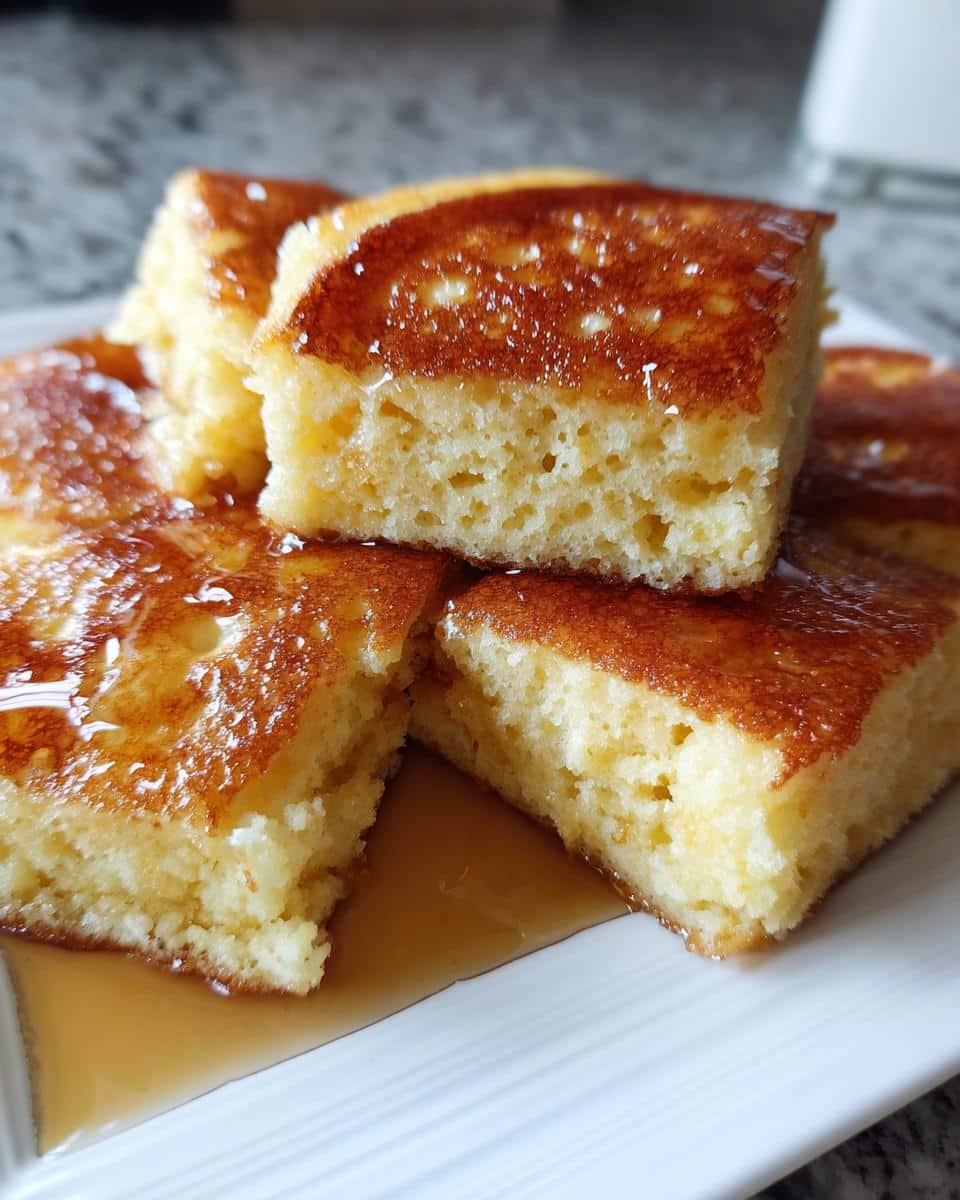
When it’s done, you’ll have one glorious golden pancake the size of your sheet pan – just begging to be cut into squares and drizzled with syrup. The hardest part? Waiting those two minutes before digging in!
Tips for the Best Sheet Pan Pancakes
After making enough sheet pan pancakes to feed my entire neighborhood, I’ve picked up some foolproof tricks that make them perfect every single time. Here are my can’t-live-without tips:
- Let the batter rest 5 minutes before pouring it onto the pan – those extra minutes help the baking powder work its magic for extra fluffy pancakes
- For mega-fluffy results, separate the eggs – whip the whites to soft peaks and fold them in last
- The pan matters! Use a light-colored pan if you have one – dark pans can make the bottom too brown before the center’s done
- Get creative with add-ins – we love chocolate chips, but diced apples with cinnamon or mashed banana with walnuts are amazing too
- Make it pretty by arranging berry “art” on top before baking – my kids love making smiley faces with blueberries
- No parchment paper? Generously grease the pan with butter or use my grandma’s trick – a light dusting of flour after greasing
- Watch that oven – all ovens vary, so start checking at 10 minutes if yours runs hot
My biggest tip? Have fun with it! Sheet pan pancakes are practically foolproof – even my kitchen disaster-prone cousin can’t mess them up.
Serving Suggestions for Sheet Pan Pancakes
Now comes the best part – decking out your golden sheet pan pancake masterpiece! This is where you can really make it your own. Here’s how we love to serve ours (though I warn you, the options are endless):
Classic Toppings:
- Maple syrup: The OG pancake partner – warm it slightly for that diner-style experience
- Fresh berries: Strawberries, blueberries, or all three – they add the perfect pop of color and freshness
- Whipped cream: My kids call this “cloud fluff” and demand extra swirls
- Butter pats: Let them melt into those fluffy squares for extra richness
Fun Variations:
- Lemon + sugar: Squeeze fresh lemon juice and sprinkle with powdered sugar – so simple but magical
- Nutella drizzle: Microwave for 15 seconds to make it pourable (this is my husband’s favorite)
- Peanut butter + banana: Spread on creamy PB and top with banana slices – practically a complete meal!
- Yogurt + honey: My go-to “healthy-ish” option when I’m feeling virtuous
Full Meal Pairings:
- Bacon or sausage: Bake them on another sheet pan while the pancakes cook – multitasking win!
- Scrambled eggs: For when you need protein to balance all that carb-y goodness
- Fruit salad: Bright and refreshing alongside the rich pancakes
- Breakfast potatoes: If you’re feeding a really hungry crowd (hello, teenage boys)
The beauty of sheet pan pancakes is that you can serve them buffet-style – I just put out all the toppings and let everyone create their perfect plate. Pro tip: Keep the pancake squares whole and let people cut their own sizes – the big squares make fantastic “pancake sandwiches” with fillings in between!
Storage & Reheating
Here’s the scoop on keeping your sheet pan pancakes tasting fresh – because let’s be real, there’s rarely leftovers in my house, but when there are, I want them just as good as day one!
Storing leftovers:
- Let the pancake cool completely first (warm pancakes = condensation = sogginess)
- Cut into portions and stack with parchment between layers in an airtight container – this keeps them from sticking together
- They’ll stay perfect in the fridge for 3 days, though mine never last that long!
- For longer storage, freeze individual portions wrapped in plastic then foil – good for 2 months
Reheating like a pro:
- Oven method: 350°F for 5-8 minutes on a baking sheet (my favorite – restores that fresh-baked crispness)
- Toaster: Pop individual squares in just like bread (watch closely though – they toast faster than you’d think!)
- Air fryer: 320°F for 3-4 minutes if you’re reheating just a few pieces
- Microwave? Nope! Unless you enjoy rubbery pancakes – trust me, it’s worth the extra few minutes to use the oven
Fun fact: Cold pancake squares straight from the fridge make a great snack – my kids grab them like cookies! And if you froze some, just take them out the night before to thaw in the fridge, then reheat as usual.
Sheet Pan Pancakes FAQ
I get so many questions about these sheet pan pancakes – seems like everyone wants to put their own spin on them! Here are the answers to the ones I hear most often (plus a few you didn’t know you needed to ask):
Can I freeze sheet pan pancakes?
Absolutely! They freeze like a dream. Just cut into squares, wrap individually in plastic wrap, then pop them in a freezer bag. When the pancake craving hits, toast straight from frozen – takes about 5 minutes in a 350°F oven. My freezer stash saves me on chaotic school mornings!
Can I use buttermilk instead of regular milk?
Oh yes – and they come out extra tender and tangy! Use the same amount of buttermilk as milk in the recipe. The acidity reacts with the baking powder for super-fluffy pancakes. No buttermilk? Make your own by adding 1 tbsp vinegar or lemon juice to 1 3/4 cups milk and letting it sit for 5 minutes.
Why did my pancake turn out dense?
Two likely culprits: overmixing the batter (those lumps are your friends!), or old baking powder. Check your baking powder’s expiration date – it loses its oomph over time. Also, make sure your oven was fully preheated before baking – a cold start makes pancakes sad and flat.
Can I make these gluten-free?
Yes! Swap the all-purpose flour with your favorite 1:1 gluten-free blend (I like King Arthur’s). The texture might be slightly different, but still delicious. My gluten-free friend adds 1/2 tsp xanthan gum to help with structure – works like a charm!
How do I know when they’re done baking?
Look for golden edges and a top that springs back when gently pressed. A toothpick should come out clean (no wet batter), but with a few moist crumbs. If it jiggles in the middle, give it 2 more minutes. And that heavenly vanilla-butter smell? That’s nature’s timer going off!
Nutritional Information
Listen, I’m no nutritionist – I’m just a pancake enthusiast who likes to know what I’m eating! These numbers are estimates based on the standard recipe, but your exact counts will vary depending on your ingredients and toppings (I won’t judge if you go heavy on the syrup). Here’s the breakdown per serving (about one 3×3 inch square):
- Calories: 180 – about the same as traditional pancakes, but way less cleanup!
- Carbohydrates: 24g (1g fiber) – perfect fuel for busy mornings
- Protein: 5g – not bad for something that tastes this good
- Fat: 7g (4g saturated) – thank that glorious butter
- Sugar: 6g – mostly from the milk and that little bit of sugar we added
Remember, nutritional values are estimates and will vary based on specific ingredients used and portion sizes (because let’s be real, who stops at just one square?). Add-ons like chocolate chips or syrup will increase these numbers – but some things are worth the extra calories!
For more delicious recipes and inspiration, follow us on Pinterest!
Print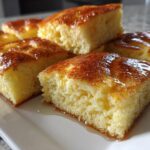
12 Genius Sheet Pan Pancakes for Effortless Mornings
- Total Time: 25 minutes
- Yield: 12 servings 1x
- Diet: Vegetarian
Description
Sheet pan pancakes are an easy way to make a large batch of fluffy pancakes with minimal effort. Perfect for serving a crowd or meal prepping breakfast.
Ingredients
- 2 cups all-purpose flour
- 2 tbsp sugar
- 1 tbsp baking powder
- 1/2 tsp salt
- 1 3/4 cups milk
- 2 large eggs
- 1/4 cup melted butter
- 1 tsp vanilla extract
Instructions
- Preheat oven to 425°F and line a sheet pan with parchment paper.
- Whisk flour, sugar, baking powder, and salt in a large bowl.
- In another bowl, mix milk, eggs, melted butter, and vanilla.
- Pour wet ingredients into dry ingredients and stir until just combined.
- Spread batter evenly onto the prepared sheet pan.
- Bake for 12-15 minutes or until golden brown.
- Cut into squares and serve with syrup or toppings of your choice.
Notes
- For fluffier pancakes, let the batter rest for 5 minutes before baking.
- Add-ins like chocolate chips or blueberries can be sprinkled on top before baking.
- Store leftovers in an airtight container for up to 3 days.
- Prep Time: 10 minutes
- Cook Time: 15 minutes
- Category: Breakfast
- Method: Baking
- Cuisine: American
Nutrition
- Serving Size: 1 pancake square
- Calories: 180
- Sugar: 6g
- Sodium: 220mg
- Fat: 7g
- Saturated Fat: 4g
- Unsaturated Fat: 2g
- Trans Fat: 0g
- Carbohydrates: 24g
- Fiber: 1g
- Protein: 5g
- Cholesterol: 45mg