Skip to content
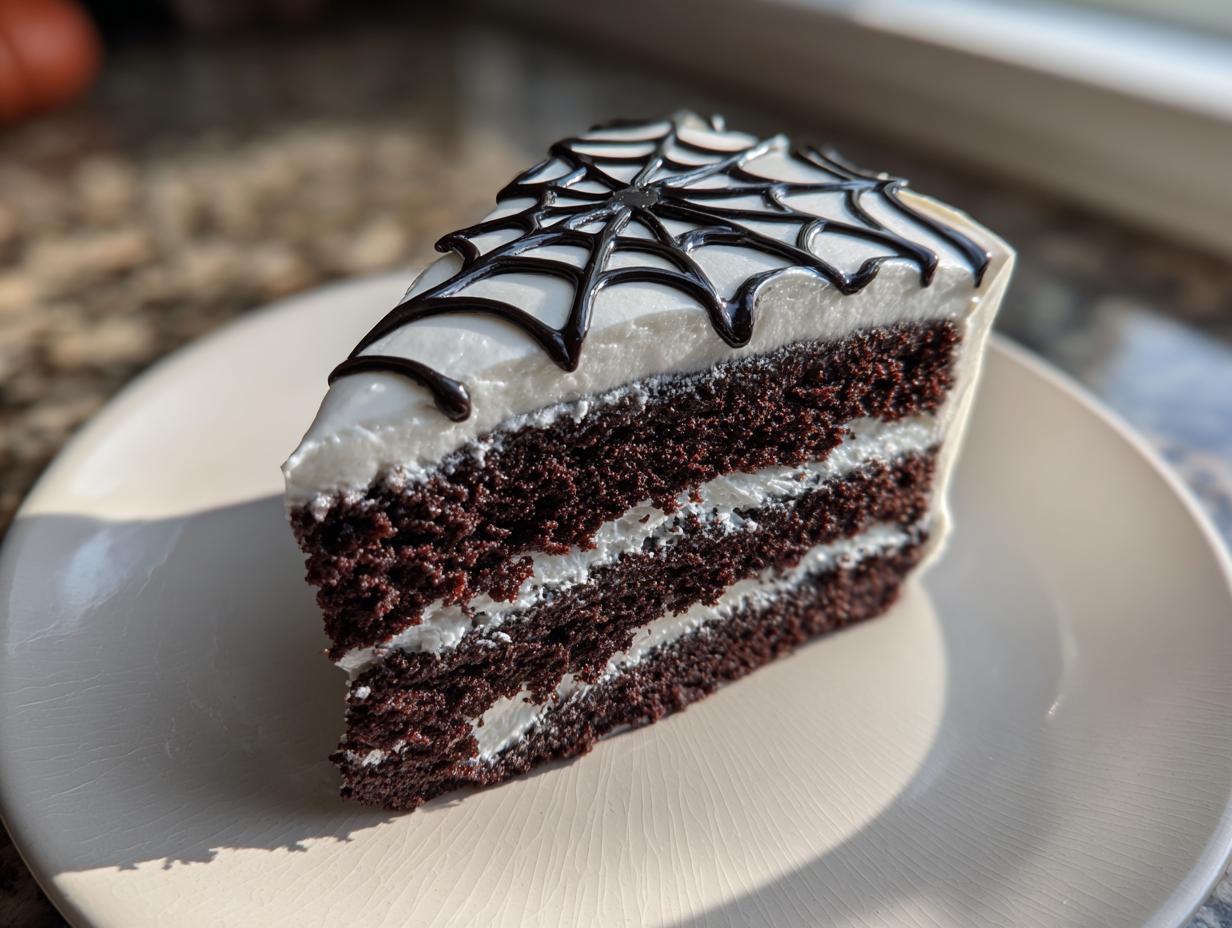
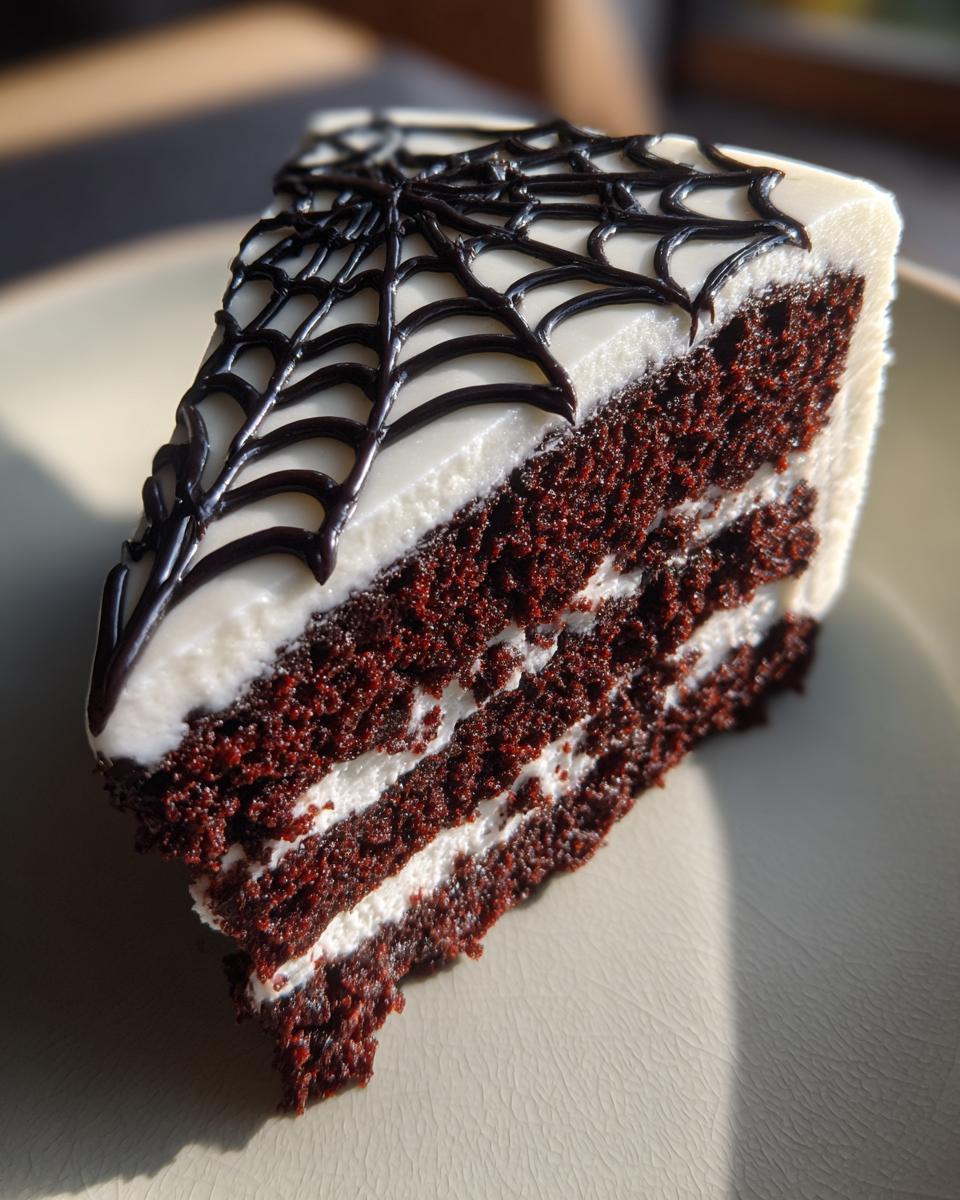
Is there anything more delightfully spooky than slicing into a ghostly white cake to reveal intricate black spiderweb designs? I still remember the first time I made this spiderweb cake for my niece’s Halloween party – the kids gasped when I lifted the lid! There’s something magical about transforming simple chocolate cake into edible art. My secret? A foolproof chocolate cake base (that stays moist for days) and a piping technique so easy even baking newbies can nail it. Whether you’re hosting a haunted house party or just craving something fun, this spiderweb cake never fails to impress. Let’s get baking!
Why You’ll Love This Spiderweb Cake
This spiderweb cake is my go-to Halloween showstopper for so many reasons:
- Easier than it looks – The web design is simple piping, but it looks like you spent hours (your secret’s safe with me!)
- Spooky-perfect – Nothing says Halloween like this dramatic black-on-white design that wows both kids and adults
- Chocolate lovers dream – The rich cocoa cake base tastes as good as it looks, staying moist for days
- Party-ready magic – One slice and you’ve got instant Halloween atmosphere on every dessert plate
Trust me – this cake disappears faster than ghosts at sunrise once you serve it!
Ingredients for Spiderweb Cake
Gather these pantry staples for your spooky masterpiece:
- Dry ingredients: 2 cups all-purpose flour, 1 1/2 cups sugar, 3/4 cup sifted cocoa powder, 1 1/2 tsp baking powder, 1 1/2 tsp baking soda, 1 tsp salt
- Wet ingredients: 2 large eggs, 1 cup milk (whole works best), 1/2 cup vegetable oil, 2 tsp vanilla extract, 1 cup boiling water
- For decorating: 1 cup white icing (homemade or store-bought), 1/4 cup black icing (or gel food coloring mixed into white icing)
Ingredient Notes & Substitutions
- The boiling water “blooms” the cocoa powder – trust me, it makes the chocolate flavor richer!
- For dairy-free: Swap milk for almond or oat milk. Gluten-free? Use 1-to-1 gluten-free flour.
- No black icing? Mix 1/4 cup white icing with black gel food coloring until deep black.
How to Make a Spiderweb Cake
Alright, let’s get to the fun part! First things first – preheat that oven to 350°F (175°C) and grease your pans really well. Nothing ruins a spooky cake faster than sticking! Here’s how we’ll bring this spiderweb cake to life:
- Mix dry ingredients: Whisk together flour, sugar, cocoa, baking powder, baking soda, and salt in a big bowl. Pro tip – sifting makes the cake extra smooth!
- Add the wet stuff: Crack in eggs, pour in milk, oil, and vanilla. Beat for 2 minutes until creamy. Don’t panic when you see how thick it is – just wait!
- The boiling water secret: Slowly stir in that hot water. Yes, the batter will look crazy thin – that’s perfect! It bakes up moist and fluffy.
- Bake with care: Pour into your pans and bake 30-35 minutes. The cake’s done when a toothpick comes out with just a few moist crumbs.
- Cool completely: Let cakes sit for 10 minutes in pans, then transfer to a rack. This is crucial – warm cakes make icing slide right off!
Creating the Spiderweb Design
Now the magic happens! Frost the cooled cake with white icing (a thin crumb coat first helps). Pipe 4-5 black concentric circles on top. Drag a toothpick from center to edge to make web strands – like spokes on a wheel! Wipe the toothpick between lines and voila – instant spooky elegance.
Tips for the Perfect Spiderweb Cake
After making dozens (maybe hundreds!) of spiderweb cakes over the years, I’ve learned a few tricks to guarantee picture-perfect results every time:
- Sift, sift, sift: Those dry ingredients really do make a difference – especially the cocoa powder. You’ll notice the smoother texture instantly!
- Patience is key: Let those cakes cool completely, I promise. Warm layers make the icing melt into a sticky mess instead of crisp spiderweb lines.
- Practice piping: Try your web design on parchment first. Once you’ve got the motion down, transferring to the cake is a breeze.
- Keep it clean: Wipe your piping tip often and use fresh toothpicks for each web line – it makes all the difference in crisp designs.
Follow these simple tricks and your spiderweb cake will be the talk of any Halloween gathering!
Serving and Storing Spiderweb Cake
Want to really wow your guests? Serve this spiderweb cake on a black platter with plastic spiders crawling around the edges – the kids go wild for it! The cake keeps beautifully at room temperature (covered) for 2 days – if it lasts that long! For longer storage, refrigerate up to 5 days (the chocolate flavor actually deepens). No need to reheat – this cake tastes perfect chilled or at room temp. Pro tip: Dust with edible glitter right before serving for extra spooky sparkle!
Spiderweb Cake Nutritional Information
Nutritional values are estimates per serving: 320 calories, 12g fat (3g saturated), 50g carbohydrates, 5g protein. The exact amounts may vary slightly depending on specific ingredients and portion sizes.
Frequently Asked Questions
Can I use store-bought icing for the spiderweb cake?
Absolutely! I often grab a tub of white frosting when I’m short on time. Just make sure it’s at room temperature for smooth spreading. For the black icing, stir in black gel food coloring until you get that deep, inky color.
Help! My spiderweb lines keep breaking when I drag them.
No worries – this happens to me too sometimes! Try making your black icing slightly thinner (add a teaspoon of milk) and work quickly. If lines break, just reconnect them gently with the toothpick. Remember – imperfect webs look more authentically spooky!
Can I make this cake ahead of time?
You sure can! Bake the cakes up to 2 days in advance (wrap tightly in plastic). Decorate the day of serving for the freshest look. The assembled cake holds up beautifully for a full 24 hours before the party.
Show me your spooky creations! Tag #SpiderwebCakeMagic so I can see your edible masterpieces. You can also find more baking inspiration on Pinterest.
Print
1 Spooky Spiderweb Cake That Will Haunt Your Tastebuds
- Total Time: 55 minutes
- Yield: 12 servings 1x
- Diet: Vegetarian
Description
A visually stunning spiderweb cake perfect for Halloween or spooky-themed parties. This cake features a chocolatey base with a spiderweb design made from icing.
Ingredients
- 2 cups all-purpose flour
- 1 1/2 cups sugar
- 3/4 cup cocoa powder
- 1 1/2 tsp baking powder
- 1 1/2 tsp baking soda
- 1 tsp salt
- 2 eggs
- 1 cup milk
- 1/2 cup vegetable oil
- 2 tsp vanilla extract
- 1 cup boiling water
- 1 cup white icing
- 1/4 cup black icing
Instructions
- Preheat oven to 350°F (175°C). Grease and flour two 9-inch cake pans.
- Mix flour, sugar, cocoa, baking powder, baking soda, and salt in a large bowl.
- Add eggs, milk, oil, and vanilla. Beat for 2 minutes.
- Stir in boiling water. The batter will be thin.
- Pour batter into pans. Bake for 30-35 minutes.
- Cool cakes for 10 minutes, then remove from pans.
- Once cooled, frost the cake with white icing.
- Pipe black icing in concentric circles to create the spiderweb design.
Notes
- For a smoother texture, sift dry ingredients.
- Let cakes cool completely before frosting.
- Use a toothpick to guide the spiderweb lines.
- Prep Time: 20 minutes
- Cook Time: 35 minutes
- Category: Dessert
- Method: Baking
- Cuisine: American
Nutrition
- Serving Size: 1 slice
- Calories: 320
- Sugar: 25g
- Sodium: 300mg
- Fat: 12g
- Saturated Fat: 3g
- Unsaturated Fat: 8g
- Trans Fat: 0g
- Carbohydrates: 50g
- Fiber: 2g
- Protein: 5g
- Cholesterol: 30mg